
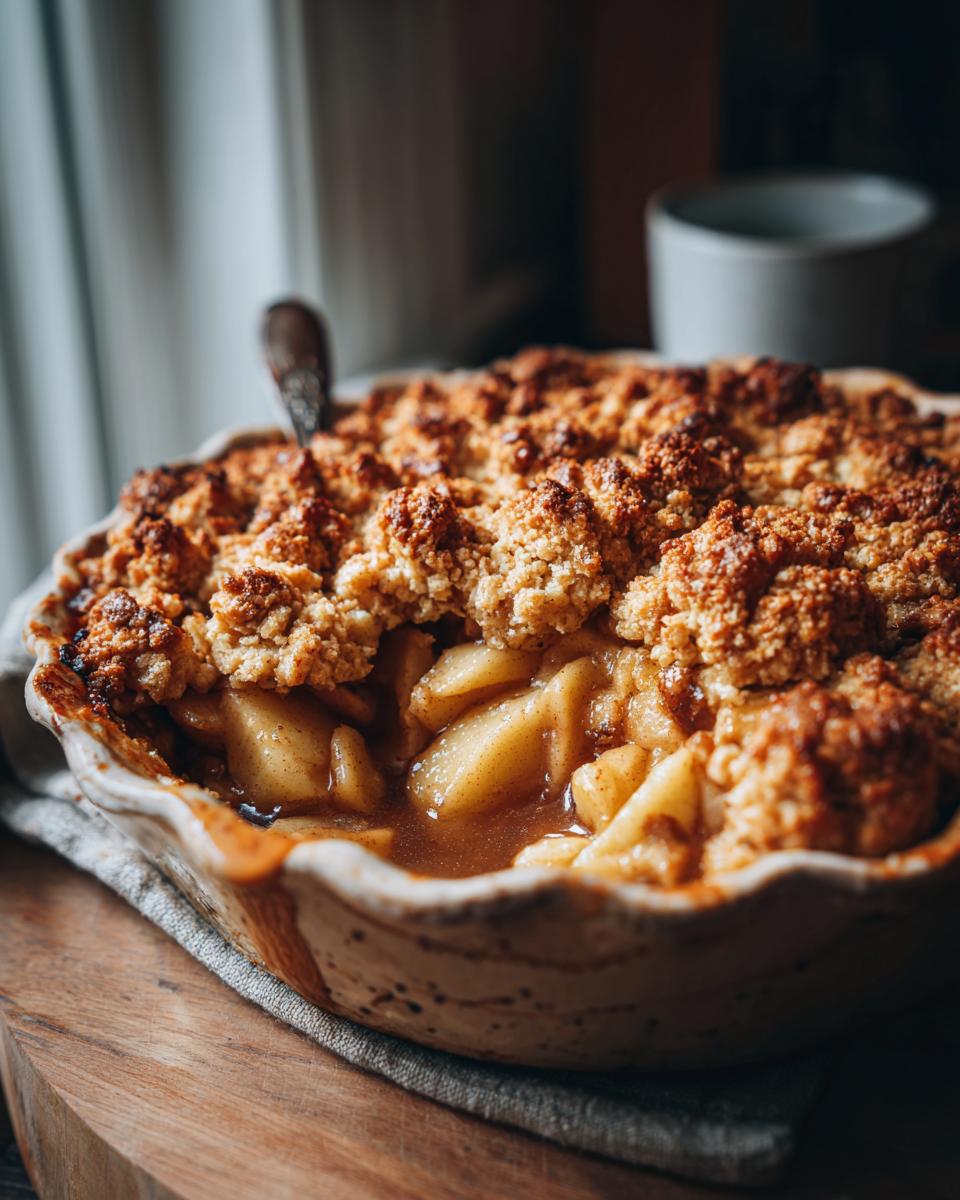
Oh, apple crisp! Just the thought of that warm, bubbly fruit topped with a golden, buttery crumble just makes my heart sing. There’s nothing quite like digging into a dish of it on a chilly evening, maybe with a scoop of ice cream melting into it. For me, it instantly takes me back to my grandmother’s kitchen, the whole house smelling like cinnamon and baked apples. We’ve all tried our fair share of apple crisps, right? But trust me, this one is special. It’s one of those truly comforting Dessert Recipes That Keep Apple Crisp Warm and Buttery, with a topping that’s just perfect – not too crunchy, not too soft, and packed with that rich butter flavor. I’m so excited to share this little slice of heaven with you!

Why You’ll Love This Warm and Buttery Apple Crisp
Seriously, who *doesn’t* love a good apple crisp? But this one? It’s got that extra something special. Here’s why you’ll be making this one again and again:
- That Topping, Oh My! We’re talking perfectly tender oats and a rich, buttery crumble that just melts in your mouth. It has that melt-in-your-mouth, decadent texture that makes it so addictive.
- Super Simple to Make: Even if you’re new to baking, you can whip this up with no fuss. It’s basically a ‘dump and bake’ situation for the apples, and the topping comes together in minutes.
- Pure Comfort Food: There’s just something so cozy and nostalgic about a warm apple crisp. It’s the perfect hug in a bowl, guaranteed to make any day feel a little bit better, especially when it’s served warm.
- Versatile and Delicious: It’s fantastic on its own, but everyone knows it’s even better with a scoop of vanilla ice cream or a dollop of whipped cream.
Ingredients for the Perfect Apple Crisp
Alright, let’s talk about what makes this apple crisp recipe so darn good. It all comes down to the right ingredients, and thankfully, they’re pretty simple! We’ll break it down into the juicy apple filling and that glorious, buttery topping.
For the Filling
This is where the sweet, tender apple magic happens. You’ll need:
- 6 cups apples, peeled, cored, and sliced (about 6-7 medium apples – I love using a mix of Granny Smith and Honeycrisp for a little tartness and sweetness!)
- 1/4 cup granulated sugar
- 1 tablespoon all-purpose flour (this helps thicken things up so it’s not too watery)
- 1 teaspoon ground cinnamon
For the Topping
This is the star of the show for me! This crumbly, buttery topping is what dreams are made of. Make sure your butter is nice and cold!
- 1 cup all-purpose flour
- 1 cup rolled oats (not the instant kind, the old-fashioned ones give the best texture!)
- 1/2 cup packed brown sugar (this is key for that deep, caramel-y flavor)
- 1/2 teaspoon ground cinnamon
- 1/2 cup cold unsalted butter, cut into small pieces (seriously, cold is important here!)
Expert Tips for Making the Best Apple Crisp
Okay, so making a truly fantastic apple crisp isn’t super complicated, but there are a few little secrets that can take it from good to absolutely mind-blowing. It’s all about those little touches that make a big difference! My grandma always said the secret to a great crisp is in the topping and making sure those apples are just right.
First off, apple selection is key. I’ve found that a mix of tart apples like Granny Smith and sweeter ones like Honeycrisp or Fuji gives the best flavor balance. If you only have one kind, that’s okay too, just bake it a little longer if they’re super firm! Also, don’t be afraid to get your hands in there for the topping! Cutting in cold butter with your fingers is the best way to get that wonderfully crumbly texture. It’s a little messy, but so worth it for that melt-in-your-mouth goodness. And remember, we want that topping to be golden and crisp, not soggy, so make sure your butter is really cold before you start mixing it in. It’s all part of creating those amazing Dessert Recipes That Keep Apple Crisp Warm and Buttery!
Oh, and a little trick I learned? If your apples seem a bit watery, you can toss them with an extra teaspoon of flour or even a pinch of cornstarch before adding the sugar and cinnamon. This helps keep that bottom layer from getting too gooey. Trust me, it’s a game-changer for avoiding that dreaded soggy bottom!
Step-by-Step Instructions for Your Apple Crisp
Alright, let’s get baking! Making this apple crisp is super straightforward, and honestly, it’s a really fun process. Follow these steps, and you’ll have a delicious, warm, buttery dessert on your table in no time. It’s one of those simple joys that makes the kitchen feel like home.
Preparing the Apple Filling
First things first, let’s get those apples ready for their cozy filling. Just peel ’em, take out the cores, and slice them up. Toss these apple slices into a big bowl with the granulated sugar, that tablespoon of flour that helps thicken things, and our lovely cinnamon. Give it all a good stir so every single slice is coated. So simple, right?
Creating the Buttery Topping
Now for my favorite part – the topping! In a separate, medium-sized bowl, dump in your flour, rolled oats, packed brown sugar, and that little bit of cinnamon. Add in your cold butter pieces. Now, this is where you get your hands dirty (the best way!). Use your fingertips or a pastry blender to cut that butter into the dry stuff until it looks like coarse crumbs. It’s seriously satisfying!
Achieving the Perfect Crumb Texture
The trick here is to work quickly so the butter stays cold. You want a texture that’s like little pebbles, not a paste. Don’t overmix it; just enough so there are no big chunks of butter left. That’s what gives you that awesome, tender crumb!
Assembling and Baking Your Apple Crisp
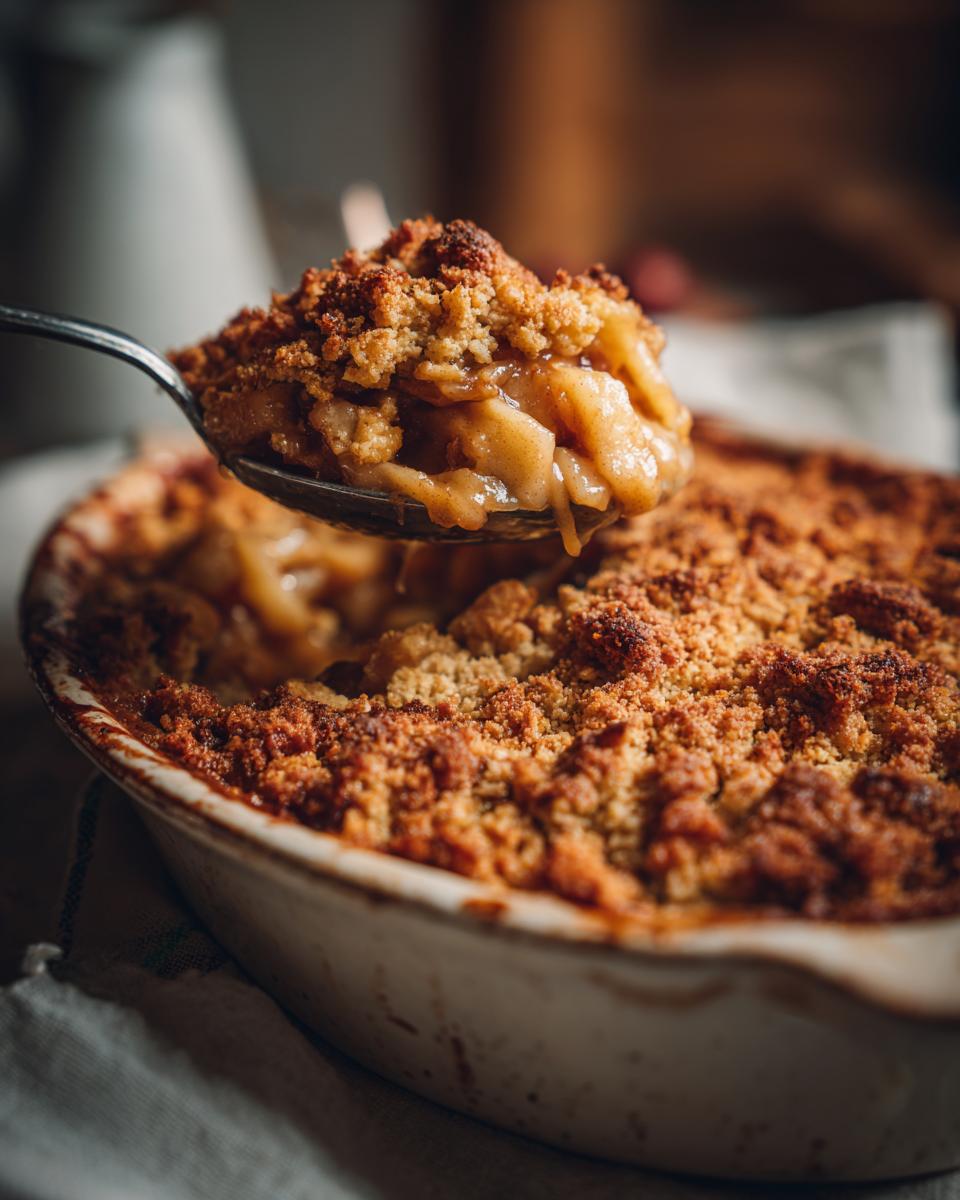
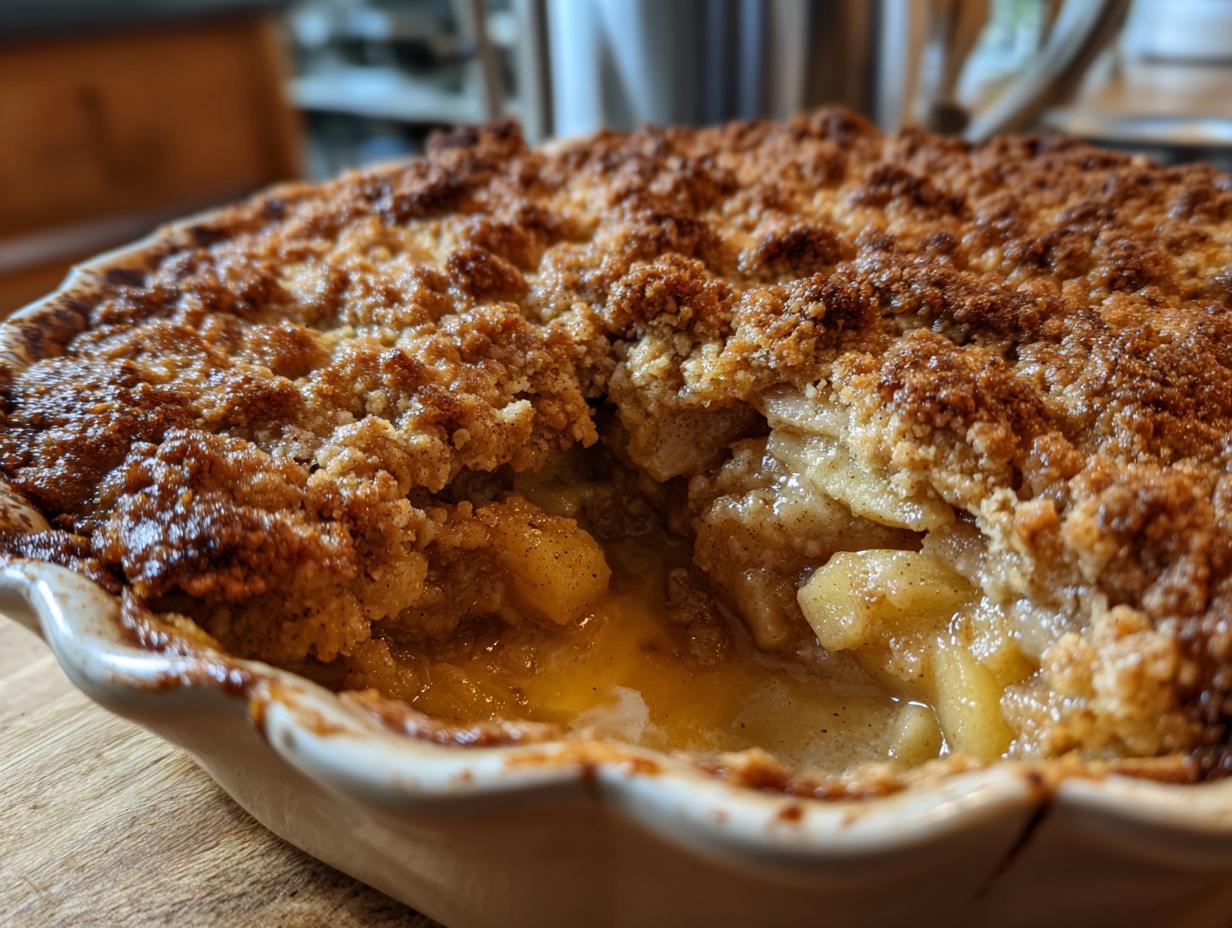
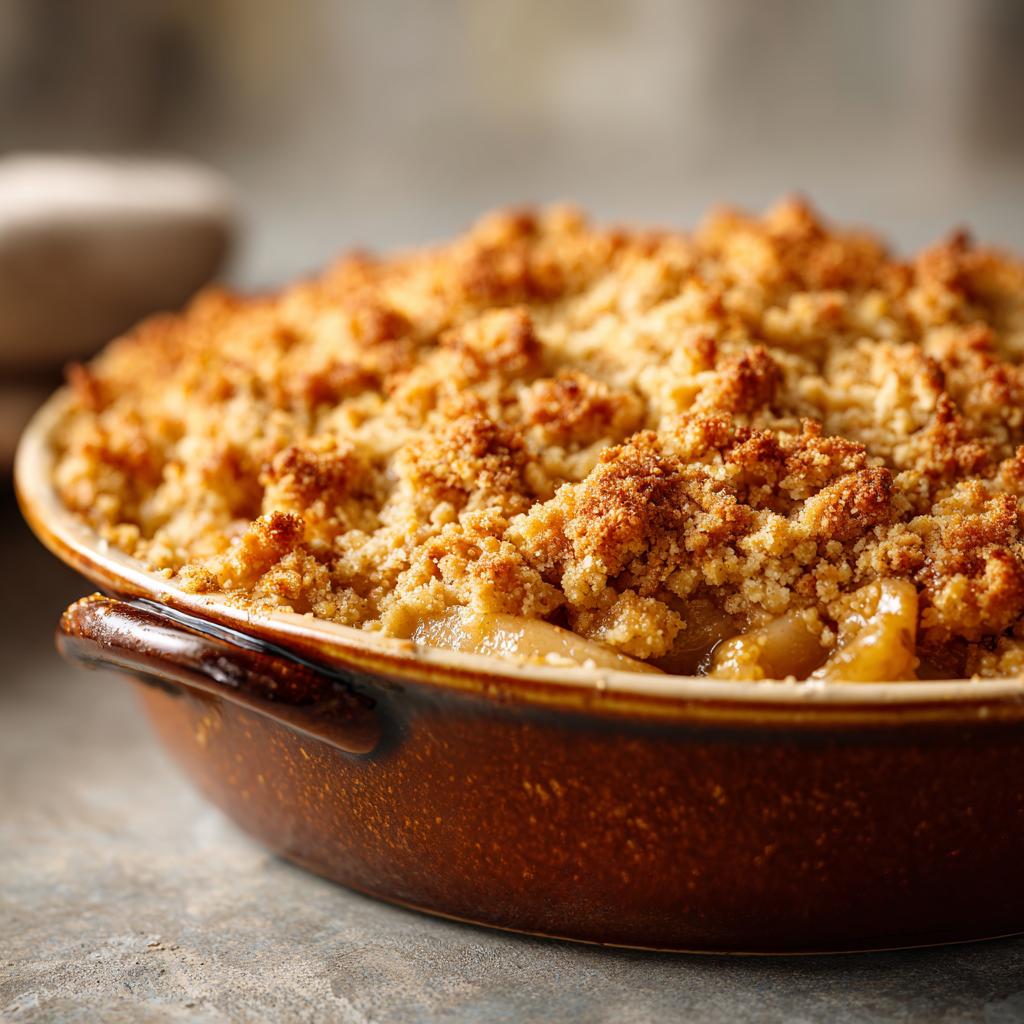
First, make sure your oven is fully preheated to 375°F (190°C). Pour that lovely apple mixture into your 9×13 inch baking dish, spreading it out evenly. Then, lovingly sprinkle that crumbly topping all over the apples. Pop it into the hot oven and bake for about 35 to 45 minutes. You’ll know it’s ready when the topping is golden brown and those apples are bubbling away – pure comfort food bliss!
Serving Suggestions for Warm Apple Crisp
This warm, buttery apple crisp is practically begging to be served with something delicious alongside it! My absolute favorite is a big scoop of creamy vanilla ice cream – the hot crisp and cold ice cream is *chef’s kiss*. A dollop of freshly whipped cream is also divine, maybe with a little sprinkle of cinnamon on top. It’s just perfection in a bowl, especially when it’s fresh from the oven. For more delightful dessert ideas, check out these dessert recipes!
Storage and Reheating Instructions
So, you’ve got some delicious apple crisp leftover? Lucky you! To keep that wonderful warm and buttery goodness going, here’s how to store and reheat it. First, let the crisp cool down completely to room temperature before you stash it. This stops condensation from making things soggy. You can then cover the baking dish tightly with plastic wrap or transfer it to an airtight container. It’ll stay good in the fridge for about 3-4 days.
When you’re ready for a warm slice again, the best way to reheat it is in the oven. Pop it back into a 350°F (175°C) oven for about 10-15 minutes, or until it’s heated through and bubbly again. This method really helps maintain that lovely crisp topping texture. Honestly, that oven reheat makes it almost as good as fresh!
Frequently Asked Questions About Apple Crisp
Got questions about making the most amazing apple crisp? I get it! It’s one of those desserts that seems simple, but you want to make sure it’s just right. Here are some common things people wonder about, and my best advice!
What are the best apples for apple crisp?
Honestly, you can use most apples, but my favorite trick is to mix it up! I love using something tart like a Granny Smith alongside a sweeter apple like a Honeycrisp or Fuji. This gives you a great balance of flavor. They hold their shape really well when baked, so you don’t end up with mush. If you only have one kind, don’t stress – it’ll still be delicious!
Can I make apple crisp ahead of time?
You totally can! You can prepare the apple filling and the topping separately up to a day in advance. Keep the filling covered in the fridge and the topping in its own container. When you’re ready to bake, assemble everything and bake as usual. Just know that the topping might not be *quite* as crisp as when it’s made fresh, but it’s still fantastic! For the ultimate warm and buttery experience, there’s nothing like baking it right before serving.
How do I prevent a soggy topping on my apple crisp?
Ah, the dreaded soggy topping! The biggest culprit is usually not using cold enough butter for the topping. Make sure your butter is really cold and cut it in quickly so it doesn’t melt too much. Also, ensure your apples aren’t releasing *too* much liquid; a little extra flour in the filling can help with that. Baking it long enough so the topping gets nice and golden really helps too. And of course, storing any leftovers properly (cooled and covered) prevents moisture buildup!
Can I use different kinds of fruit in this crisp recipe?
Absolutely! This recipe is super forgiving and works beautifully with other fruits. Peaches, pears, berries (like blueberries or raspberries), or even a mix like apples and cranberries would be amazing. You might need to adjust the sugar slightly depending on the fruit’s sweetness. It’s a great base for all sorts of fruity creations, like those peach crumble bars!
Nutritional Information
Please keep in mind that these numbers are just estimates. The actual nutritional values can change based on the specific ingredients you use and how large you slice your servings. This information is here to give you a general idea, but the real magic is in the taste!
Ingredients
Equipment
Method
- Preheat your oven to 375°F (190°C).
- In a large bowl, combine the sliced apples, granulated sugar, 1 tablespoon of flour, and 1 teaspoon of cinnamon. Toss to coat the apples evenly.
- Pour the apple mixture into the 9×13 inch baking dish.
- In a medium bowl, combine 1 cup of flour, rolled oats, brown sugar, and 1/2 teaspoon of cinnamon.
- Add the cold butter pieces to the dry ingredients. Use your fingers or a pastry blender to cut the butter into the mixture until it resembles coarse crumbs.
- Sprinkle the topping evenly over the apple mixture in the baking dish.
- Bake for 35-45 minutes, or until the topping is golden brown and the apples are tender and bubbly.
- Let the apple crisp cool for a few minutes before serving. It is best served warm.