
Oh, banana pudding! Just saying the words makes me feel all warm and fuzzy inside. This is one of those desserts that just screams comfort and happy memories to me. I remember my grandma making this for Sunday dinners, and the entire house would smell like sweet bananas and creamy vanilla. And let me tell YOU, the secret weapon that takes this from good to absolutely *spectacular* is the homemade whipped cream. Trust me on this one! This recipe for Classic Banana Pudding With Homemade Whipped Cream is a real winner, a true crowd-pleaser that always brings a smile.

Why You’ll Love This Classic Banana Pudding With Homemade Whipped Cream
Seriously, what’s not to adore about this banana pudding? It’s like a warm hug in a bowl, but even better because it’s a dessert! Here’s why I think you’ll be making this over and over:
- It’s SO Easy to Make! You don’t need to be a fancy pastry chef for this one. The steps are straightforward, and you’ll be amazed at how quickly it comes together.
- That Homemade Whipped Cream Tho! Forget the stuff from a can. Making your own whipped cream is a game-changer, and it makes this pudding feel extra special and decadent.
- Perfectly Ripe Banana Flavor: The natural sweetness of ripe bananas just sings in this recipe. They get so soft and creamy, it’s pure heaven.
- Comfort Food Central: This is the ultimate comfort dessert. It’s creamy, it’s sweet, it’s got that perfect vanilla goodness. Pure nostalgia in every single spoonful!
- Customizable Too: While it’s perfect as is, you can totally play around with it. Add a little rum to the custard? Go for it! Love crushed nuts on top? Knock yourself out!
- A Real Crowd-Pleaser: Whether it’s a family dinner, a potluck, or just a cozy night in, this banana pudding is always a hit. People just can’t get enough.
Ingredients for Classic Banana Pudding With Homemade Whipped Cream
Alright, let’s get down to the good stuff – the ingredients! Having everything ready before you start makes this whole process so much smoother. It’s all about that perfect combo of creamy custard, sweet bananas, buttery wafers, and of course, that dreamy homemade whipped cream. Make sure you’ve got these on hand!
For the Custard
This is the heart and soul of the pudding, so we gotta get it right. Whole milk really gives it that lush richness, but feel free to use what you have!
- 1/2 cup granulated sugar
- 1/4 cup cornstarch
- 1/4 teaspoon salt
- 3 cups milk (whole milk is best here!)
- 4 egg yolks, lightly beaten
- 2 tablespoons unsalted butter
- 1 teaspoon vanilla extract
For the Whipped Cream and Assembly
This is where things get truly decadent. Cold cream is key for the fluffiest whipped cream, and don’t skimp on the vanilla! Ripe bananas are a must for that sweet flavor, and good old vanilla wafers are the perfect base.
- 2 cups heavy cream, nice and cold
- 1/4 cup powdered sugar
- 1 teaspoon vanilla extract
- 4 ripe bananas, sliced
- 1 package vanilla wafers
Equipment Needed for Your Dessert Recipes for Classic Banana Pudding
Alright, let’s talk tools! Having the right gear makes all the difference, especially when you’re whipping up something as comforting as this banana pudding. You don’t need anything too fancy, just the basics. Makes cooking a breeze!
- A reliable medium saucepan (for that luscious custard!)
- A good whisk (essential for smooth custard and lump-free batter)
- A couple of mixing bowls (one for custard, one for whipped cream is super helpful)
- An electric mixer (or a strong arm for whipping cream – your choice!)
- Your favorite serving dish (a nice clear one shows off those pretty layers!)
How to Make Classic Banana Pudding With Homemade Whipped Cream: Step-by-Step
Alright, let’s get cooking! This is where the magic happens, and trust me, it’s way easier than you think. The key is just taking your time and enjoying the process. You’ve got this!
Preparing the Custard Base
First off, grab a medium saucepan – this is where your beautiful custard gets its start. Whisk together the sugar, cornstarch, and that pinch of salt. It looks dry now, but just wait! Now, slowly pour in the milk while whisking like crazy until it’s all smooth and creamy. Pop that pan over medium heat and just keep stirring constantly. You’ll see it start to thicken up, and then a gentle bubble or two will pop. That’s your cue! While that’s happening, lightly beat your egg yolks in a little bowl. Then, *very carefully*, scoop about a cup of that hot milk mixture and slowly whisk it into the yolks. This is called tempering, and it stops your eggs from scrambling! Pour that back into the saucepan with the rest of the milk. Keep stirring for another couple of minutes – don’t let it boil! Finally, take it off the heat and stir in that butter and vanilla until everything is smooth and gorgeous. Pour this dreamy custard into a bowl, press some plastic wrap right on the surface (this is super important to stop a skin from forming!), and pop it in the fridge to chill for at least 30 minutes.
Crafting the Perfect Homemade Whipped Cream
Now for the star of the show – homemade whipped cream! Grab your cold heavy cream and pour it into a large, *really* chilled bowl. Bust out your electric mixer (or a whisk and some serious arm power!) and start beating. As it begins to thicken and looks a bit like soft, fluffy clouds, slowly add your powdered sugar and vanilla extract. Keep going until you get lovely stiff peaks. You know, when you lift the beater, the cream stands straight up! That’s perfection, right there. This stuff makes all the difference!
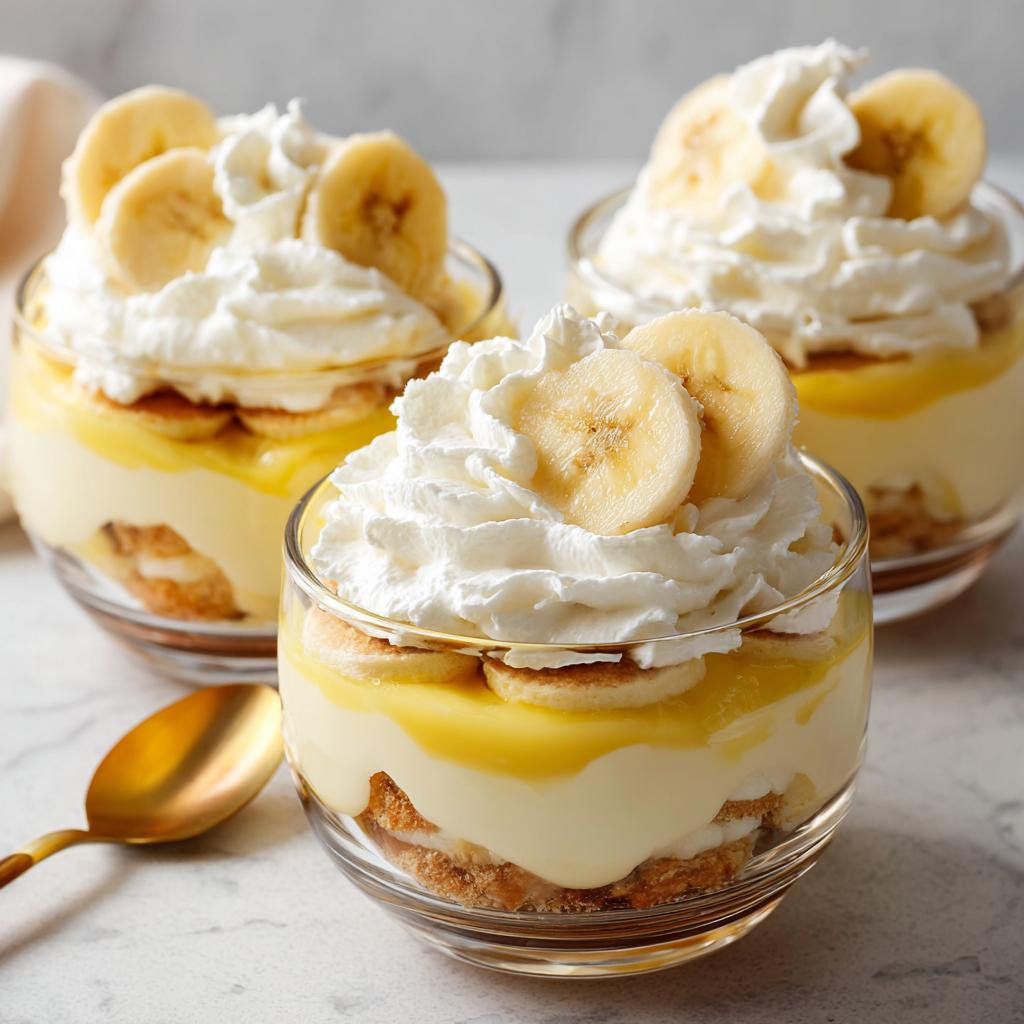
Assembling Your Classic Banana Pudding
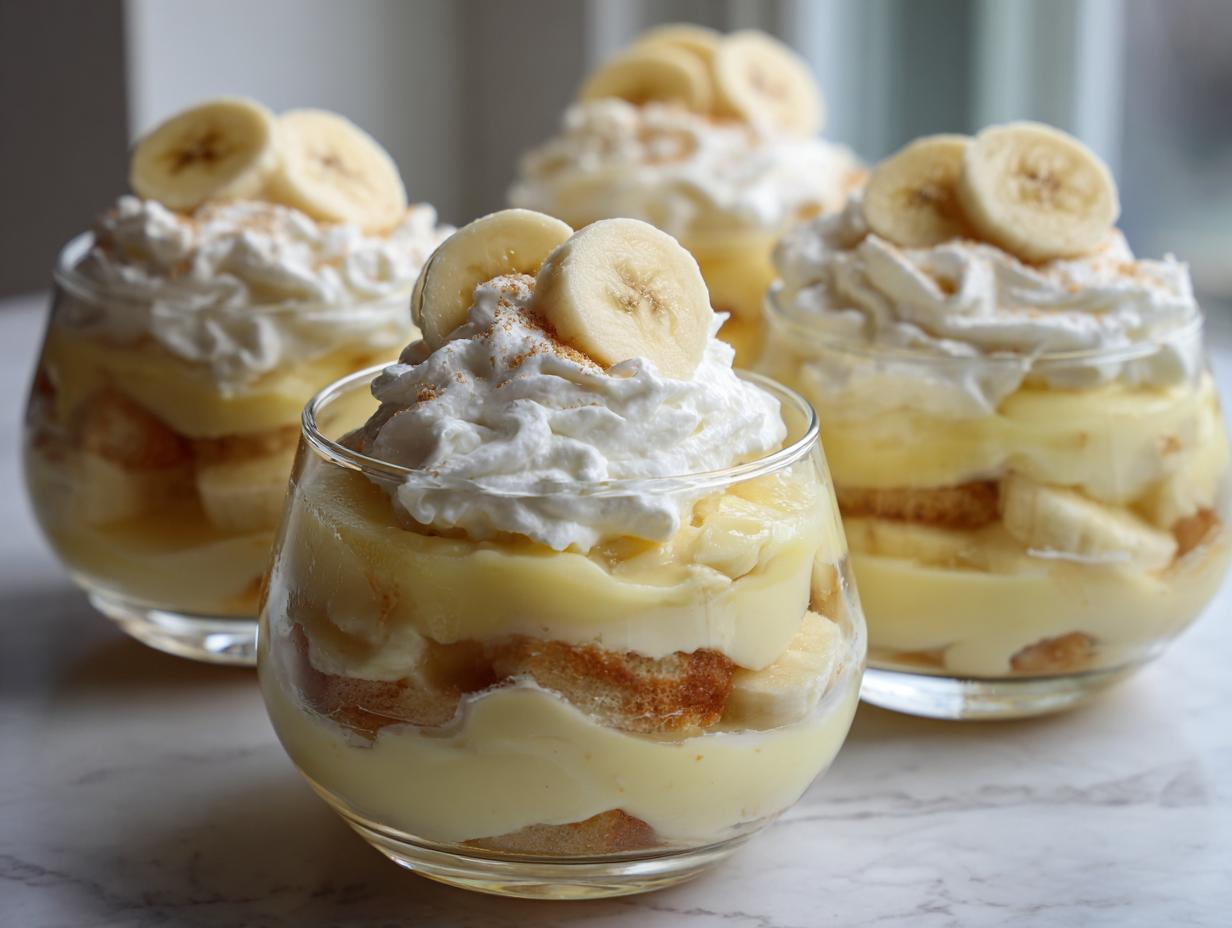
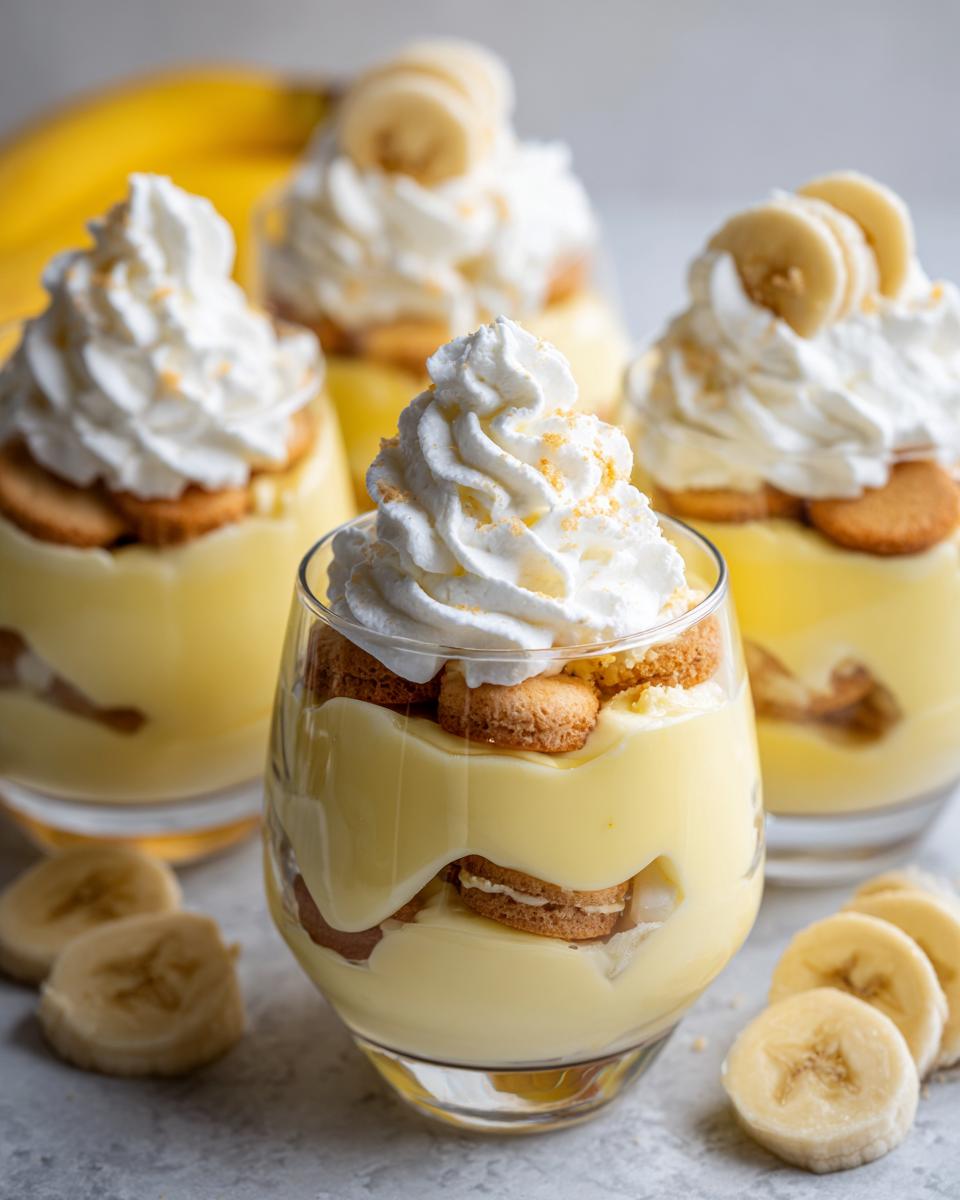
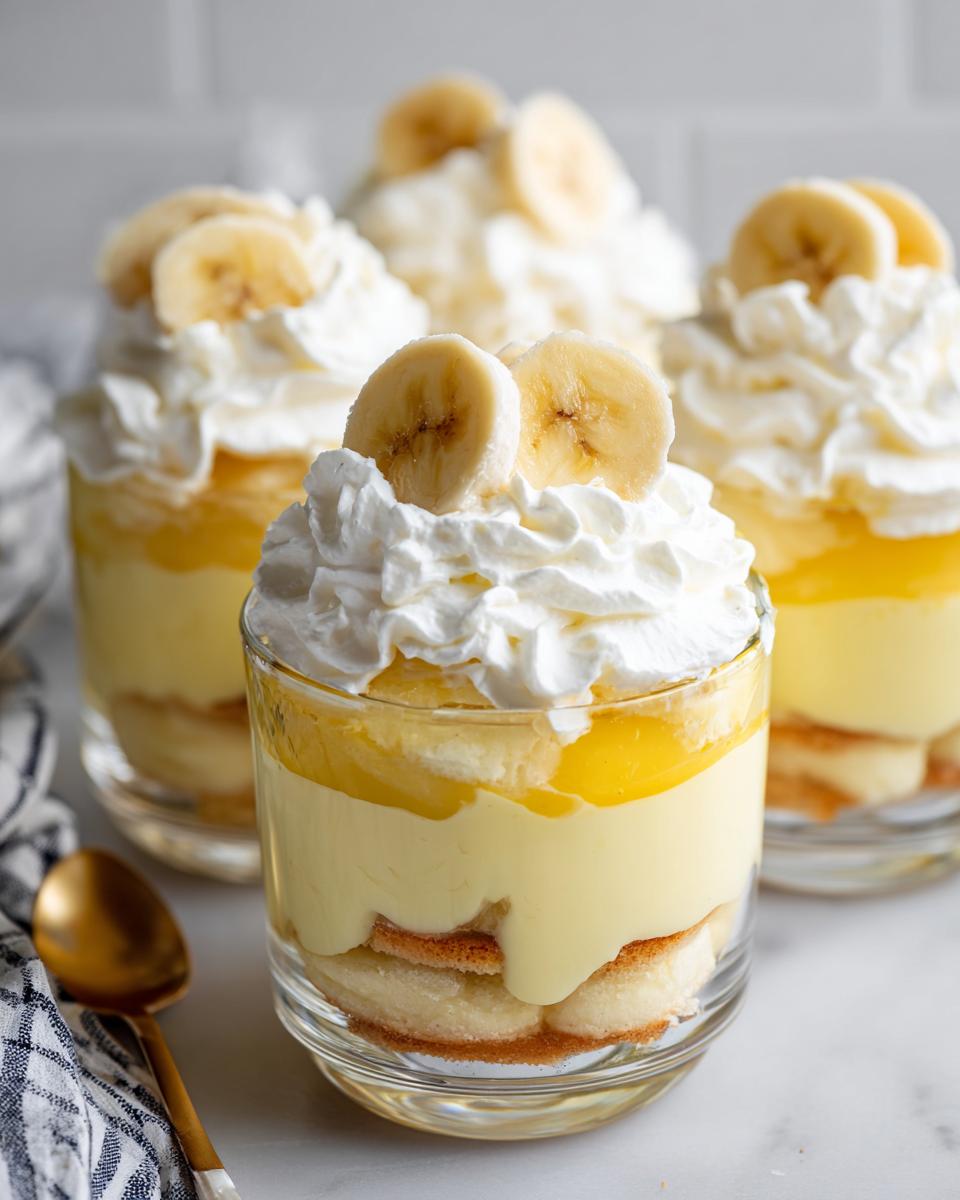
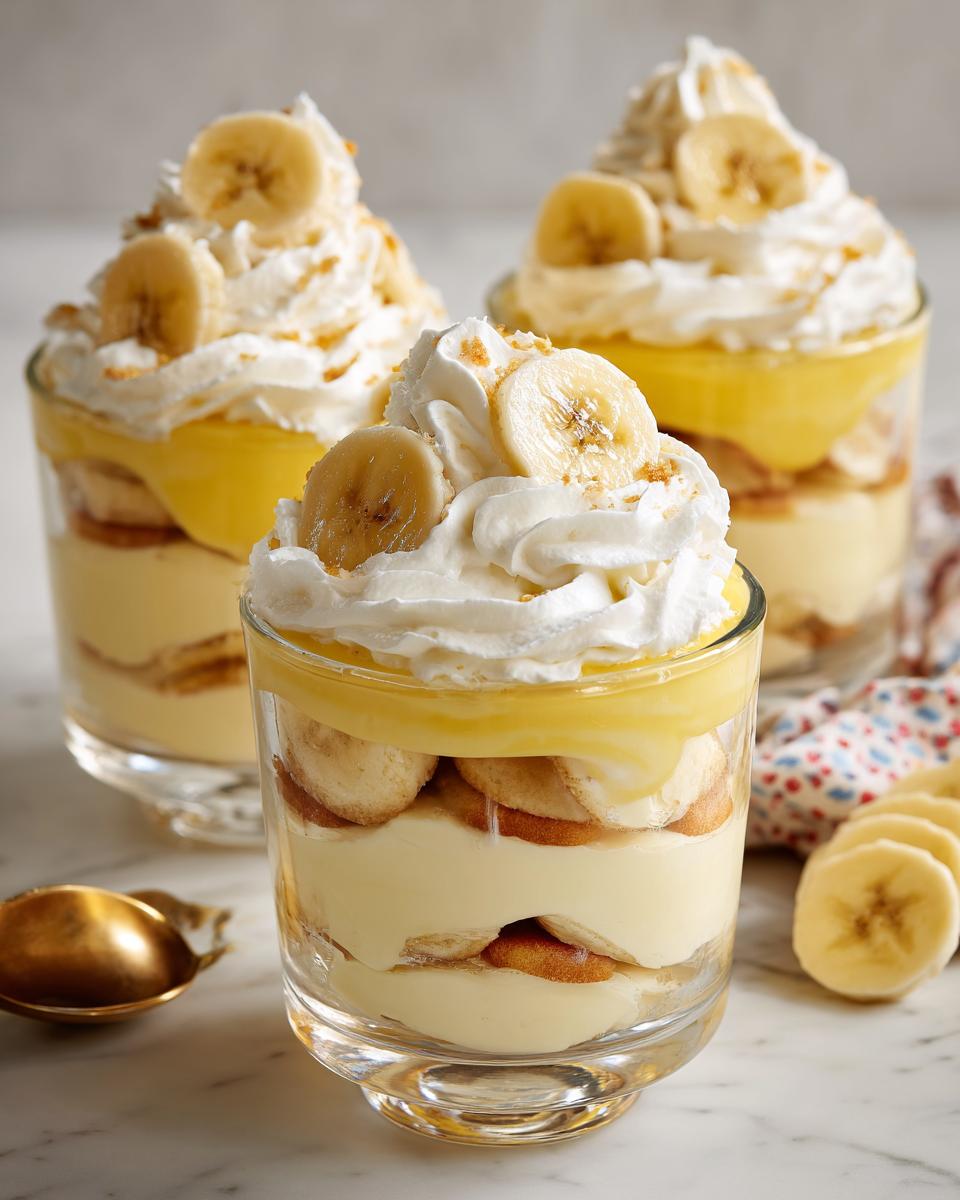
Okay, time to bring it all together! Grab your serving dish. Spread a nice, even layer of those vanilla wafers on the bottom. Then, arrange a layer of your sliced bananas right on top. Now, spoon about a third of that lovely chilled custard over everything. See those layers forming? Gorgeous! Repeat that process – wafers, bananas, custard – two more times. You want to end with that beautiful custard layer on top. Grab your amazing homemade whipped cream and spread it all over the custard. For a little extra flair, you can sprinkle some crushed wafers or add a few more banana slices on top. Pop it back in the fridge for another 30 minutes to let all those flavors really get to know each other.
Tips for the Best Dessert Recipes for Classic Banana Pudding
You know, there are a few little secrets that I’ve picked up over the years that really make this banana pudding sing. It’s these small things that turn a good dessert into an absolutely unforgettable one! So, listen up, because these tips are gold:
- Banana Bliss: For the love of all things creamy, use ripe bananas! Not the mushy, overripe ones, but the ones that are yellow with just a few brown spots. They’re sweeter and have that amazing banana flavor. Firm but ripe is the sweet spot.
- Custard Consistency is Key: When you’re stirring that custard, keep it moving! Don’t let it sit on the heat for too long without stirring, or you’ll end up with scrambled eggs. And remember, it should thicken nicely but never actually boil after you add the eggs back in.
- Chill Out: Seriously, don’t rush the chilling time for the custard or the final pudding. That half-hour (or more!) is crucial. It lets the custard set up properly and allows all those amazing flavors to meld together. Patience, my friends, is a virtue, especially in baking!
- Cold Cream for Creamy Dreams: Make sure your heavy cream is super cold when you whip it. This helps it get nice and fluffy with stiff peaks. Cold bowl, cold beaters – the works! It makes all the difference.
Ingredient Notes and Substitutions for Banana Pudding
You know, I always go for whole milk in my custard because it just makes it that much richer and creamier, like a luxurious hug. But if you need a substitute, 2% milk will work, it’ll just be a little less decadent. For the vanilla wafers, they’re classic for a reason, but if you want to get fancy, shortbread cookies could be a fun alternative! And if you’re looking for a dairy-free version, you could try using a good quality coconut cream for the whipped cream and a plant-based milk for the custard, though the flavor will change a bit.
Frequently Asked Questions About Classic Banana Pudding
Got questions about making the perfect banana pudding? I hear you! It’s a classic for a reason, and sometimes little things can make a big difference. Let me shed some light on those common queries so your pudding turns out absolutely amazing every time.
Can I make this banana pudding ahead of time?
Oh, absolutely! In fact, I actually think it’s *better* if you make it a few hours ahead, or even the day before. That chilling time really lets all those flavors meld together beautifully. Just assemble the entire pudding and keep it covered in the fridge. It gives those wafers time to soak up some of that yummy custard and get perfectly soft.
How do I prevent the bananas from browning?
This is a common worry, right? The trick is to slice your bananas just before you assemble the pudding. Also, making sure your custard is cool enough when you layer it helps too. The acid from the milk and the sugar in the custard actually helps slow down the browning process a bit. Some people even toss their banana slices with a tiny bit of lemon juice beforehand, but I usually find that just assembling it quickly works perfectly fine for me!
What kind of milk is best for the custard?
For the richest, creamiest custard, I always reach for whole milk. It just has that perfect fat content that makes the custard so luscious and smooth. If you don’t have whole milk on hand, 2% will work, but it might be just a touch less rich. Honestly, though, even with 2%, it’s still going to be super delicious!
My custard seems a little thin. What did I do wrong?
Don’t panic! Sometimes the cornstarch needs a little extra coaxing. Make sure you cooked it long enough after adding the eggs – that extra couple of minutes really helps it set. If it still feels too thin after chilling, you can always try gently reheating a small portion of it with a tiny bit more cornstarch mixed with cold water (a slurry!) and stirring that back in. But usually, the chilling process firms it up quite a bit. Just give it time!
Nutritional Information (Estimated)
Okay, so let’s talk numbers! Keep in mind these are just estimates, okay? The exact calories, fat, protein, and carbs can totally change depending on the brands you use and just how much of that yummy whipped cream you pile on. But roughly, you’re looking at about 400-500 calories per generous serving, with around 20-25g of fat, especially from that glorious custard and cream. It’s a treat, for sure!
Share Your Creations!
I absolutely LOVE seeing what you all whip up in your kitchens! Did you make this classic banana pudding? Did it bring back special memories for you? Please, please leave a comment below and tell me all about it! And if you took some gorgeous photos, share them with me on social media – I can’t wait to see your amazing creations! If you have any questions or just want to chat about this recipe, feel free to reach out via my contact page!
Classic Banana Pudding With Homemade Whipped Cream
Ingredients
Equipment
Method
- In a medium saucepan, whisk together the granulated sugar, cornstarch, and salt.
- Gradually whisk in the milk until smooth.
- Cook over medium heat, stirring constantly, until the mixture thickens and begins to bubble. This should take about 8-10 minutes.
- In a small bowl, whisk the egg yolks. Gradually whisk about 1 cup of the hot milk mixture into the egg yolks to temper them. Then, pour the tempered egg yolk mixture back into the saucepan with the remaining milk mixture.
- Cook, stirring constantly, for another 2 minutes. Do not boil. Remove from heat and stir in the butter and vanilla extract until the butter is melted and the custard is smooth.
- Pour the custard into a bowl. Cover the surface directly with plastic wrap to prevent a skin from forming. Let it cool slightly, then refrigerate for at least 30 minutes, or until chilled.
- While the custard chills, prepare the whipped cream. In a large bowl, beat the cold heavy cream with an electric mixer until soft peaks form. Gradually add the powdered sugar and vanilla extract, and continue beating until stiff peaks form.
- To assemble, spread a layer of vanilla wafers in the bottom of your serving dish. Top with a layer of sliced bananas. Spoon about one-third of the chilled custard over the bananas. Repeat the layers twice more, ending with a layer of custard.
- Spread the whipped cream evenly over the top of the pudding. Garnish with additional banana slices or crushed vanilla wafers, if desired.
- Refrigerate for at least 30 minutes before serving to allow the flavors to meld.