
Oh, those moments, right? When a serious sweet craving hits and you just NEED something rich, decadent, and oh-so-satisfying. For me, that’s almost always a pull towards something chocolate and peanut butter. And if I’m being honest, there are few things that hit the spot quite like a thick, chewy piece of homemade peanut butter fudge. This recipe for Dessert Recipes With Peanut Butter Fudge for Sweet Cravings is my absolute go-to. I’ve tinkered with it over the years to get it just right – that perfect balance of creamy, sweet, and nutty. It’s stupidly simple, which is a huge bonus when that craving strikes hard and fast!
Why You’ll Love This Dessert Recipes With Peanut Butter Fudge for Sweet Cravings
Seriously, this fudge is a game-changer for those times you just need a little something sweet. Here’s why it’s become my absolute favorite:
-
It’s CRAZY Easy: We’re talking minimal ingredients and pretty much mix-and-chill. No complicated candy-making skills needed here, trust me!
-
Pure Blissful Flavor: That classic combo of rich peanut butter and sweet, creamy fudge? It’s pure comfort in every bite. Seriously, heavenly!
-
Satisfies ANY Sweet Craving: Whether it’s a small afternoon pick-me-up or a late-night treat, this fudge is the perfect answer. It’s dense and satisfying!
-
Quick Prep Time: You can whip this up in about 15 minutes, which is fantastic when you need something sweet *now*.
Gather Your Ingredients for the Perfect Peanut Butter Fudge
Alright, to whip up this amazing peanut butter fudge, you don’t need a whole pantry raid. Just a few simple things and you’re golden. Make sure you’ve got these handy:
- 1 cup of unsalted butter, and make sure it’s softened! This is key for a smooth mix.
- 1 cup of creamy peanut butter. I like creamy best for that super smooth texture, but you do you!
- 3 cups of powdered sugar. And listen, please sift it! It makes a world of difference in getting that unbelievably smooth fudge.
- 1 teaspoon of vanilla extract. Just a little splash to round out that nutty flavor.
- 1/4 teaspoon of salt. This little bit just helps all those flavors pop!
That’s it! See? So easy. Having everything measured and prepped makes the whole process a breeze.
Step-by-Step Guide to Making Peanut Butter Fudge
Okay, getting this ridiculously yummy fudge made is honestly a piece of cake – well, a piece of fudge! It’s so straightforward, you’ll be wondering why you haven’t made it a million times already. Here’s how we do it:
-
Prep that Pan! First things first, grab your 8×8 inch baking pan. Line it with parchment paper. Now, I always leave a little overhang on the sides – like little handles. Trust me, this makes lifting the fudge out so much easier later on. No wrestling matches with your pan needed!
-
Melt it Down: Pop your butter into a medium saucepan. Put it over low heat. We’re not trying to fry it, just gently melt it. Once it’s all liquid gold, stir in your creamy peanut butter. Keep stirring until it’s all smooth and perfectly combined. So creamy and smells so good already!
-
Sugar Time!: Now, take that saucepan off the heat. This is important so we don’t cook the sugar. Slowly, and I mean *slowly*, start whisking in that sifted powdered sugar. Keep whisking until everything is super smooth and there are no annoying lumps. Then, add in your vanilla extract and that little pinch of salt. Give it one final whisk until it all looks like one glorious, smooth mixture.
-
Into the Pan: Pour all that beautiful fudge mixture into the parchment-lined pan you prepped earlier. Use a spatula or the back of a spoon to spread it out evenly. Try to get it as smooth as you can on top – it’ll look so much prettier when you cut it!
-
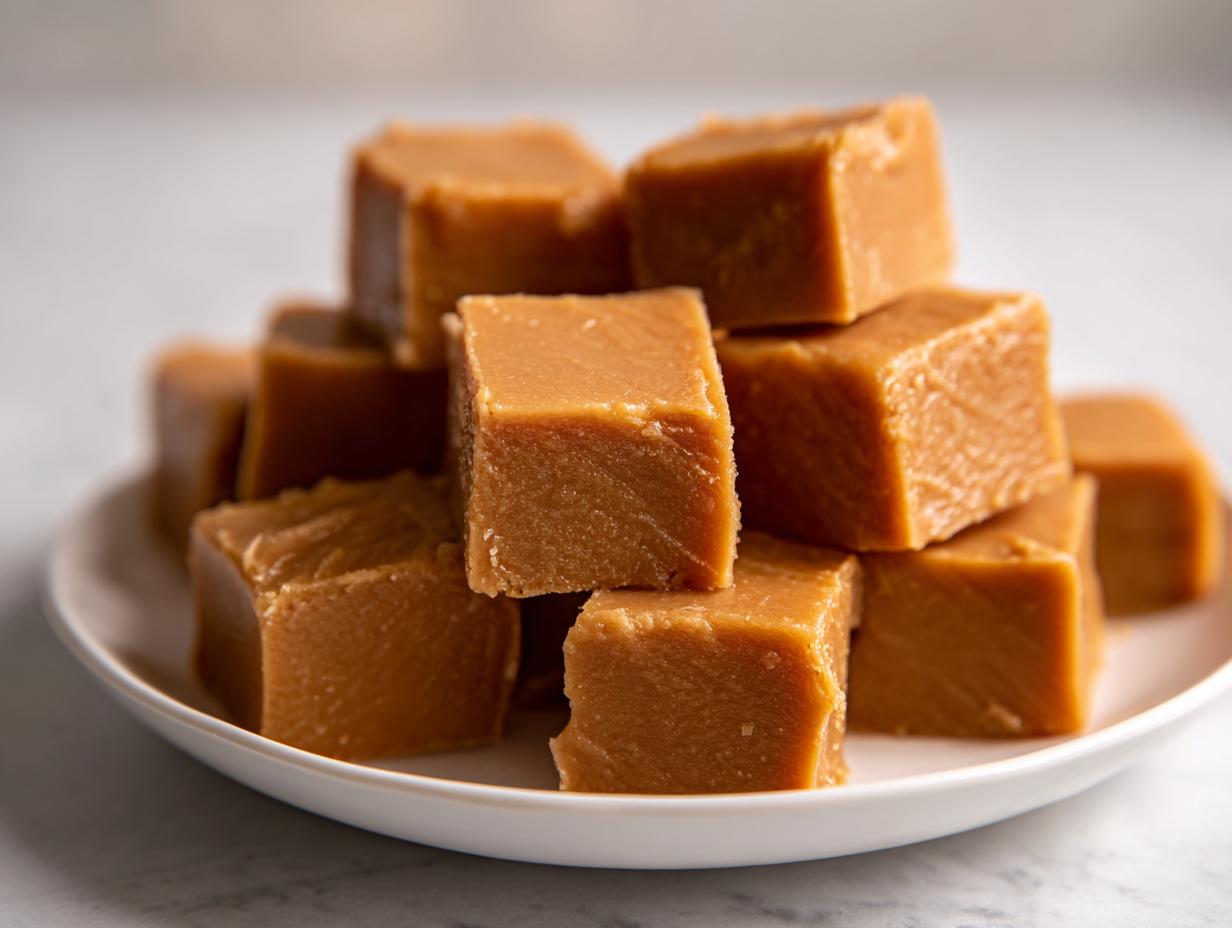
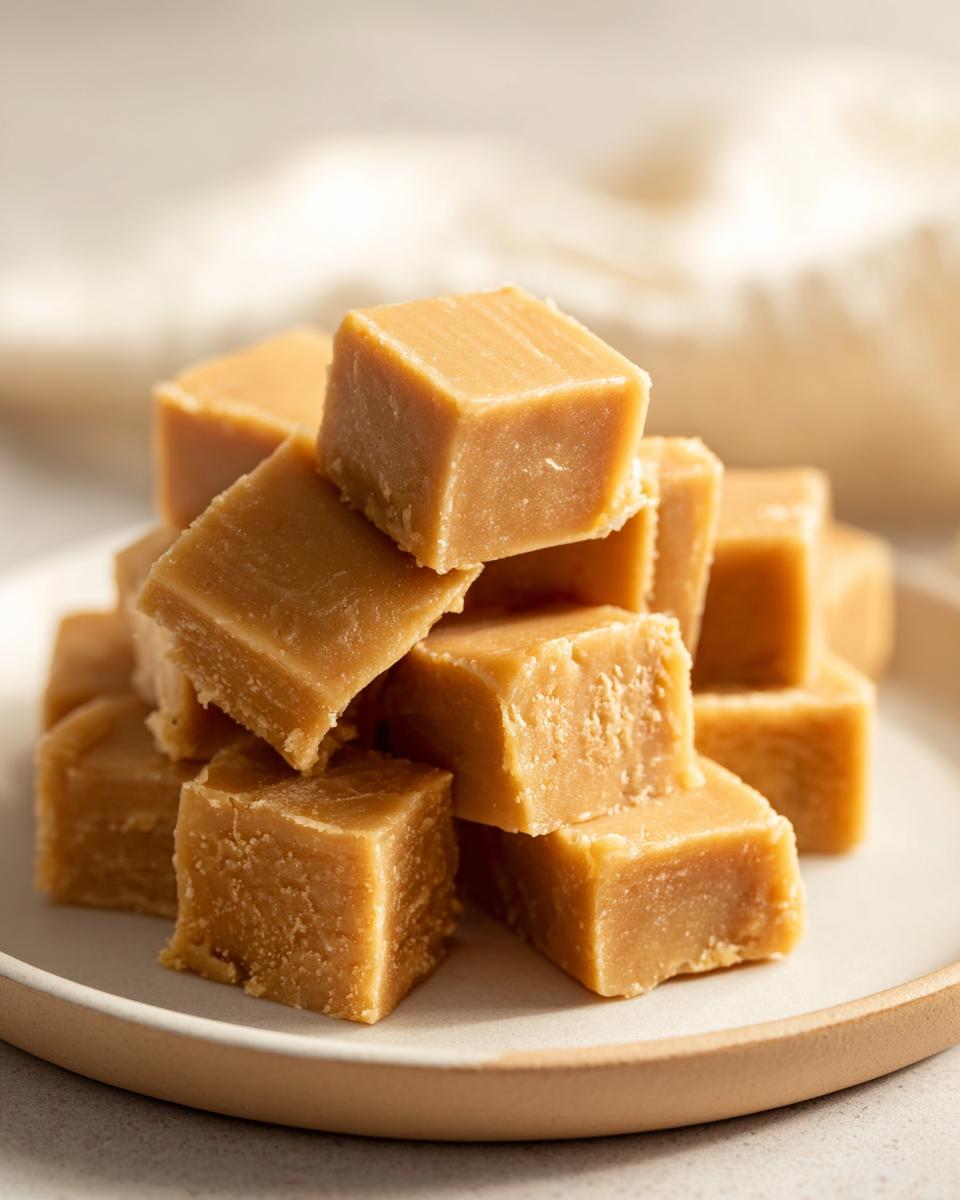
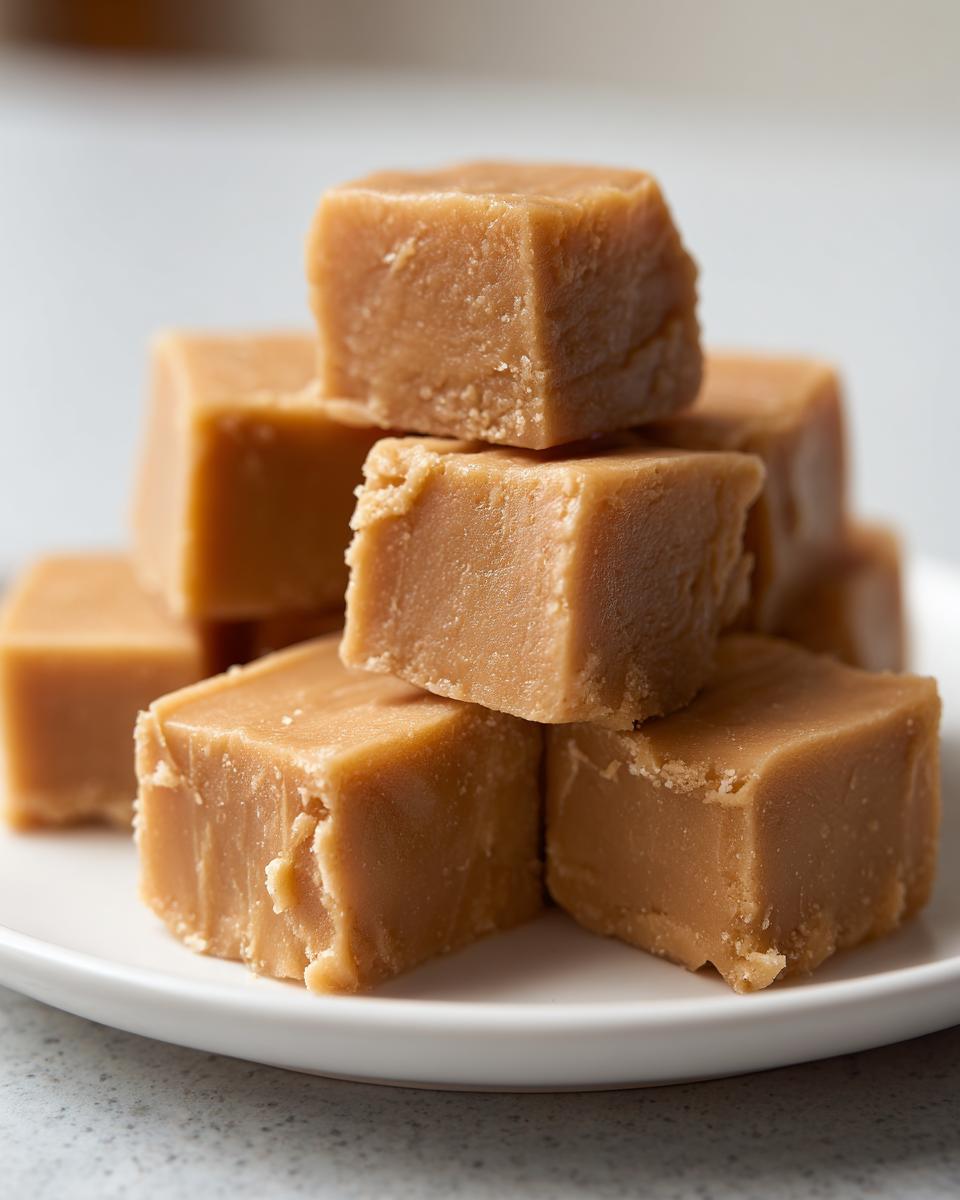
Chill Out: This is the hardest part – waiting! Pop the pan into the refrigerator. You need to let it chill for at least 2 hours. I usually just leave it for a bit longer, maybe 3 hours, just to make sure it’s super firm. The colder it is, the cleaner you can cut those squares.
-
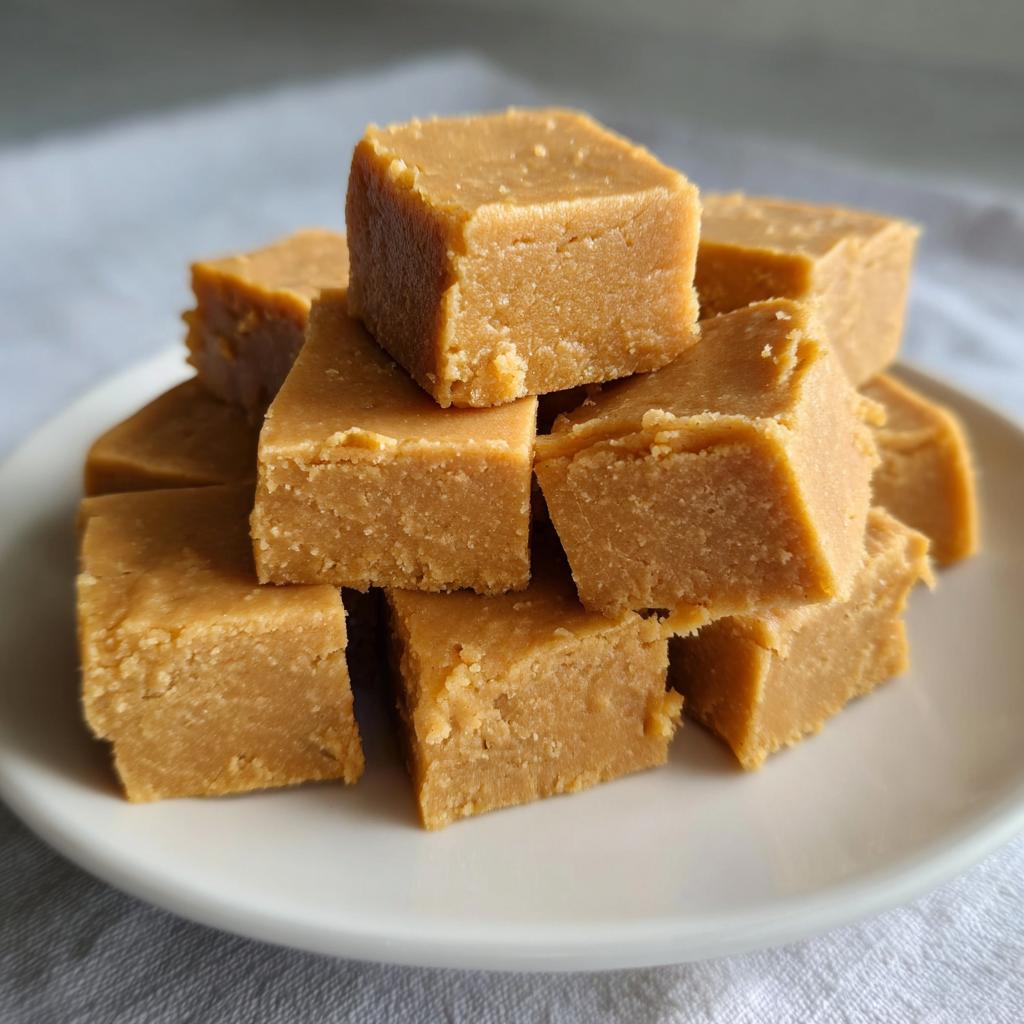
Cut and Enjoy: Once it’s nice and firm, use those parchment paper handles you left to lift the whole block of fudge right out of the pan. Place it on a cutting board. You can use a sharp knife to cut it into whatever size squares you like – I usually go for about 36 little pieces. Perfect for sharing… or not!
For a little extra something, if you’re feeling fancy, you could even sprinkle some flaky sea salt on top right before chilling! You can find more awesome no-bake peanut butter treats on my sister site if you love this kind of stuff.
Tips for the Best Peanut Butter Fudge
You want your fudge to be absolutely perfect, right? Here are a few little tricks I’ve picked up that make all the difference:
-
Sift That Sugar, Please! I know I said it before, but it’s so important. Sifting the powdered sugar prevents those dreaded lumps and gives you that super smooth, melt-in-your-mouth texture. Nobody wants gritty fudge!
-
Low Heat is Key: When you’re melting the butter and peanut butter, keep that heat low. We just want things to melt together, not get greasy or scorch. Patience here really pays off for a silky smooth finish.
-
Don’t Skimp on the Chilling: Seriously, let it chill for the full 2 hours, or even a bit longer. A well-chilled fudge cuts much cleaner and has a firmer, more satisfying texture. Trying to cut it too soon is a recipe for sticky, melty disaster!
-
Quality Peanut Butter Matters: Using a good quality, creamy peanut butter really does make a difference in the flavor and texture. Avoid any brands with tons of added oils that might separate!
Making Dessert Recipes With Peanut Butter Fudge Ahead of Time
This peanut butter fudge is a total lifesaver when I’m planning for parties or just want a sweet treat ready to go. The best part? It keeps really well! Once it’s completely firm and cut into pieces, I just pop it into an airtight container. I usually store it in the fridge, and it stays perfectly delicious for about a week. This means I can totally make it a day or two before guests arrive, or hide it in the back of the fridge for myself when a craving hits out of nowhere. It doesn’t get hard or stale, it just stays that wonderfully fudgy and delicious. You can even find more no-bake goodies if you’re looking to prep ahead for other occasions!
Frequently Asked Questions About Peanut Butter Fudge
Can I use crunchy peanut butter instead of creamy?
You sure can! Using crunchy peanut butter will give your fudge a bit of a nutty texture in every bite. It’s a fun variation if you like a little chewiness. Just know that it won’t be as super smooth as the creamy version, but still absolutely delicious for satisfying those sweet cravings!
How long does this peanut butter fudge last?
This fudge is pretty forgiving! When stored in an airtight container in the refrigerator, it stays wonderfully fresh and fudgy for up to a week. Honestly, it rarely lasts that long in my house because it’s just too good!
Can I freeze peanut butter fudge?
Yes, you can definitely freeze it! Just make sure to wrap the pieces tightly in plastic wrap, and then place them in a freezer-safe bag or container. It should keep well for a couple of months. Thaw it in the refrigerator overnight before you plan to enjoy it.
My fudge is too soft, what did I do wrong?
Oh, that’s usually because it didn’t chill quite long enough, or maybe your kitchen was a little warm when you made it! The chilling time is super important for fudge to firm up properly. Make sure you give it at least the full 2 hours in a cool fridge. If it’s still a bit soft, pop it back in for another hour.
Nutritional Information for This Peanut Butter Fudge
Just a heads-up, the nutrition info for this fudge is an estimate, as it can totally depend on the specific brands of butter and peanut butter you use. But generally speaking, a serving (which is one of those lovely little squares) comes in around 120 calories, with about 8g of fat, 2g of protein, and 10g of carbohydrates. Enjoy it guilt-free… mostly!

Share Your Sweet Cravings Creations!
I’m so excited for you to try this peanut butter fudge! If you whip up a batch, I’d absolutely love to hear about it. Drop a comment below with how it turned out or tell me what you thought! And hey, if you snap a picture, tag me on social media – seeing your delicious creations makes my day! You can also reach out through my contact page if you have any questions at all.
Peanut Butter Fudge
Ingredients
Equipment
Method
- Line an 8×8 inch baking pan with parchment paper, leaving an overhang on the sides.
- In a medium saucepan over low heat, melt the butter. Stir in the peanut butter until smooth.
- Remove the saucepan from the heat. Gradually whisk in the sifted powdered sugar, vanilla extract, and salt until well combined and smooth.
- Pour the mixture into the prepared baking pan and spread evenly.
- Chill in the refrigerator for at least 2 hours, or until firm.
- Lift the fudge out of the pan using the parchment paper overhang. Cut into small squares.