
Ever scroll through your feed and wonder, “Are These Baked Protein Bowls Really That Fluffy?” I get it! Sometimes healthy food can seem a bit, well, *dense*. But trust me, achieving a wonderfully light and fluffy texture in a dish packed with protein is totally possible. I remember the first time I stumbled across a recipe for baked protein bowls. I was in a rush post-workout and needed something quick, satisfying, and healthy. As I mixed ingredients that included gluten-free oats and rich protein sources, I never anticipated the delightful fluffiness that would result from my baking endeavor. Watching those bowls rise in the oven, I was reminded of how the right combination of ingredients can transform everyday meals into something extraordinary. That day, I discovered not just a recipe but a new passion for experimenting with nutrition in ways that delighted both my taste buds and my health goals. As a Nutritional Science Advisor, I’ve explored countless ways to make healthy eating exciting, and these bowls are a true testament to how science and deliciousness can go hand-in-hand!
Why You’ll Love These Baked Protein Bowls
You’ve gotta try these! They’re seriously a game-changer for a few reasons:
- Super Quick Prep: Seriously, you just mix everything up and pop it in the oven. Perfect for busy mornings or when you need a fast snack.
- Protein Powerhouse: Packed with protein to keep you full and satisfied for hours. Great for post-workout fuel or a hearty breakfast.
- Gluten-Free Friendly: You can easily make these gluten-free, so they’re suitable for almost everyone!
- Incredibly Fluffy Texture: Yep, they really are fluffy! Say goodbye to dense, heavy protein meals.
- So Versatile: Customize them with your favorite fruits, nuts, or seeds. The possibilities are endless!
- Great for Meal Prep: Whip up a few at the start of the week for easy, healthy grab-and-go meals.
The Secret to Fluffy Baked Protein Bowls
So, how do we get these baked protein bowls so wonderfully fluffy, you ask? It’s all about a few key players and a little bit of kitchen know-how! The magic really starts with our baking powder. That little leavening agent is what creates those airy bubbles that make the bowls light and puffy as they bake. Think of it as tiny magic dust! And the egg? Oh, the egg is crucial! It acts as a binder, of course, but also contributes to that super soft, cake-like texture we’re aiming for. When you whisk it in with the other wet ingredients, it helps create a smooth batter that bakes up beautifully. For more ideas on baking with protein, check out this easy banana bread brownie recipe!
Now, for my secret tips from the nutritional science side of things to really maximize that fluff: make sure your ingredients, especially the milk and Greek yogurt, are at room temperature. Cold ingredients can actually shock the batter and make it less fluffy. Also, don’t overmix the batter once you add the flour and protein powder. A few little lumps are totally fine! Overmixing develops the gluten too much, which can lead to a tough, dense bowl instead of the light, airy treat we want. It’s all about a gentle hand and understanding what these simple ingredients do! If you’re curious about other great protein-packed baked goods, take a peek at this baked protein pancake bowl recipe. It’s all about a gentle hand and understanding what these simple ingredients do!
Ingredients for Your Fluffy Baked Protein Bowls
Alright, let’s get down to what you’ll need to make these fluffy little wonders! It’s a pretty straightforward list, and you probably have most of this already in your kitchen. Remember, the quality of your ingredients really makes a difference, especially with protein powder and yogurt!
For the Bowl Base
This is where the magic happens and we build that fluffy texture:
- 1 large egg
- 1/4 cup plain Greek yogurt (use dairy-free if you need it!)
- 1/3 cup milk (any kind works, almond, oat, cow’s milk – you name it!)
- 1-2 Tablespoons flax meal
- 1/3 cup flour (again, gluten-free works perfectly here if that’s your jam)
- 1 scoop vanilla protein powder (this is key for that protein boost!)
- 1 Tablespoon maple syrup or stevia (for a touch of sweetness, adjust to your liking!)
- 3/4 teaspoon baking powder (our secret weapon for fluffiness!)
Suggested Toppings
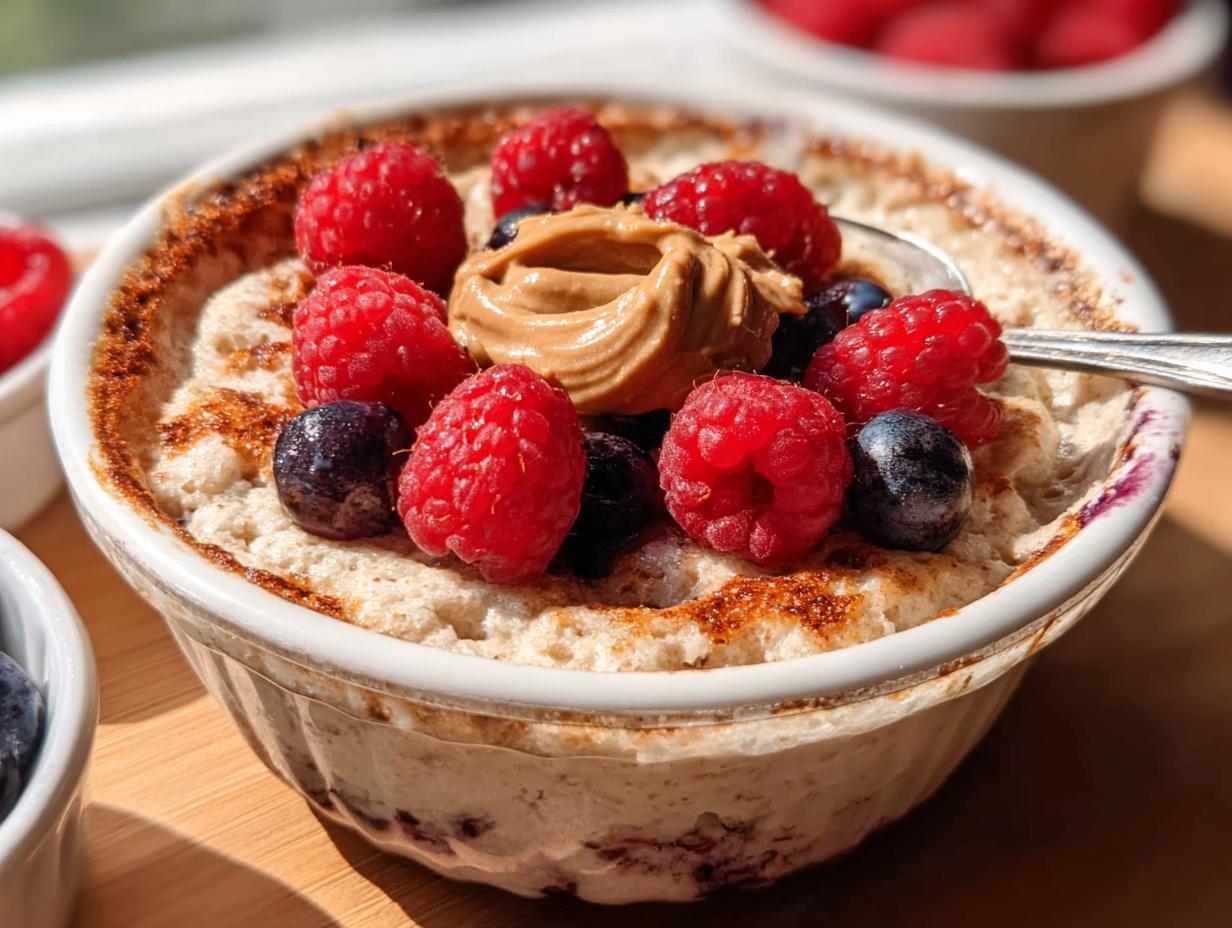
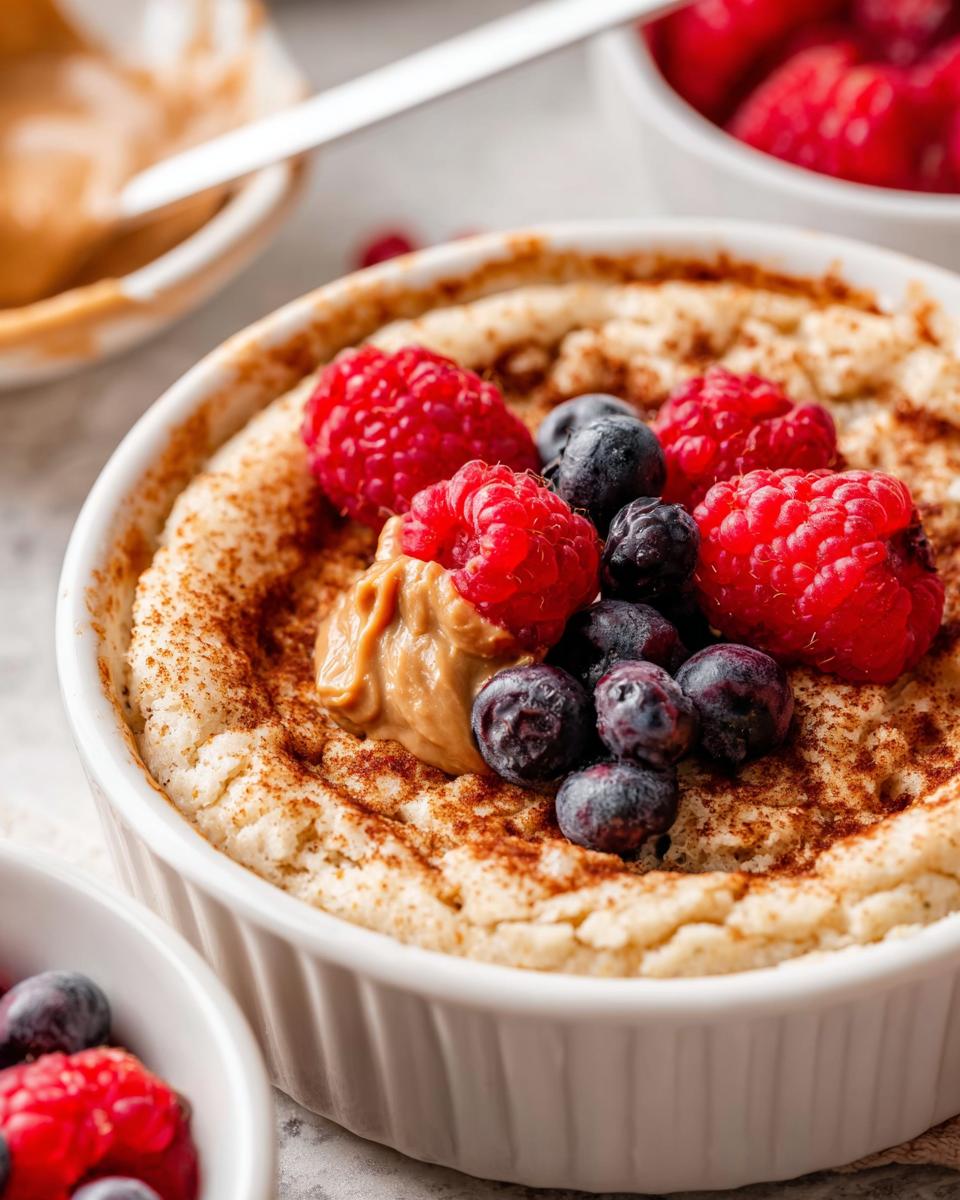
Now for the fun part – toppings! This is where you can really get creative and make these bowls your own. Think of these as suggestions to get your ideas flowing:
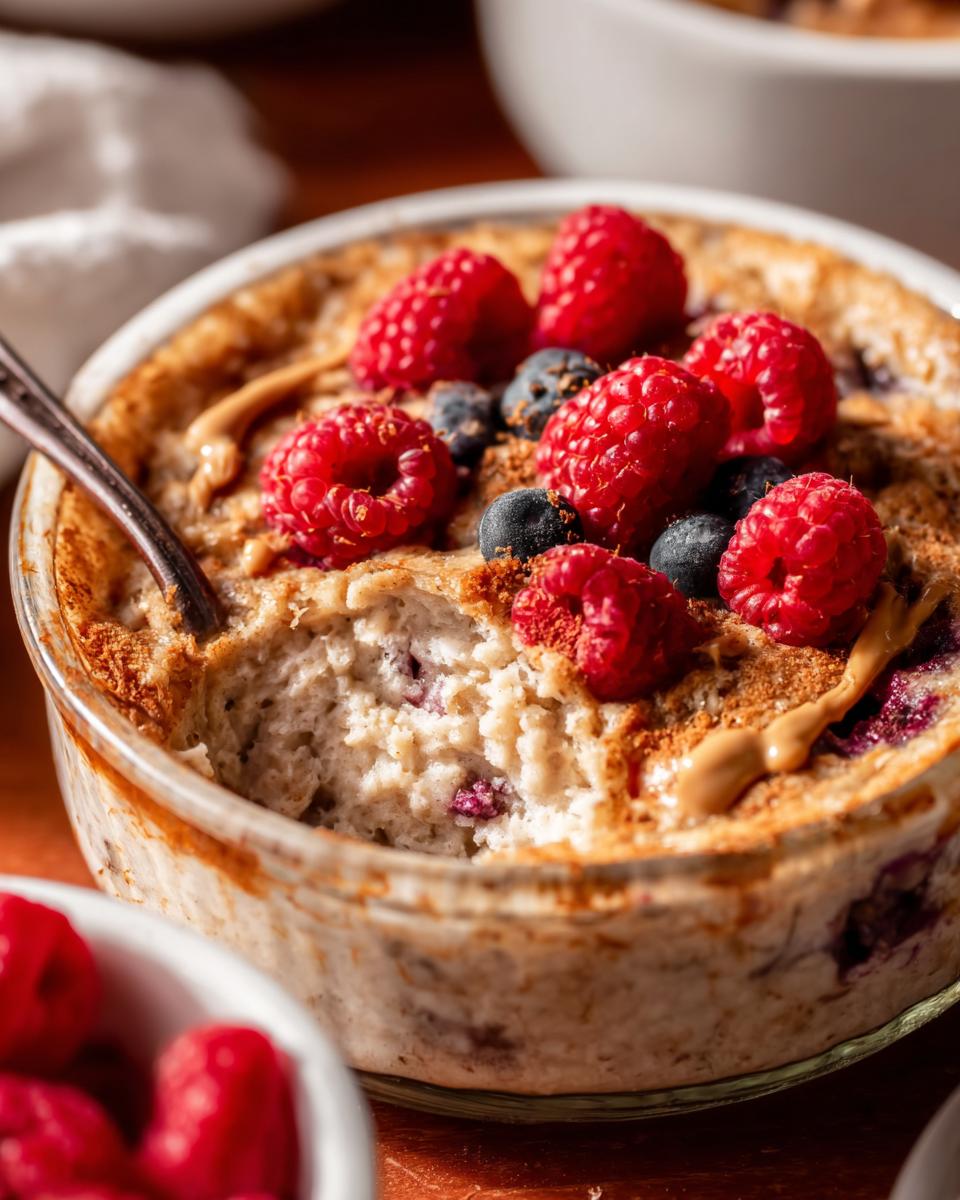
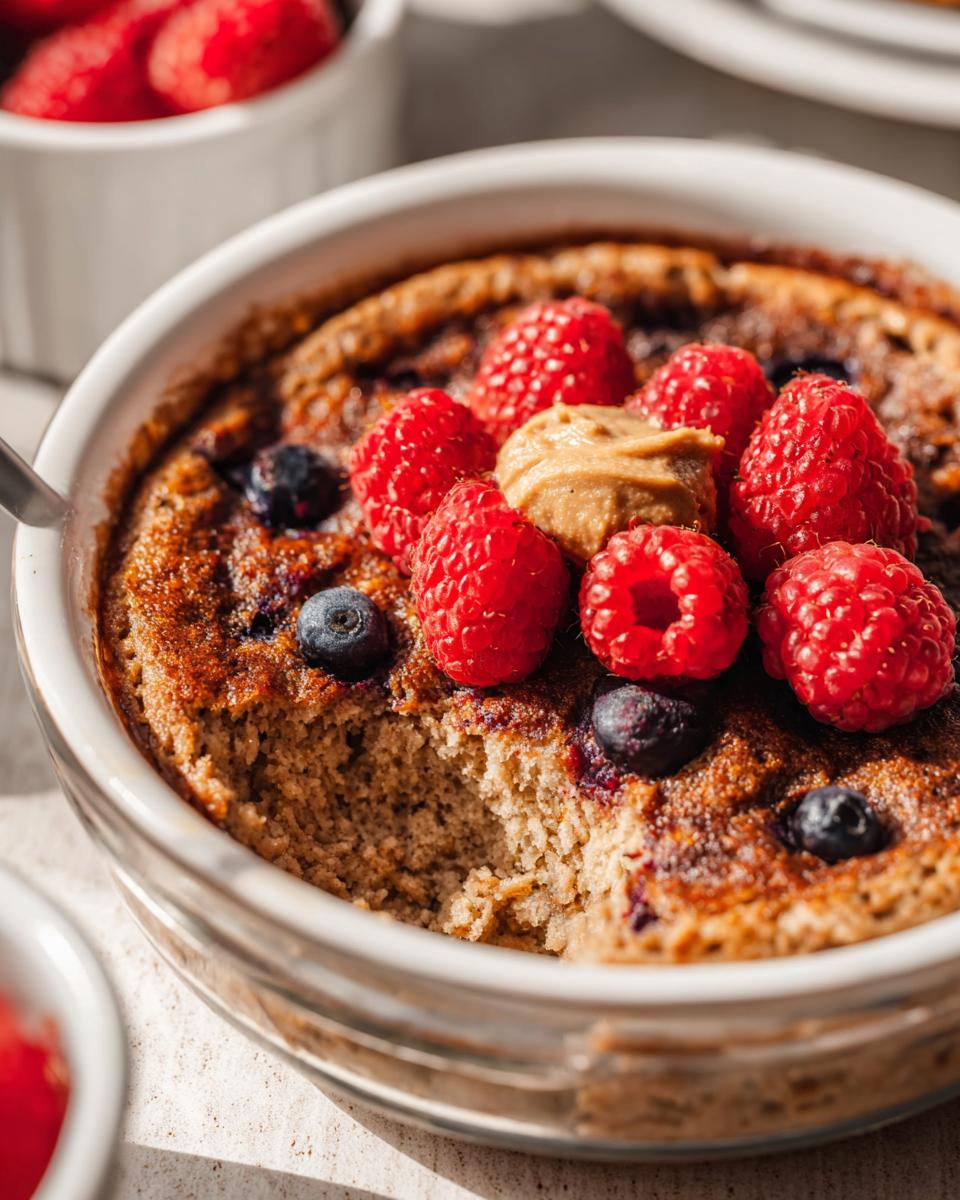
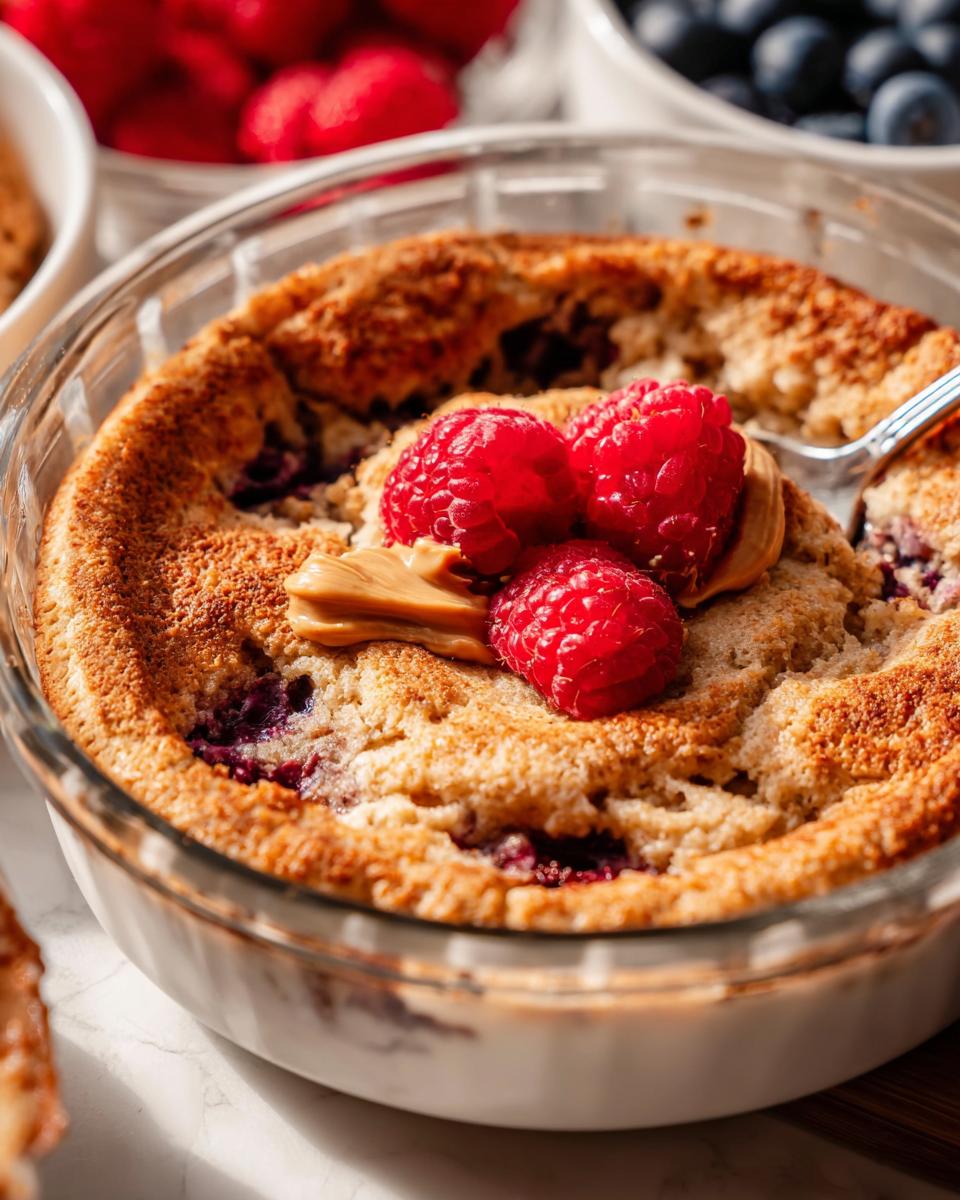
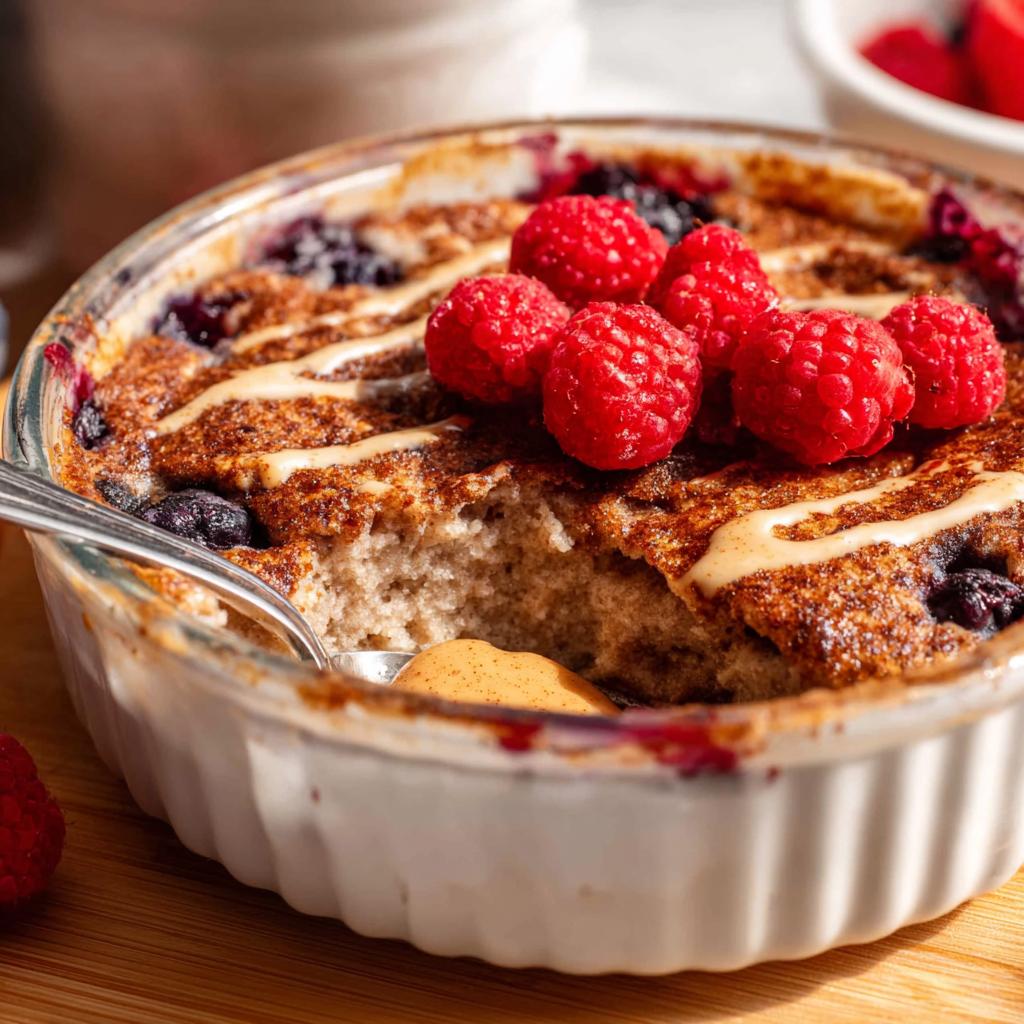
- Fresh berries like raspberries, strawberries, or blueberries
- A drizzle of your favorite nut butter
- A dollop of extra Greek yogurt
- A little extra maple syrup or chia jam
- A sprinkle of chia seeds for extra goodness
- Maybe even some chocolate chips or banana slices if you’re feeling decadent!
How to Make Are These Baked Protein Bowls Really That Fluffy?
Okay, you’ve got your ingredients, you’re ready to get baking, and you’re still wondering, “Are These Baked Protein Bowls Really That Fluffy?” The answer is a resounding YES, if you follow these simple steps! It’s surprisingly easy to get that perfect texture. Let’s get these delicious bowls into the oven!
Step 1: Prepare Your Baking Dish and Oven
First things first, preheat your oven to 350°F (that’s around 175°C). It’s super important to let your oven come up to temperature fully before the bowls go in for even baking. Then, grab a 12-14 ounce glass dish or a couple of ramekins and give them a good spray with nonstick cooking spray. This stops anything from sticking and makes cleanup a breeze!
Step 2: Mix the Bowl Ingredients
Now for the fun part – making the batter! Grab a mixing bowl and toss in all the ingredients for the bowl base: the egg, Greek yogurt, milk, flax meal, flour, protein powder, sweetener, and our fluffy hero, the baking powder. Whisk it all together until it’s just combined and smooth. Don’t go overboard with the mixing; we want to keep it light and airy! At this stage, you can gently stir in any desired toppings like berries or chocolate chips that you want baked into the bowl itself.
Step 3: Bake to Perfection
Carefully pour your batter into the prepared dish or ramekins. Pop it into your preheated oven and let it bake for about 22 to 25 minutes. You’ll know they’re ready when the center looks set and doesn’t jiggle too much, and the edges are getting just a little bit golden brown. It’s that perfect balance of cooked through without getting dry.
Step 4: Cool and Serve
Once they’re out of the oven, let them cool in the dish for about 5 to 10 minutes. This helps them firm up a bit more. Then, dive in right there in the dish with any of your favorite extra toppings – maybe a swirl of nut butter or some fresh fruit? Enjoy that fluffy goodness!
If you’re looking for more fun baking ideas, this chocolate strawberry yogurt clusters recipe is also a real treat!
Tips for Extra Fluffy Baked Protein Bowls
Want to make sure your baked protein bowls are *extra* fluffy? I’ve got you covered with a few little tricks that really make a difference. It’s all about paying attention to the details!
First off, make sure your wet ingredients, like the Greek yogurt and milk, are at room temperature. Seriously, this small step can prevent the batter from getting dense. Cold ingredients hitting the mix can sometimes make things a bit heavy.
Second, treat that baking powder like gold! Make sure it’s fresh. Old baking powder just won’t give you that lift. And don’t skimp on the measurement; that 3/4 teaspoon is there for a reason. Want more yummy baking ideas? Check out this easy banana bread brownie recipe!
Lastly, resist the urge to overmix! Once you add the flour and protein powder, just stir until everything is *barely* combined. A few little lumps are perfectly fine. This is super important for keeping the texture light and airy, not tough. It’s these little things that take your bowl from good to amazingly fluffy!
Variations and Customizations
One of the best things about these baked protein bowls? You can totally mix things up and make them exactly how YOU like them! Don’t feel like vanilla protein powder? No problem! Try chocolate protein powder for a richer flavor, or even a berry-flavored one if you’re feeling adventurous. That’s what makes them so fun and versatile.
Want to add a little somethin’-somethin’ to the batter itself? A pinch of cinnamon or nutmeg can be lovely, especially if you’re topping with apple slices. And let’s not forget the toppings – the possibilities are practically endless! Beyond the usual berries and nut butters, think about adding a sprinkle of shredded coconut, some chopped nuts for crunch, or even a drizzle of sugar-free caramel sauce for a treat. If you’re looking for more yummy recipe ideas, you’ll definitely want to check out this chocolate strawberry yogurt clusters recipe; it’s a real crowd-pleaser!
Make-Ahead and Storage Instructions
These fluffy baked protein bowls are an absolute dream for meal prep! Seriously, you can whip up a batch of 4-5 bowls over the weekend and have healthy breakfasts or snacks ready to go all week long. Just let them cool completely after baking, then pop them into an airtight container or wrap them well. They’ll keep beautifully in the refrigerator for up to 5 days.
When you’re ready to enjoy one, just pop it in the microwave for about 30-60 seconds, or reheat it gently in a toaster oven. They taste almost as good as freshly baked! If you’re always looking for more easy make-ahead ideas, you’ll love this easy baked churro bites recipe; it’s a lifesaver!
Nutritional Information (Estimated)
Just a little heads-up, the nutritional info here is an estimate, okay? It can totally change depending on the exact brands you use and which yummy toppings you add. But generally, one of these fluffy bowls will come in around 476 calories, with a fantastic 40 grams of protein, 48 grams of carbs, and about 13 grams of fat. Pretty solid for a healthy meal!
Frequently Asked Questions About Fluffy Baked Protein Bowls
Got more questions brewing about these fluffy delights? I’m happy to help! It’s totally normal to wonder about the little details. Here are some of the questions I get asked most often.
Can I use a different type of protein powder?
Oh, absolutely! While vanilla is my go-to, feel free to experiment. Just know that different protein powders can absorb liquid a bit differently, so you might need to tweak the milk amount slightly. Whey, casein, or even plant-based blends can work, but they might change the final texture just a tad. Give it a try and see what you love!
Why aren’t my baked protein bowls fluffy?
If your bowls aren’t puffing up like you hoped, don’t worry! It often comes down to a couple of things we talked about. Make sure your baking powder is fresh – that’s a biggie! Also, try not to overmix the batter once you add the dry ingredients. Gentle mixing is key for that airy texture. And double-check your oven temp; sometimes ovens can run a little cool and affect the rise.
Are these bowls suitable for meal prep?
Yes, yes, and YES! These bowls are total superstars for meal prep. You can easily make up a batch, let them cool completely, and store them in the fridge for up to 5 days. Just reheat them gently in the microwave or oven when you’re ready for a quick, healthy bite. They’re perfect for busy weeks!
Looking for more make-ahead goodies? You’ll adore this lemon cream chia pudding recipe; it’s another fantastic option!
Are These Baked Protein Bowls Really That Fluffy?
Ingredients
Equipment
Method
- Preheat your oven to 350°F. Spray a 12-14 ounce glass dish or ramekin with nonstick spray.
- Add all of the ingredients for the bowl to a mixing bowl and mix well until combined. Arrange your desired toppings on top.
- Bake in the preheated oven for 22-25 minutes, or until the pancake bowls are set in the middle and slightly golden brown.
- Cool for 5-10 minutes, then serve in the dish with any additional toppings.