

Oh, get ready for a flavor explosion that’ll hug your soul! We’re talking about the ultimate mashup: the Garlic Bread Grilled Cheese. Seriously, if you’ve ever dreamed of combining the gooey, cheesy goodness of a classic grilled cheese with the intoxicating aroma and savory crunch of garlic bread, this is it. I still remember the first time I whipped this up on a dreary, rainy afternoon. I’d just come back from the farmers’ market, practically swimming in fresh garlic and herbs, and I just *had* to create something magical. That moment, as the cheese melted and the garlic butter sizzled, was pure comfort. As Chef Maria Rodriguez, Founder & Executive Recipe Developer, I’ve made countless meals, but this one holds a special place – it’s a little bit of childhood nostalgia with a grown-up, garlicky twist that just makes everything feel right again.
Why You’ll Love This Garlic Bread Grilled Cheese
This isn’t just any grilled cheese; it’s a flavor upgrade that’s ridiculously easy! Here’s why it’ll become your new go-to:
- Cheesy Heaven Meets Garlic Bliss: It’s the best of both worlds – gooey melted cheese and that craveable garlic bread flavor.
- Super Quick Prep: Seriously, you can whip this up in about 15 minutes total. Perfect for when hunger strikes FAST.
- Comfort Food King: It brings all the warm fuzzies of childhood favorites, but with a delicious, savory kick.
- Impressive Flavor, Minimal Effort: Who knew something so simple could taste so gourmet?
- Customizable to Your Taste: Easily tweak the cheese or bread to make it exactly how *you* like it.
- The Ultimate Anytime Meal: It’s fantastic for a speedy lunch, a satisfying dinner, or even a late-night snack attack.
Ingredients for the Ultimate Garlic Bread Grilled Cheese
Alright, let’s get down to what magic goes into this fantastic sandwich. You’ll want to have these ready:
- 4 slices of your favorite sandwich bread – sourdough with a soft crust is my absolute jam for this!
- 4 tablespoons of softened unsalted butter
- 1 tablespoon of mayonnaise (trust me, it helps with browning!)
- 3 cloves of garlic, minced up super fine
- 1 tablespoon of fresh Italian parsley, chopped
- Salt and pepper, just to make it taste perfect
- 1 cup of freshly shredded cheese. I love a mix of Gruyere, Colby Jack, and smoked Cheddar, but feel free to play around!
Expert Tips for the Perfect Garlic Bread Grilled Cheese
Okay, so making this incredible sandwich is pretty straightforward, but a few little tricks from my kitchen to yours can really take it from great to absolutely mind-blowing. Trust me on these!
First off, that heat is EVERYTHING. You absolutely want to cook these sandwiches over medium-low heat. This might sound slow, but it’s the secret to getting that perfect, golden-brown crust without burning it, while giving the cheese all the time it needs to melt into a gooey, glorious mess. Don’t rush this part – good things come to those who wait (and cook low and slow!).
And speaking of cheese, make sure you’re using freshly shredded cheese. I know, I know, pre-shredded is easier, but the stuff in the bag often has anti-caking agents that stop it from melting as beautifully. For this Garlic Bread Grilled Cheese, we want maximum melt factor, so taking an extra minute to shred it yourself makes a HUGE difference. You can find more yummy grilled cheese ideas right here if you’re feeling inspired!
Oh, and one more thing! When you’re flipping these beauties, give them a gentle little press with your spatula. This helps ensure even browning and encourages all that melty cheese to spread out perfectly. It’s like a little hug for the sandwich!
How to Make Garlic Bread Grilled Cheese: Step-by-Step
Alright, let’s get this party started! Making your own amazing Garlic Bread Grilled Cheese is super simple, and honestly, it’s half the fun. Follow these easy steps, and you’ll be diving into cheesy, garlicky perfection in no time. You can find tons of other delicious sandwich ideas over at Cooking For My Soul, but this one is a personal favorite!
Step 1: Make That Glorious Garlic Butter! In a small bowl, get all your flavor boosters together. Mix that softened butter, the secret-weapon mayonnaise (it helps get that perfect golden crust!), your super-finely minced garlic, and the chopped parsley. Give it all a good stir until it’s beautifully combined. Then, just a little pinch of salt and pepper to taste. Easy peasy!
Step 2: Bread Time! Now, grab your bread slices. Take that delicious garlic butter mixture and spread it evenly on *one* side of each slice. This is the side that’s going to get all toasty and amazing in the pan. Don’t be shy with it!
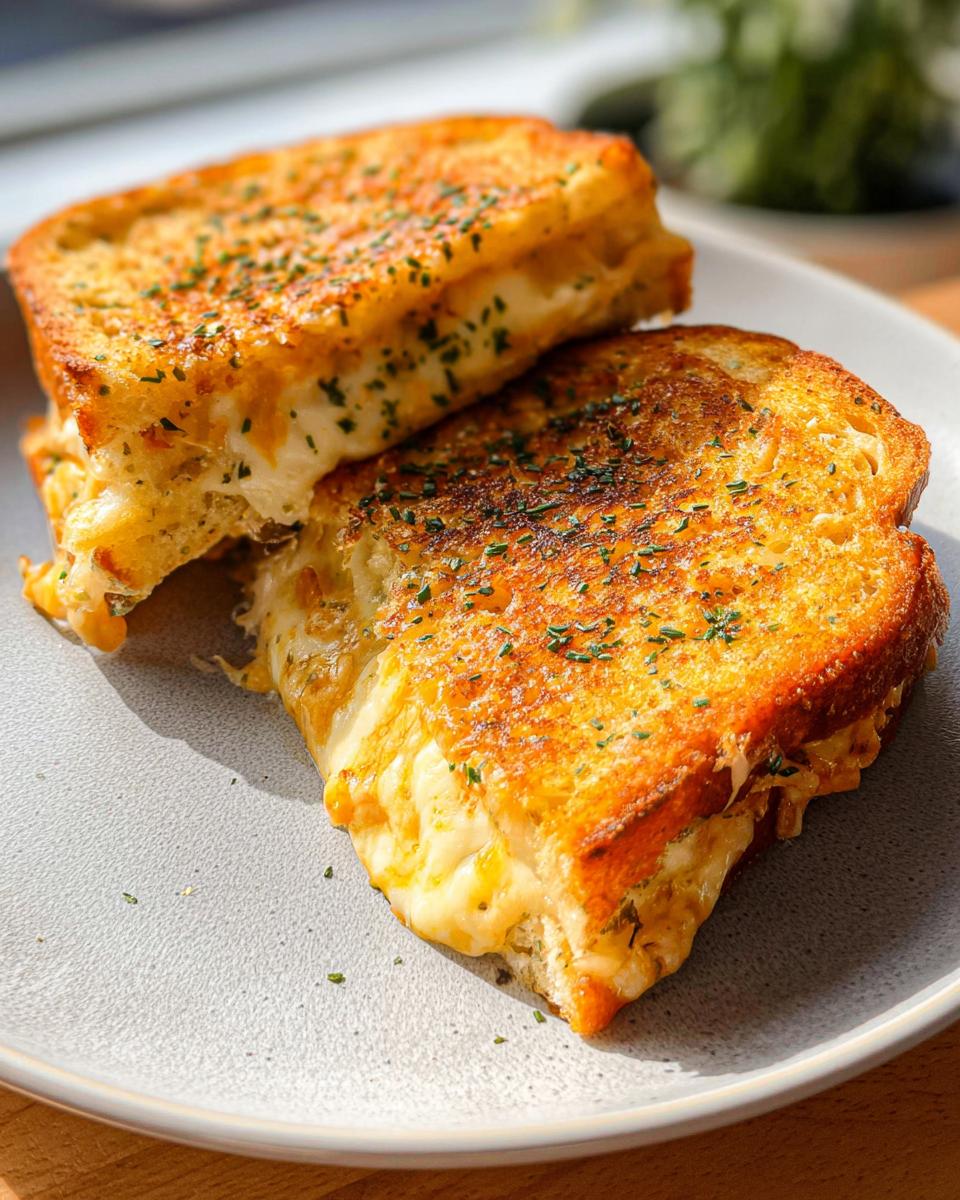
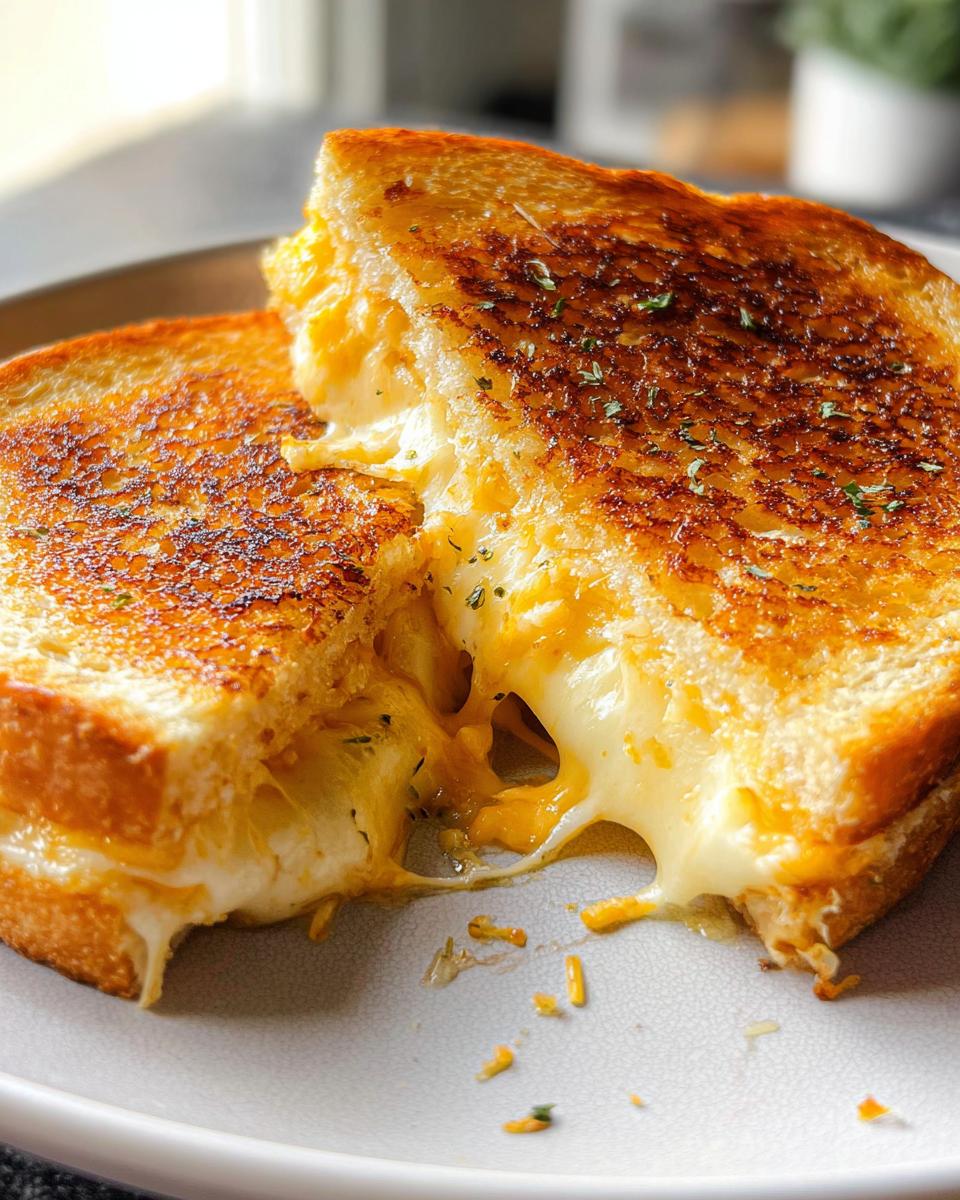
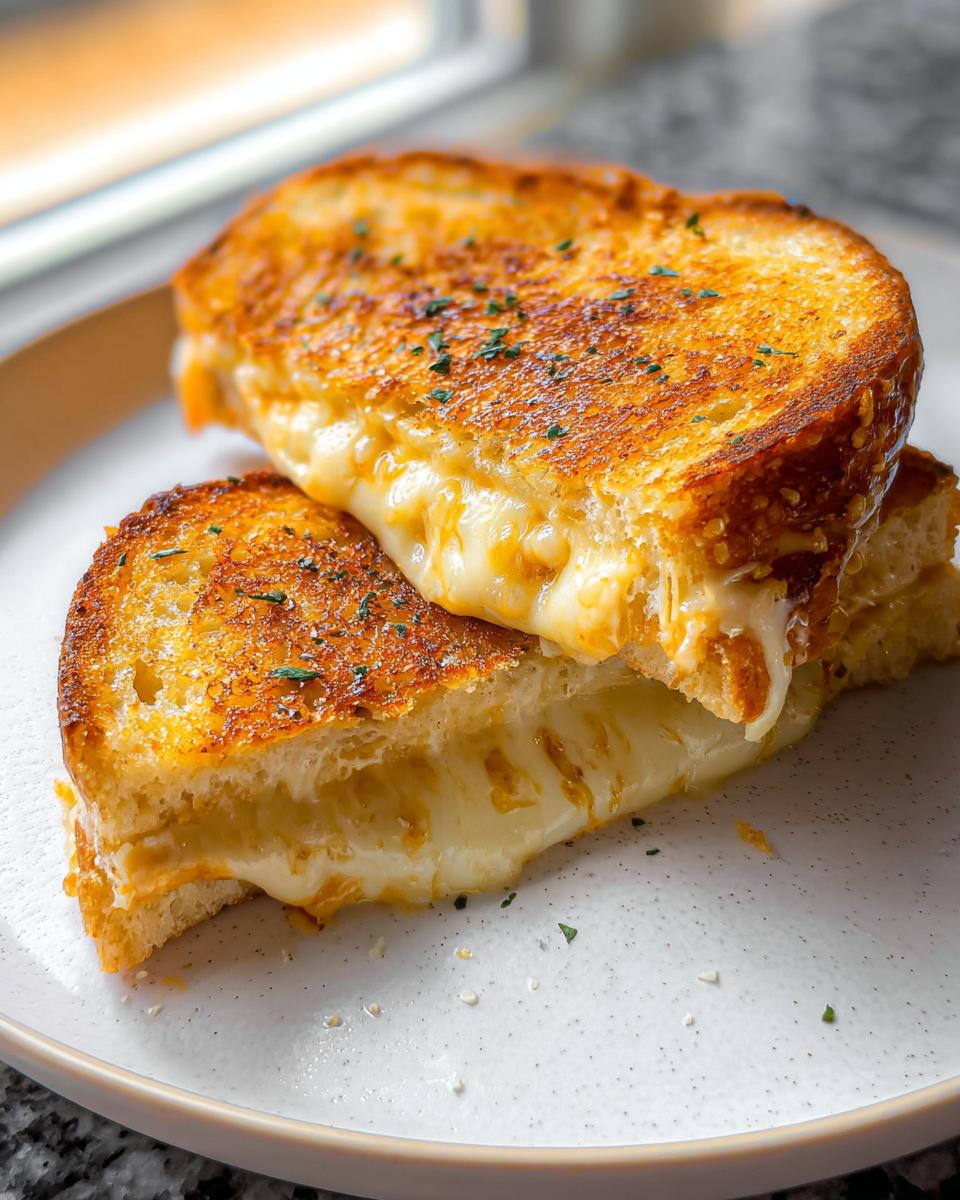
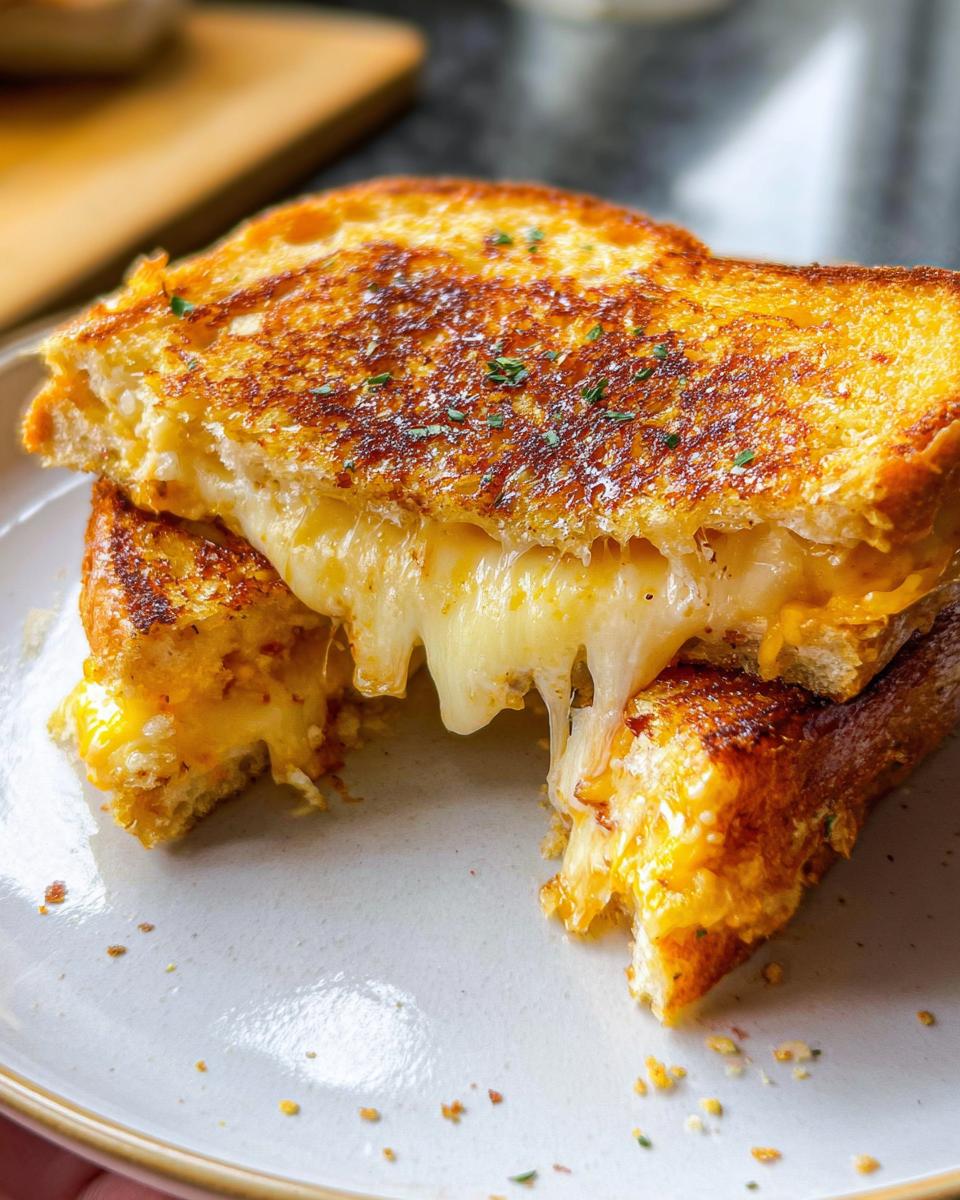
Step 3: Cheese Please! Okay, take two of those bread slices and pile that lovely shredded cheese onto the buttered side. Get a good, generous amount in there – we want it super melty! Then, top it off with the other two bread slices, making sure those buttered sides are facing UP and OUT.
Step 4: Get Your Skillet Ready Place your trusty nonstick skillet over medium-low heat. Seriously, don’t crank it up high! We want to cook this slow and steady so the bread gets perfectly golden brown and the cheese has enough time to melt all the way through without the outside burning. Patience, my friend!
Step 5: Grill It Up! Carefully place your cheesy masterpieces into the warm skillet. Let them cook for about 5 minutes on the first side. You’re looking for that gorgeous golden-brown color. Now, flip them over and cook the other side for another 5 minutes, or until it’s just as golden and delicious.
Step 6: The Melty Magic Peek inside! If the cheese isn’t quite melted, that’s totally okay. You can gently press down on the sandwiches with your spatula, flip them a couple more times, and maybe even turn the heat down a tiny bit more. This helps ensure the cheese is perfectly gooey and stretchy.
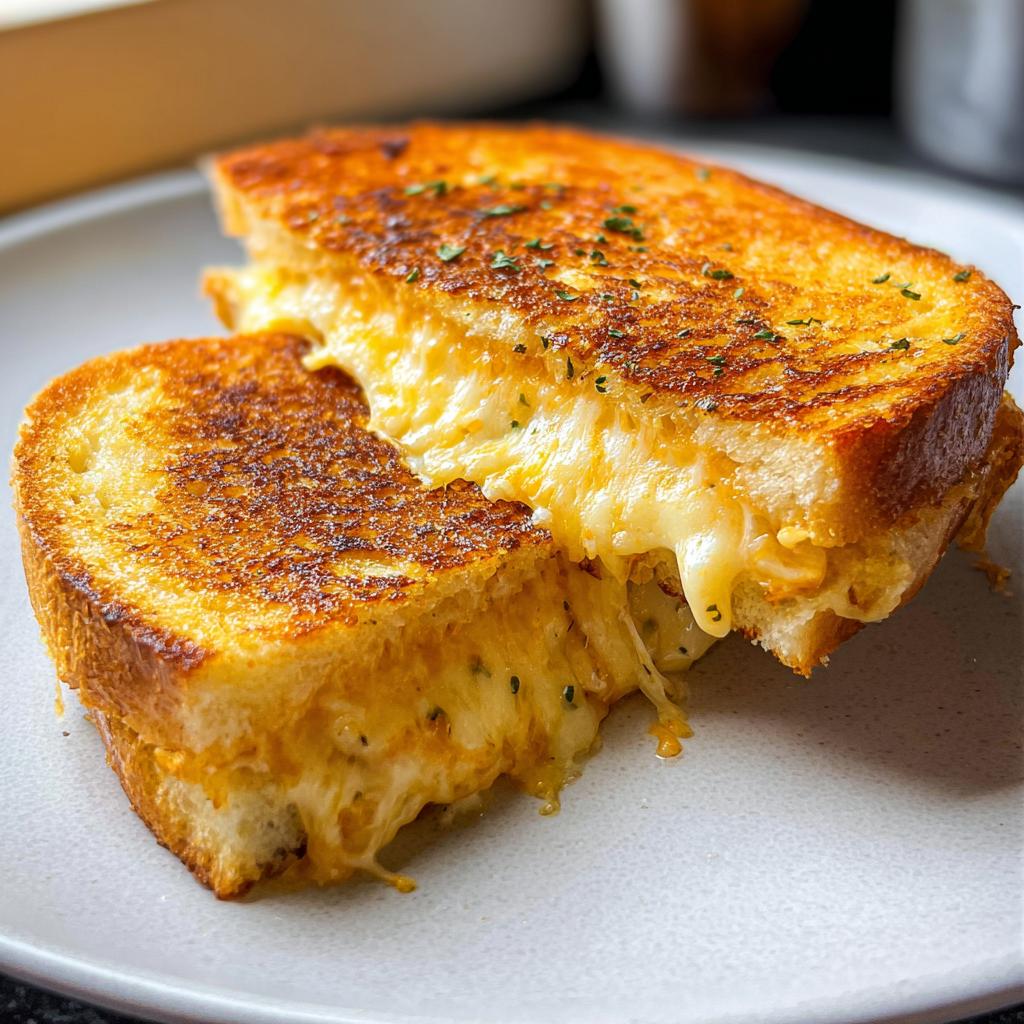
Step 7: Serve and Devour! Once they’re perfectly golden and the cheese is oozing out, slide them onto a plate. Slice them in half – watch that cheese pull! – and enjoy them while they’re nice and warm. You totally deserve it!
Ingredient Notes and Substitutions
Let’s talk ingredients, because they’re the heart and soul of any great dish, right? For this Garlic Bread Grilled Cheese, the bread really sets the stage. I mentioned sourdough, and it’s fantastic because it holds up well and has a lovely tang, but honestly, any good quality sandwich bread will do. If you’re going gluten-free, there are some amazing GF loaves out there now that crisp up beautifully – maybe check out this guide for some ideas on meal planning!
Now, the cheese! Gruyere, Colby Jack, and smoked Cheddar are my go-to dream team because they melt like a dream and give a complex flavor. But don’t be afraid to mix it up! Monterey Jack, Havarti, or even a good sharp Cheddar are also winners. If you’re dairy-free, there are some seriously tasty dairy-free cheese alternatives available now that melt really well – give them a try!
Serving Suggestions for Your Garlic Bread Grilled Cheese
This incredible sandwich is pretty darn hearty on its own, but it also loves to play with friends on the plate! For a truly comforting meal, you can’t go wrong with a classic tomato soup – check out my soup guide for some ideas. A simple side salad with a light vinaigrette is also perfect for cutting through all that cheesy goodness. And if you need more veggie inspiration, these sides are always a hit!
Frequently Asked Questions about Garlic Bread Grilled Cheese
Got questions about making the ultimate Garlic Bread Grilled Cheese? I’ve got you covered!
Can I make the garlic butter mixture ahead of time?
You bet! You can totally whip up that delicious garlic butter mixture a day or two in advance and keep it covered in the fridge. Just let it sit out on the counter for about 15-20 minutes to soften up before you spread it on the bread. It makes getting your sandwich ready even quicker!
What’s the best type of bread for this sandwich?
While I adore sourdough for its flavor and structure, don’t let that stop you from experimenting! A nice hearty white bread, brioche, or even a good multi-grain works wonderfully. The key is to use bread that has a bit of substance and can hold up to the butter and cheese without falling apart. If you’re looking for lower-carb options, there are some fantastic gluten-free or keto breads out there that grill up beautifully.
Can I add other ingredients to my Garlic Bread Grilled Cheese?
Absolutely! This recipe is a fantastic base for all sorts of fun additions. Thinking about adding some cooked bacon, thinly sliced tomato, or maybe some caramelized onions? Go for it! Deli meats like ham or turkey also pair really well. Just make sure whatever you add is cooked and ready to go, and don’t overload the sandwich too much, or it might not cook as evenly.
How do I get an extra crispy crust?
Besides cooking it over medium-low heat and using that mayo-butter combo, another trick for an extra crispy crust is to make sure your pan is evenly heated. Also, don’t move the sandwich around too much while it’s cooking on the first side – let that golden crust develop! A gentle press with the spatula can also help ensure the bottom is perfectly toasted.
Nutritional Information (Estimated)
Now, about the numbers! Keep in mind that these are estimates, and the exact nutritional info can change depending on the specific ingredients you use, especially the types of bread and cheese. But for a general idea, one serving of this amazing Garlic Bread Grilled Cheese usually comes out to about:
Calories: 621
Carbohydrates: 28g
Protein: 19g
Fat: 49g
Saturated Fat: 26g
Cholesterol: 120mg
Sodium: 834mg
Potassium: 139mg
Fiber: 1g
Sugar: 3g
Calcium: 523mg
Iron: 2mg
Share Your Garlic Bread Grilled Cheese Creation!
I genuinely hope you adore making and eating this Garlic Bread Grilled Cheese as much as I do! If you give it a try, please, please let me know how it turned out! Leave a comment below, tell me your favorite cheesy combo, or even rate the recipe. And if you snap a pic, tag me on social media – I just love seeing your kitchen creations! Have questions or just want to say hi? You can always reach me here!
Garlic Bread Grilled Cheese
Ingredients
Equipment
Method
- In a bowl, mix the softened butter, mayonnaise, garlic, and parsley until evenly combined. Season with a pinch of salt and pepper to taste.
- Spread the garlic butter mixture on one side of each slice of bread. Top two slices with shredded cheese and cover with the remaining two slices, buttered side up.
- Heat a nonstick skillet over medium-low heat. Cooking on medium-low heat allows the cheese to fully melt before the crust becomes too browned.
- Once the skillet is warm, cook the sandwiches for about 5 minutes per side, until golden brown and the cheese is melted. You may need to flip them a few times and gently press them down to ensure the cheese melts evenly.
- Slice and serve immediately. Enjoy while warm and melty.
Nutrition
Notes
Tried this recipe?
Let us know how it was!
Certified Gluten-Free Culinary Master
Everything changed in 2017 when I received my celiac diagnosis. After ten years as a traditional pastry chef creating elaborate wedding cakes and French pastries, I suddenly couldn’t even taste my own work. It felt like the end of my culinary world.
Instead, it became my greatest challenge. I had to completely relearn baking – understanding how gluten-free flours behave differently, how they bind, how they absorb moisture. Adding the low-carb requirement? That was like solving a puzzle with half the pieces missing.
My breakthrough came with what I now call my “foundation flour blend system” – different combinations that seamlessly replace wheat flour while maintaining low-carb macros. These techniques have been adopted by culinary schools and have helped countless bakers who thought their favorite treats were gone forever.
That first successful batch of gluten-free, low-carb chocolate chip cookies? Watching my husband close his eyes and smile told me I’d found my true calling. Now, with over 300 tested recipes, I prove daily that dietary restrictions don’t mean culinary limitations.
When I’m not experimenting in my Austin test kitchen, I’m teaching weekend workshops or tending my herb garden with Biscuit, my rescue beagle who’s become an expert at detecting oven timers.