
Oh, tiramisu! Just saying the name makes me feel a little fancy, doesn’t it? That layered cloud of coffee-kissed mascarpone and delicate ladyfingers is just pure magic. But you know me, I can’t resist a good twist! My love affair with this classic started way back when I was in my early twenties, discovering its wonders at a sweet little Italian place in my hometown. Each bite was a revelation! Then came my gluten intolerance diagnosis in 2017, and I thought those indulgent moments were over. Nope! Not on my watch. I’ve always believed that dietary needs shouldn’t steal our joy, and after endless kitchen experiments, one glorious day, the idea for a Biscoff Tiramisu hit me. The warm, spiced hug of Biscoff cookies and that dreamy cookie butter just sings with creamy mascarpone. It’s like a cozy blanket for your taste buds, and trust me, it’s a game-changer for anyone who loves unique, accessible desserts.
Why You’ll Love This Biscoff Tiramisu
Okay, so why is this Biscoff Tiramisu going to be your new favorite dessert? Let me tell you!
- It’s surprisingly easy! Seriously, no complicated steps here. You can whip this up without breaking a sweat.
- That unique flavor combo? Chef’s kiss! The warm spice of Biscoff cookies blended with creamy mascarpone is just out of this world. It’s tiramisu, but with a cozy, comforting hug.
- It’s a total crowd-pleaser. Anyone who tries this Biscoff Tiramisu is going to ask for the recipe, guaranteed. It’s perfect for dinner parties, holidays, or just because you deserve a treat.
- Perfect for special occasions! Whether it’s a birthday, anniversary, or just a Tuesday that needs some serious cheering up, this dessert always feels a little bit elegant and extra special.
Ingredients for Your Biscoff Tiramisu
Alright, let’s talk ingredients! Gathering everything before you start is *key* to making this Biscoff Tiramisu a breeze. Don’t worry, it’s all pretty straightforward. We’ll group things a bit so you know exactly what’s going where.
For the Biscoff Cookies:
- 2 packets Biscoff cookies (that’s about 64 cookies!)
For That Dreamy Filling:
- 1/2 cup Biscoff cookie butter – this is our flavor star!
- 2 cups heavy whipping cream, gotta be nice and chilled for whipping
- 1 (16 oz) block cream cheese, make SURE it’s at room temperature. This is super important for a smooth filling!
- 1 Tablespoon vanilla extract (optional, but it adds a nice little something extra)
- 1/4 cup raw sugar (optional, only if you like it a little sweeter. Biscoff is pretty sweet already!)
To Make That Coffee for Soaking:
- 1.5 cups water
- 4 Tablespoons espresso or strong coffee – use your favorite!
And for the Top Dusting:
- 2-3 Tablespoons unsweetened cocoa powder
- 1 Tablespoon instant coffee
See? Not so scary, right? Just gather these up and we’re ready to go!
Crafting the Perfect Biscoff Tiramisu: Step-by-Step
Okay, let’s dive in and make this magic happen! Don’t be intimidated, it’s really quite straightforward, and seeing your gorgeous Biscoff Tiramisu come to life is so rewarding.
Preparing the Base Elements
First things first, let’s get our coffee ready. Brew up your espresso or strong coffee and let it cool completely. While that’s happening, grab a small bowl and whisk together your cocoa powder and instant coffee. You want a nice even mix for that beautiful topping. And remember that room temperature cream cheese from earlier? Make sure it’s truly soft – that’s your secret weapon for a super smooth filling!
Creating the Creamy Biscoff Filling
In a good-sized mixing bowl, plop in that soft cream cheese, the star of the show – your Biscoff cookie butter – and any optional sugar or vanilla you’re using. Give it a good whisk for about 30 to 60 seconds. You’re looking for a wonderfully creamy, lump-free base. Then, pour in the *cold* heavy whipping cream. Now, grab your whisk (or electric mixer!) and get going on medium speed. Whip it up for a couple of minutes until you see lovely stiff peaks forming. They should hold their shape when you lift the whisk. Use a spatula to gently scrape down the sides and bottom, making sure everything is perfectly blended. You want this filling to be heavenly!
Assembling Your Biscoff Tiramisu Layers
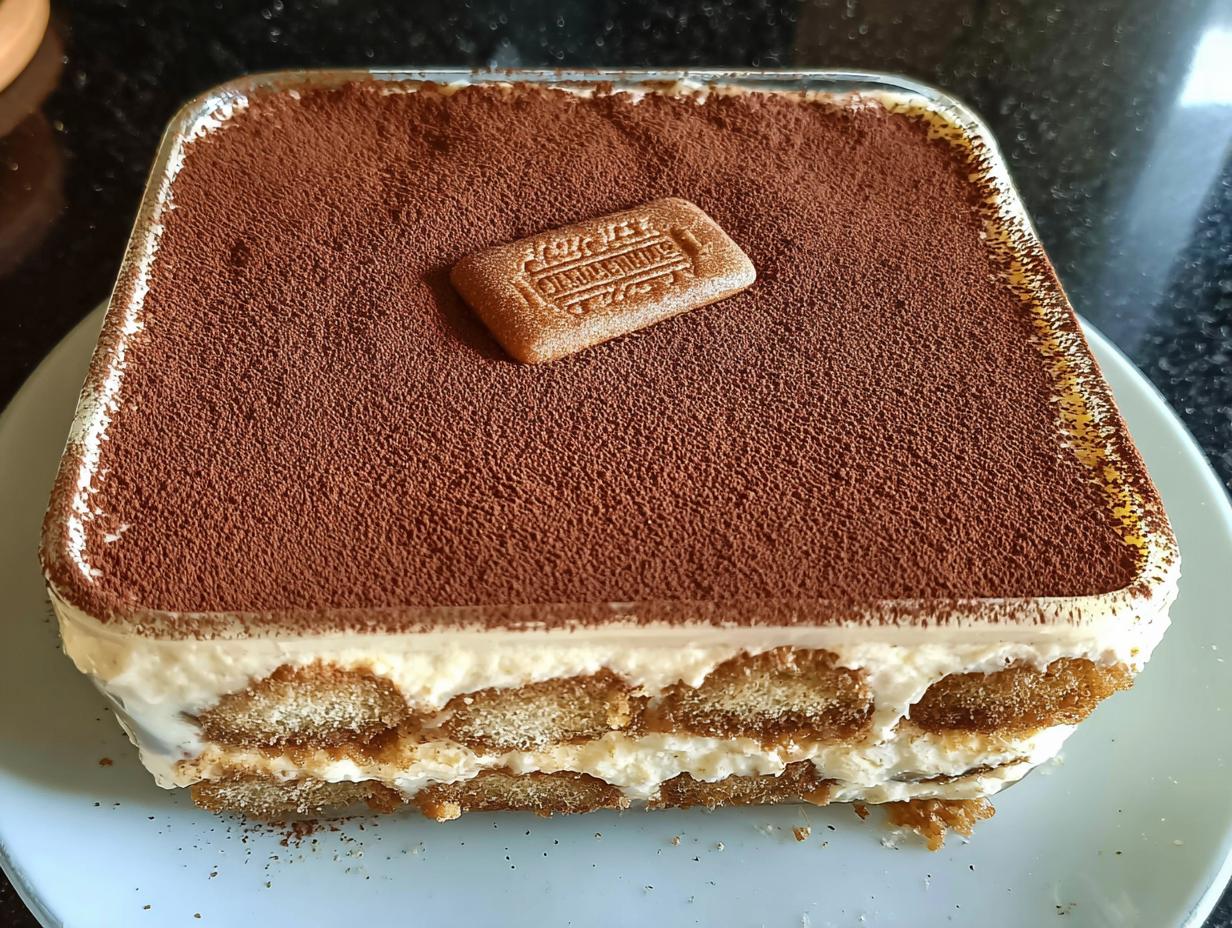
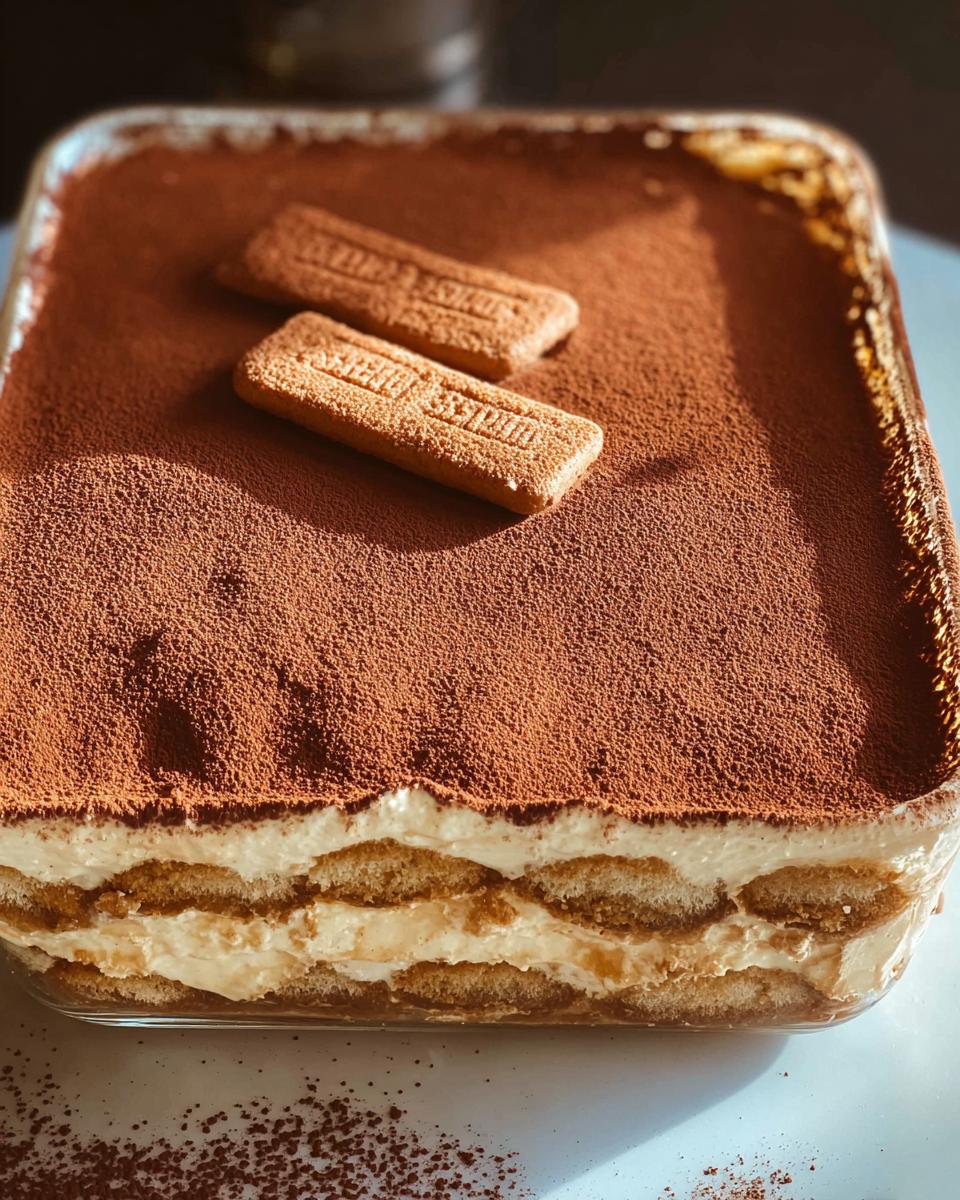
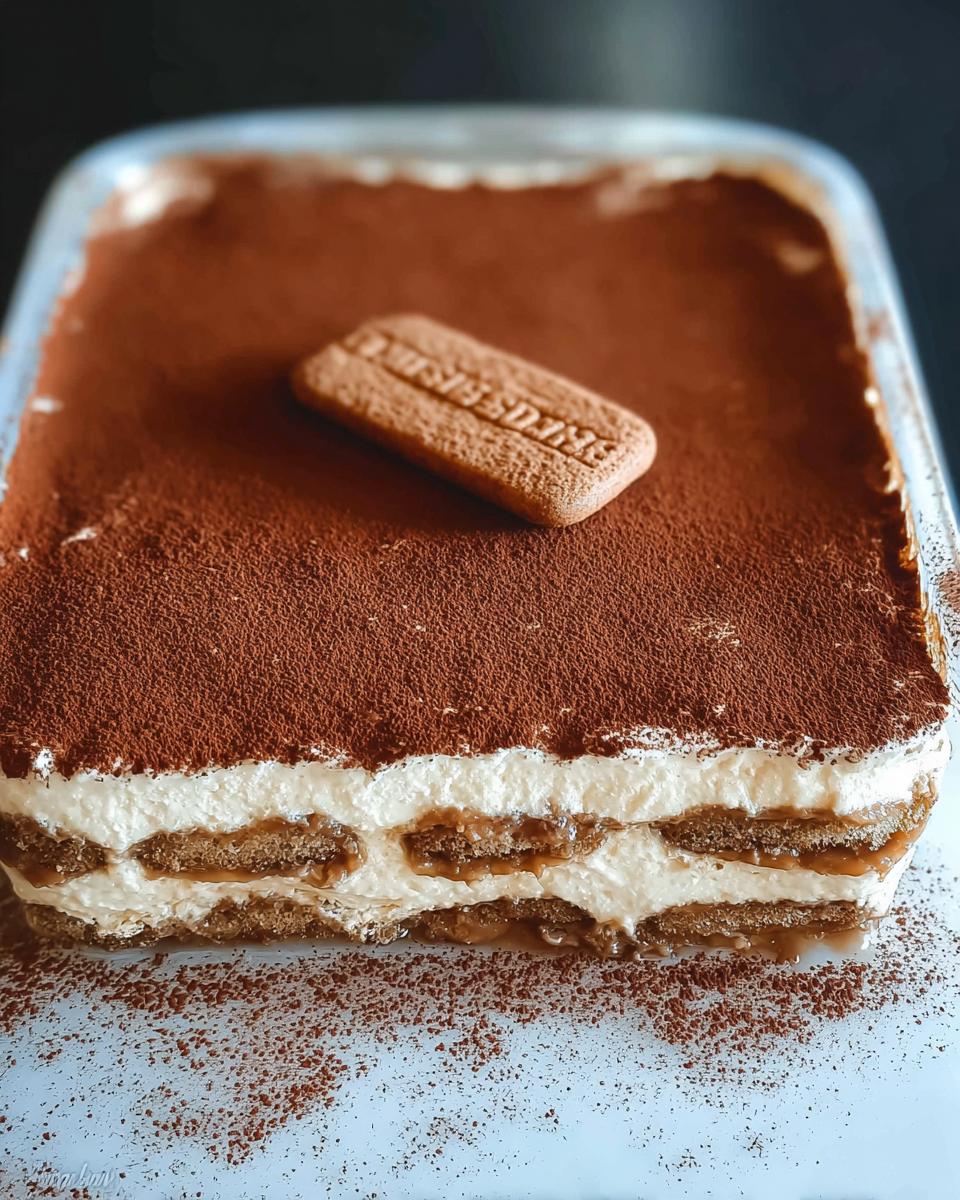
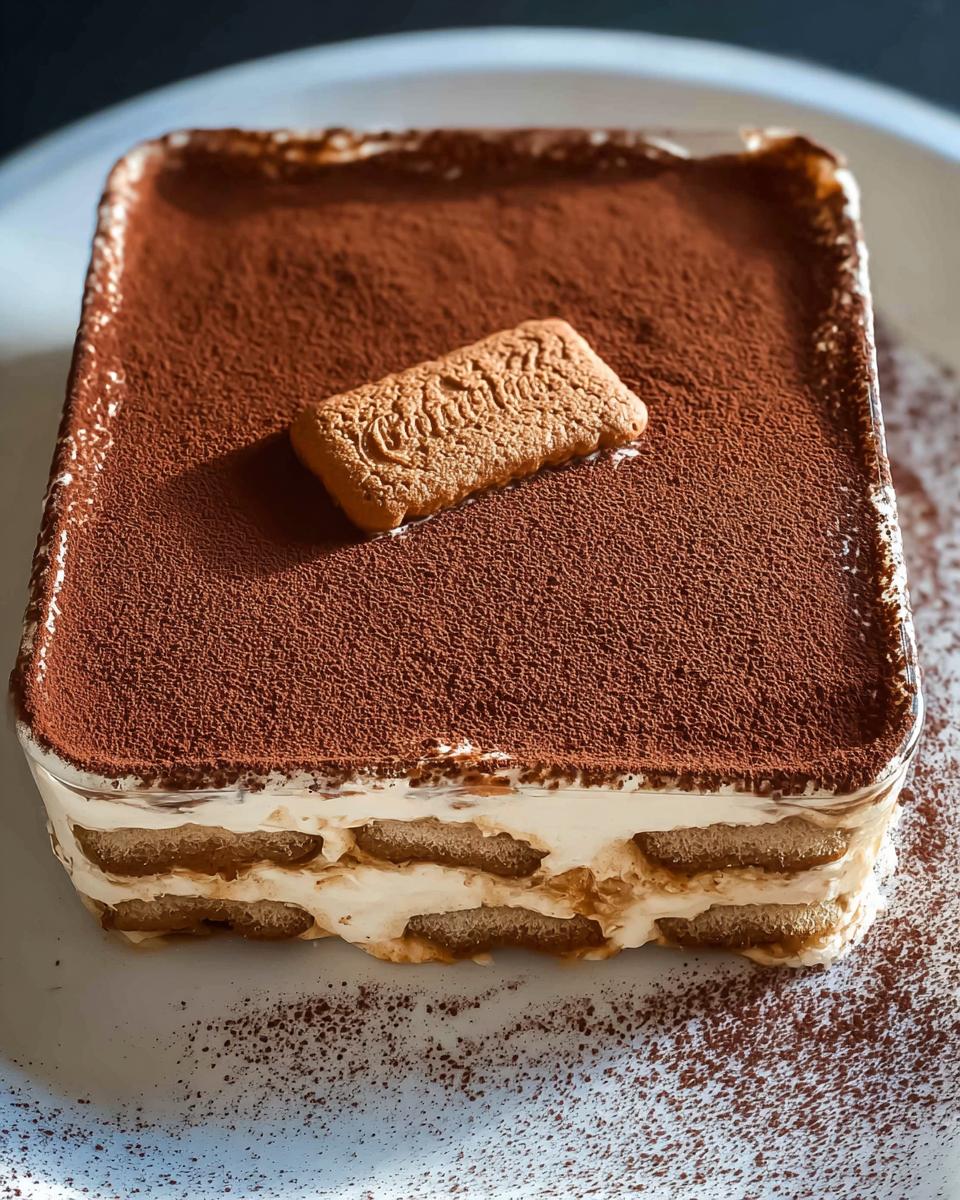
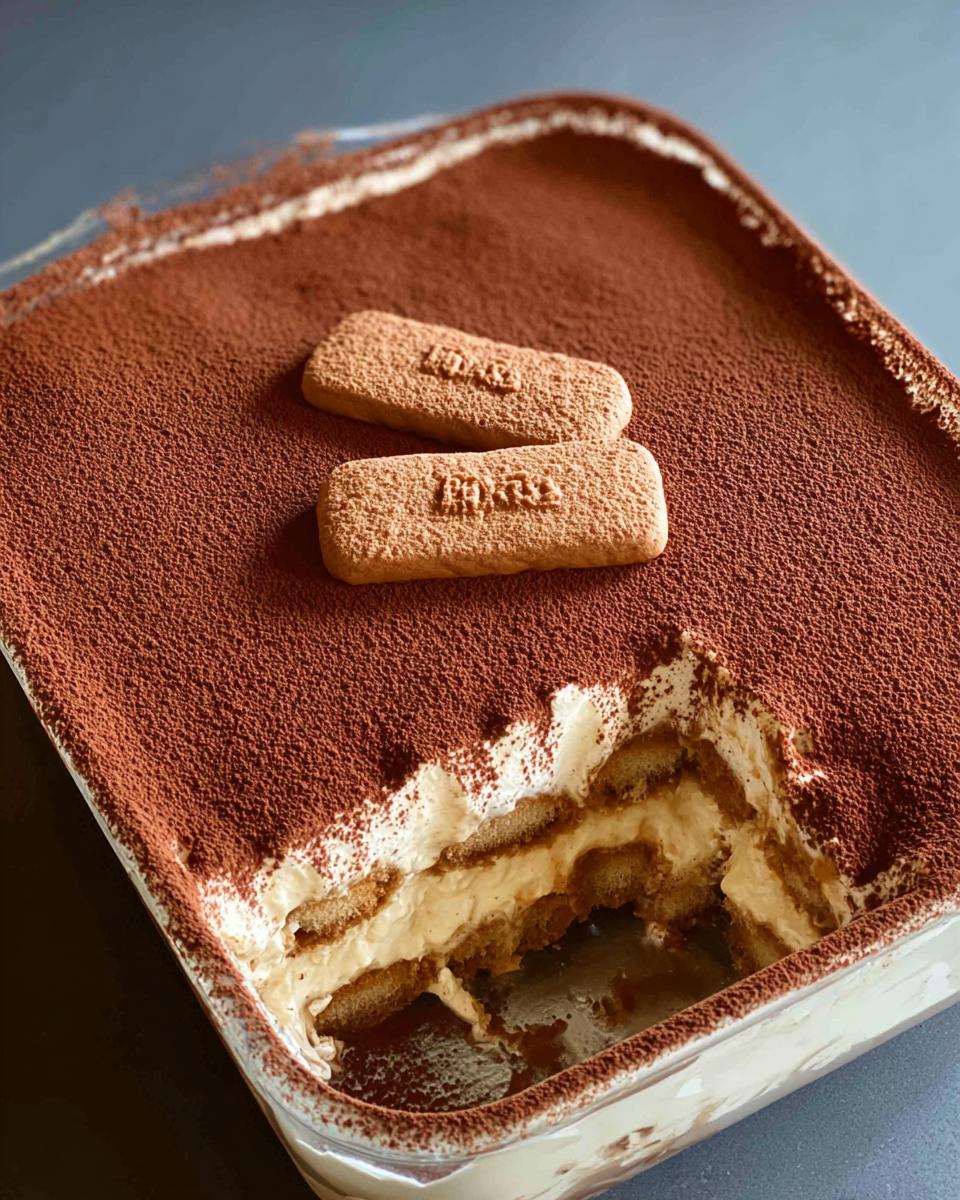
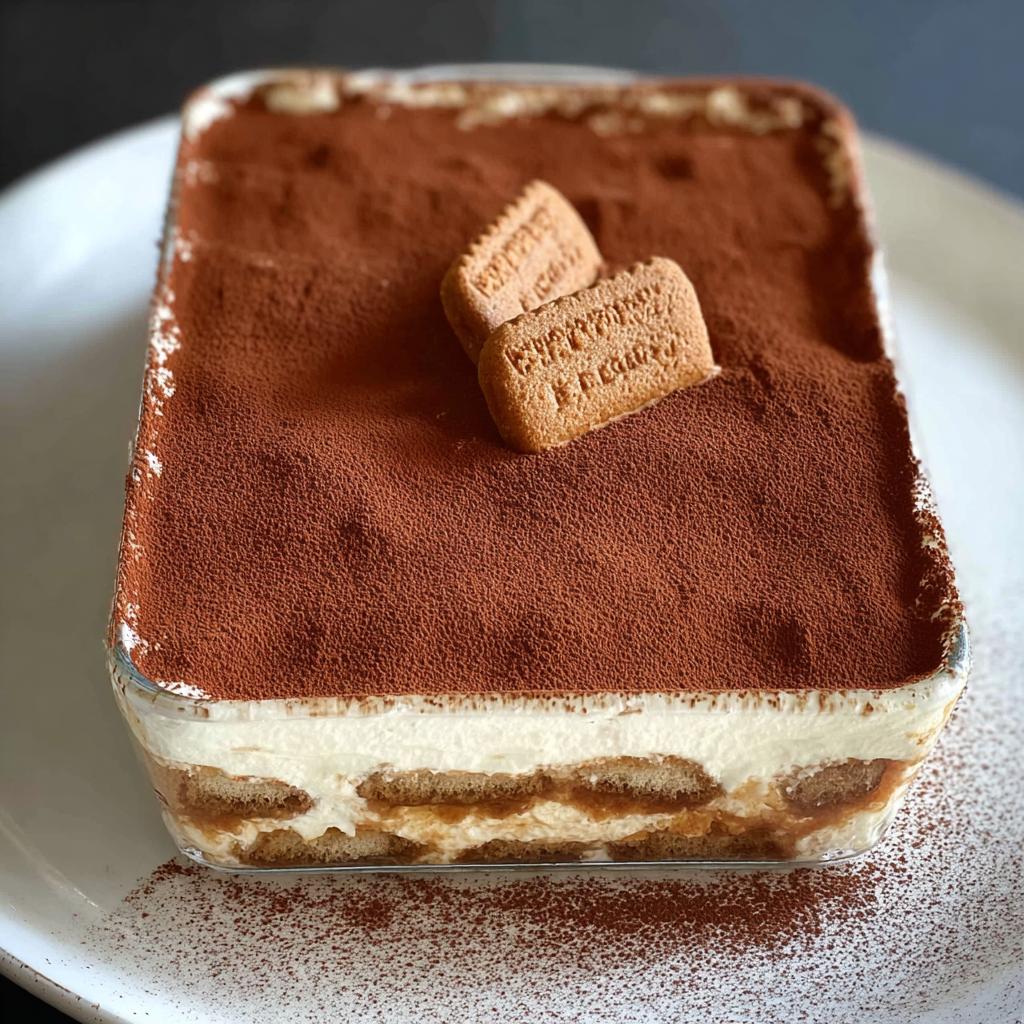
This is where it all comes together! Grab your serving dish – a nice rectangular one works great for slicing. Gently dip your Biscoff cookies into that cooled coffee, just a quick dunk! You don’t want them to get too soggy. Arrange them snugly in the bottom of your dish, overlapping them a bit if needed to cover the whole base. Now, spread about half of that luscious Biscoff cream mixture right over the cookies, making sure it’s nice and even. Repeat those layers: another layer of coffee-dipped Biscoff cookies, then the rest of that dreamy cream. Smooth it out on top for a clean finish. For more no-bake dessert inspiration, check out these cheesecake bites!
Chilling and Finishing Your Biscoff Tiramisu
Now for the hardest part: waiting! Cover your beautiful creation with plastic wrap or foil and pop it into the fridge. It needs at least 4 hours, but honestly, overnight is even better. That chilling time is crucial for all those flavors to meld and for the dessert to set up perfectly. Before you serve, give the top a generous, even dusting with that cocoa and coffee mix you prepared. You can even crush a few extra Biscoff cookies to sprinkle on top for a little texture and extra Biscoff goodness!
Tips for the Ultimate Biscoff Tiramisu
Okay, so you’ve got the recipe down, but want to take your Biscoff Tiramisu from delicious to absolutely mind-blowing? I’ve got a few tried-and-true tricks up my sleeve! Quality ingredients are *always* your best friend here. Using good quality espresso for soaking makes a huge difference in flavor – no one wants a weak coffee soak! And please, *please* make sure that cream cheese is truly at room temperature. It makes all the difference in getting that filling super smooth and creamy, no lumps allowed!
When you’re dipping those Biscoff cookies, a quick dip is all you need. We want them tender, not mushy! If you’re worried about them falling apart, try using a spoon to quickly pour the coffee over them while they’re on a rack, or just be super quick with your dunk. And speaking of texture, if you love a little extra crunch, you can save a few Biscoff cookies and crush them up to sprinkle on top along with the cocoa – it’s divine! For more amazing dessert ideas, you HAVE to check out these banana bread brownies; they’re a game-changer!
Variations on Your Biscoff Tiramisu
Now that you’ve mastered the classic Biscoff Tiramisu, let’s get a little wild! While this recipe is amazing as is, sometimes you just want to play with flavors. Feeling adventurous? You could totally add a pinch of cinnamon or a dash of nutmeg to the cream mixture; it really plays up that cozy Biscoff vibe! Or, if you can’t find Biscoff cookies, don’t sweat it – speculoos cookies are basically their cousins and work like a charm. For something a little extra decadent, maybe swirl in a little extra Biscoff spread right before you assemble, or even add a layer of chopped chocolate. If you’re looking for more fun dessert ideas, you won’t regret checking out these chocolate strawberry yogurt clusters!
Storing and Reheating Your Biscoff Tiramisu
So you’ve got leftovers of this incredible Biscoff Tiramisu? Lucky you! Tiramisu is actually best served chilled, so you don’t need to reheat it at all. Just make sure to cover it tightly with plastic wrap or foil and keep it in the refrigerator. It’ll stay wonderfully fresh and delicious for about 5 to 7 days. The flavors actually get even better as it sits, so don’t be surprised if it tastes even more amazing on day two!
Frequently Asked Questions about Biscoff Tiramisu
Got questions about this dreamy Biscoff Tiramisu? I totally get it! It’s always good to have a few pointers. Let’s clear up some common curiosities!
Can I make this Biscoff Tiramisu gluten-free?
Absolutely! The easiest way is to find gluten-free Biscoff-style cookies, which are becoming more available. If you can’t find those, any gluten-free ladyfinger or even a simple gluten-free vanilla cookie will work. Just be mindful that the flavor might shift a little depending on which cookie you choose!
How long does Biscoff Tiramisu need to chill?
Patience is a virtue with tiramisu! You *really* want to let it chill for at least 4 hours, but overnight is the sweet spot. This gives all those amazing flavors time to meld together and ensures the dessert is perfectly set. It makes all the difference for that classic, creamy texture!
What kind of coffee is best for soaking the cookies?
For that authentic tiramisu kick, strong espresso is your best bet! If you don’t have an espresso machine, just brew some really strong coffee. You want a bold flavor that will hold up against all that creamy goodness. Avoid anything too mild, or the coffee flavor might get lost!
Estimated Nutritional Information
Just a little heads-up, the nutritional info can totally change depending on exactly what you use and how big a slice you cut! But as a general idea, each serving of this dreamy Biscoff Tiramisu is estimated to have around 198 calories, about 18g of fat, and ballpark 9g of carbs with 7g of sugar. It’s a treat, after all!
Share Your Biscoff Tiramisu Creations!
I truly hope you give this Biscoff Tiramisu a try! It’s such a fun dessert to make and even more fun to eat. I’d absolutely LOVE to hear what you think! Did you try it? Did you love it? Please drop a comment below and let me know how it turned out for you. If you made it, snap a pic and tag me on social media – I can’t wait to see your gorgeous creations! And if you have any questions at all, don’t hesitate to reach out using my contact page. Happy baking!
Biscoff Tiramisu
Ingredients
Equipment
Method
- Prepare the coffee or espresso and let it cool completely. In a separate small bowl, combine the cocoa powder and instant coffee mix. Ensure the cream cheese is at room temperature.
- In a large mixing bowl, add the cream cheese, Biscoff cookie butter, sugar (if using), and vanilla extract (if using). Whisk for 30-60 seconds until a creamy mixture forms.
- Add the cold heavy cream to the same bowl. Whisk on medium speed for 1-2 minutes until the mixture reaches stiff peaks. Use a spatula to scrape the sides and bottom to create a uniform mixture.
- Dip some Biscoff cookies in the cooled coffee and arrange them tightly in the bottom of your serving dish, overlapping slightly if needed. Spread half of the whipped Biscoff butter cream mixture over the cookie layer, spreading it evenly with a spatula. Repeat with another layer of soaked Biscoff cookies and the remaining cream mixture. The top layer should be cream.
- Dust the top evenly with the dry instant coffee and cocoa mix. Cover the dish with plastic wrap or foil.
- Refrigerate overnight or chill for at least 4 hours until fully set. Decorate with crushed Biscoff cookies before serving. Cut into desired pieces and serve.