
Oh, you know those days when a sweet craving hits HARD, but you’re trying to be good? I totally get it! That’s exactly how I felt when I stumbled upon the recipe forHigh Protein Cheesecake Jars. Seriously, it felt like finding a golden ticket for dessert lovers everywhere. This isn’t just any sweet treat; it’s like a dessert hug that’s actually good FOR you, packed with protein to keep you feeling full and energized. I remember prepping for a fitness event and craving something decadent, but knowing I needed to stick to my nutrition goals. The idea of a protein-packed cheesecake in a jar was a total game-changer. That first batch? Creamy, rich, and it powered me through my whole day! Since then, these jars have become my go-to, whether it’s post-workout fuel or a weekend indulgence. They prove that healthy eating can absolutely be delicious and totally satisfying!
Why You’ll Love These High Protein Cheesecake Jars
Trust me, these little jars are going to become your new best friend in the kitchen. Here’s why:
- Super Easy to Make: Seriously, no baking required! You can whip these up in about 15 minutes, plus a little chilling time. Perfect for when you need a dessert STAT.
- Packed with Protein: Thanks to the cottage cheese and Greek yogurt, these are loaded with protein. They’re fantastic for post-workout recovery or just keeping those hunger pangs at bay.
- Guilt-Free Indulgence: You get all the creamy, dreamy goodness of cheesecake without all the sugar and fat. It’s the perfect way to satisfy your sweet tooth without derailing your healthy eating goals.
- Deliciously Versatile: You can totally customize these! Switch up the berries, add a splash of vanilla, or even try a different kind of crust. They’re a blank canvas for your sweet cravings.
Gather Your Ingredients for High Protein Cheesecake Jars
Alright, let’s get down to business and talk about what you’ll need for these amazing High Protein Cheesecake Jars! Don’t worry, it’s super simple stuff you probably already have or can easily grab at the store. Think of it as collecting treasure for your taste buds!
First up, for that creamy, dreamy cheesecake part:
- 2 cups cottage cheese, 2% MF: This is our protein powerhouse! Make sure it’s 2% milkfat so it’s got that perfect creamy texture without being too heavy.
- 3 cups plain Greek yogurt, full fat: More protein and that signature tangy cheesecake flavor! Full-fat yogurt really gives it that luscious mouthfeel we’re going for.
- 4 tablespoons maple syrup: Just a touch of sweetness to make everything sing. You can always add a little more if you have a super sweet tooth!
And for those yummy layers and toppings:
- 2 cups crushed graham crackers: This makes our easy, crumbly base. If you’re going gluten-free, just use your favorite gluten-free cookie crumbs!
- 1 cup berries (or more!): Fresh or frozen, berries are fantastic here. Think strawberries, blueberries, raspberries – whatever makes you happy!
A little note on ingredients: I always like to use full-fat Greek yogurt for the best texture, but 2% works too if you’re watching those fats even more closely. And for the cottage cheese, if you’re not a fan of the little curds, you can totally blend it in a food processor first until it’s super smooth, just like we do in the recipe! Easy peasy!
Simple Steps to Make Your High Protein Cheesecake Jars
Okay, get ready, because making these High Protein Cheesecake Jars is seriously a piece of cake… well, cheesecake! It’s so easy, you’ll wonder why you haven’t made them before. No fancy oven required, just a few simple steps and you’re on your way to dessert heaven. For a closer look at other ways to use cottage cheese, check out this recipe for cottage cheese flagels. Let’s do this!
Preparing the Creamy Cheesecake Base
First things first, we need that super smooth, luscious cheesecake filling. Grab your food processor and pop in the cottage cheese. You’re going to blend it for about 1 to 2 minutes until it’s completely smooth and creamy – no lumps allowed! Then, add in the maple syrup and give it another quick blend. Trust me, getting that cottage cheese silky smooth is key for that authentic cheesecake vibe. Next, grab a mixing bowl and combine this whipped cottage cheese mixture with your Greek yogurt. Gently fold it all together with a spatula until it’s perfectly blended. If you love creamy, layered desserts, you might also enjoy this lemon cream chia pudding.
Assembling Your High Protein Cheesecake Jars
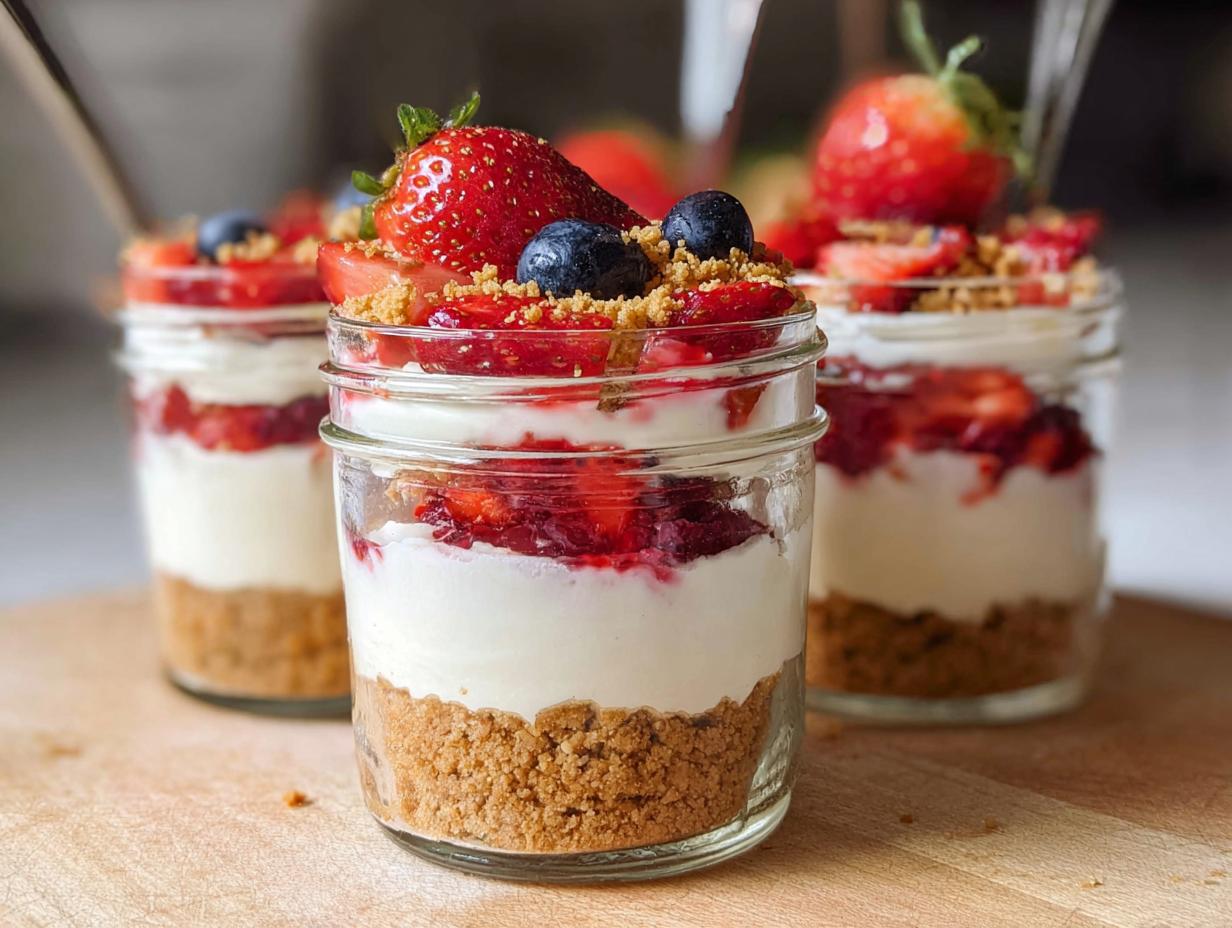
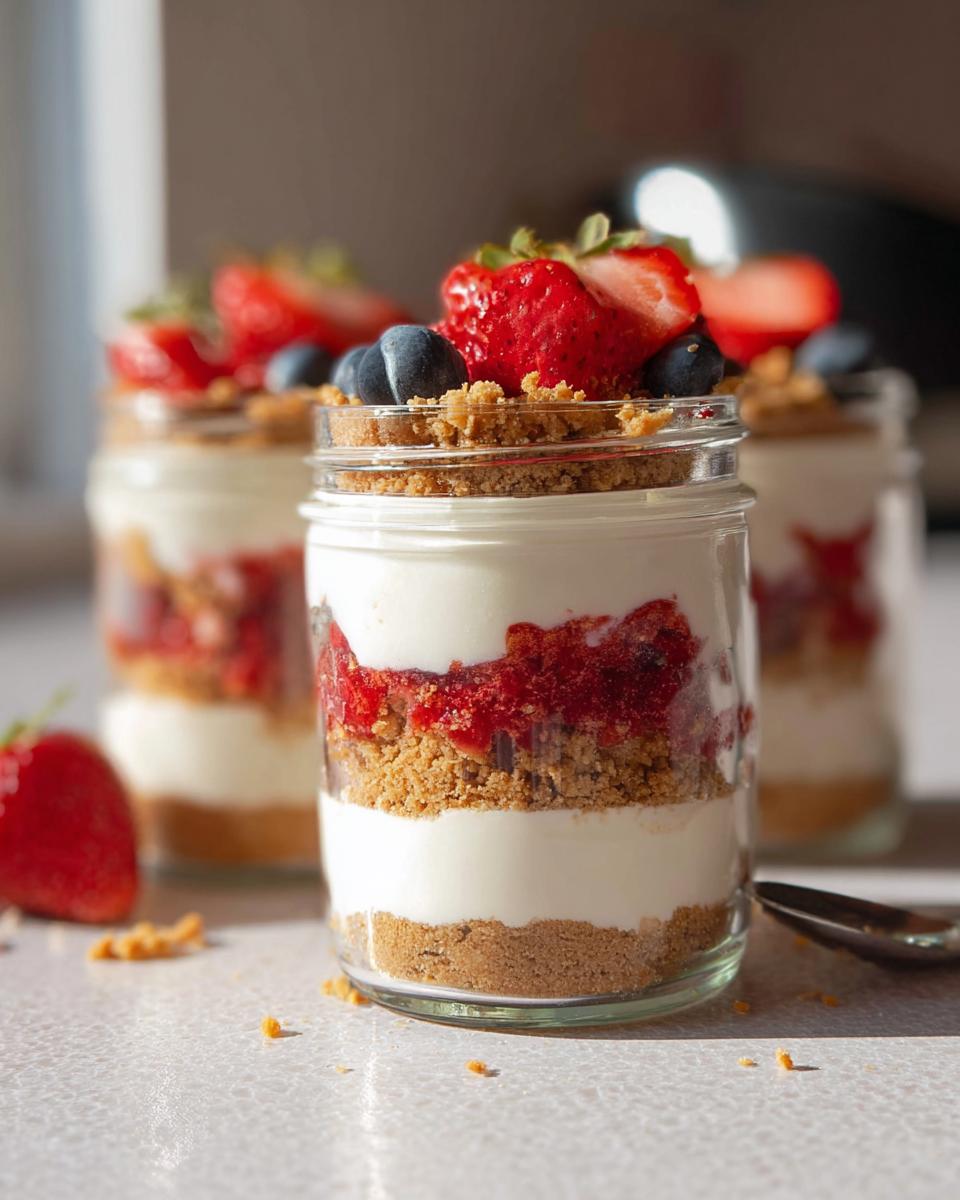
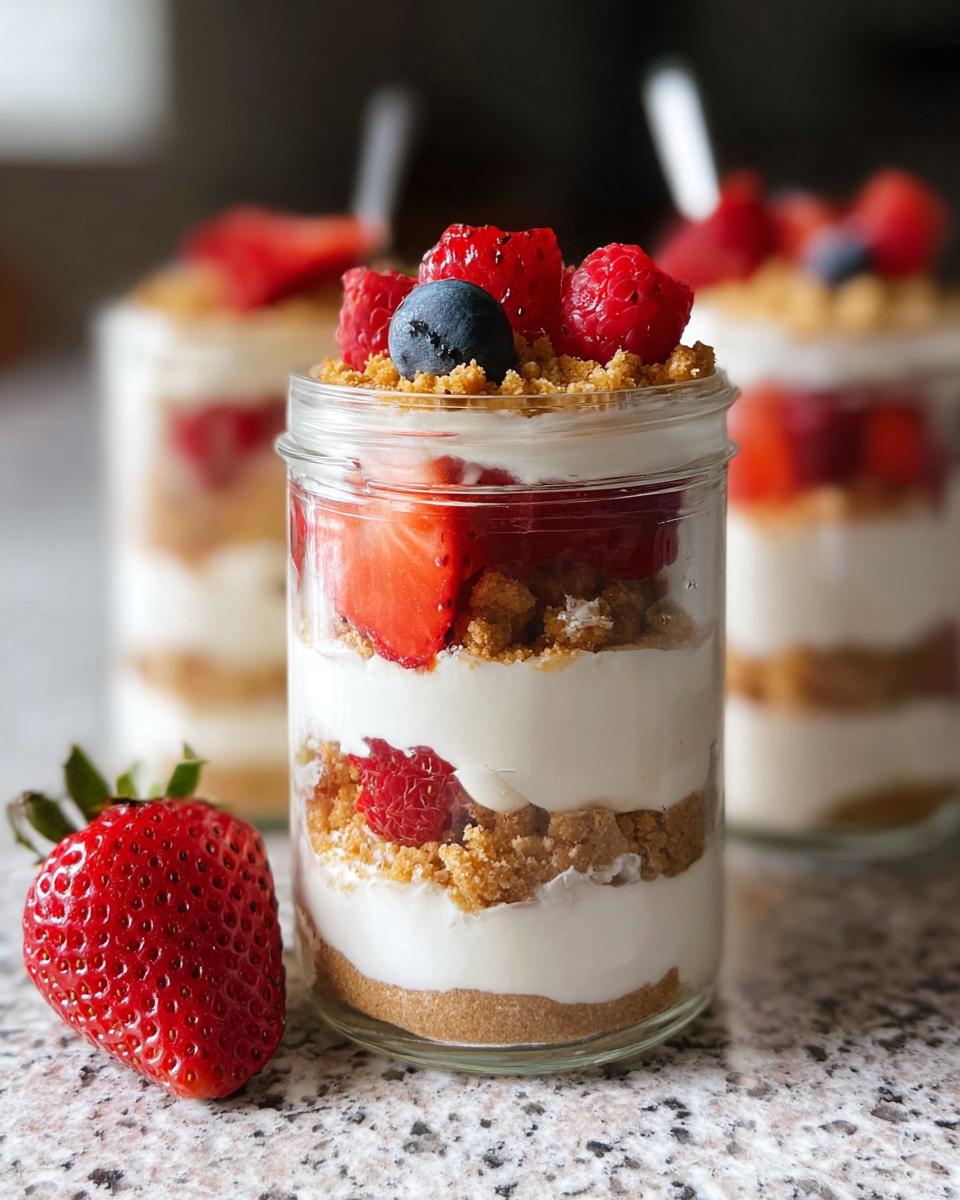
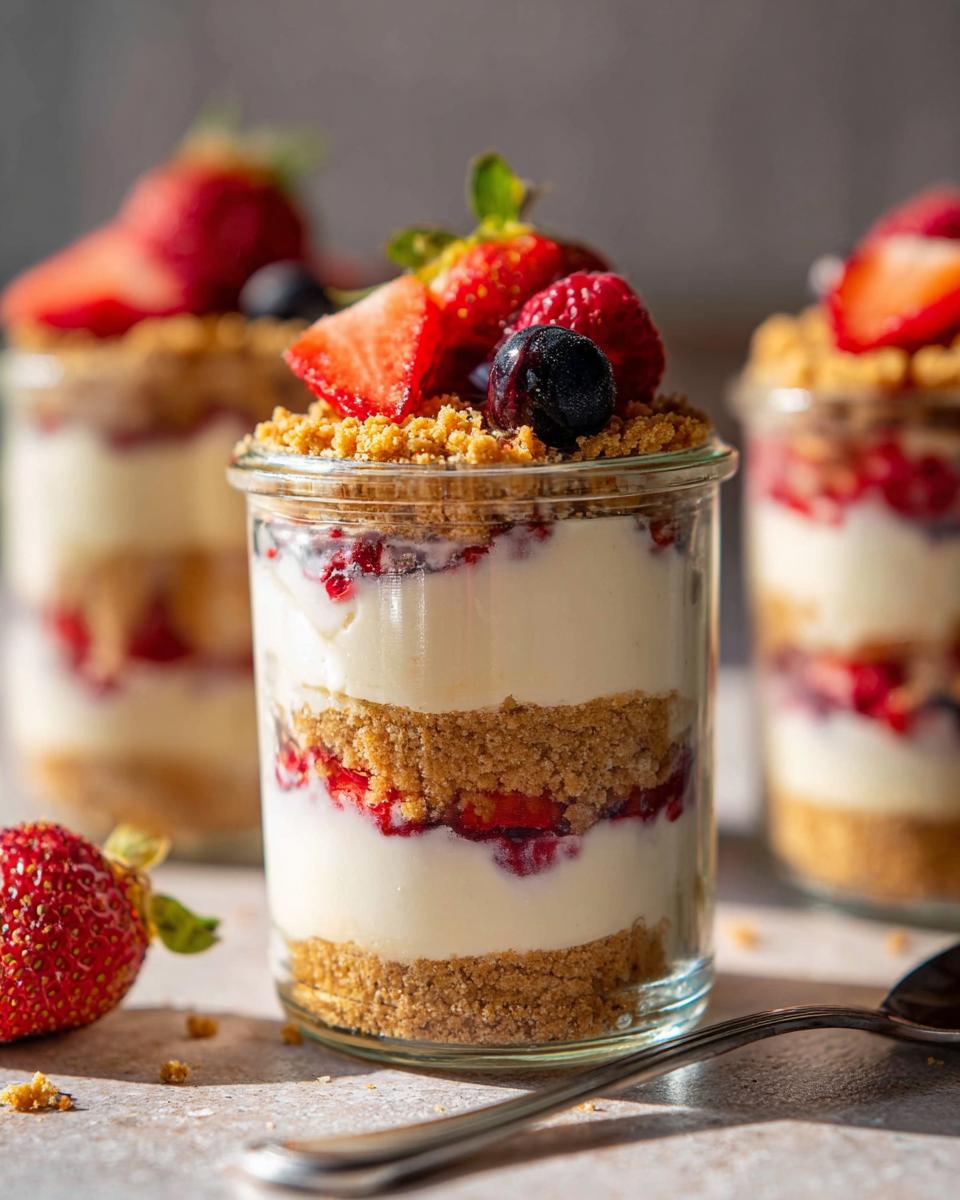
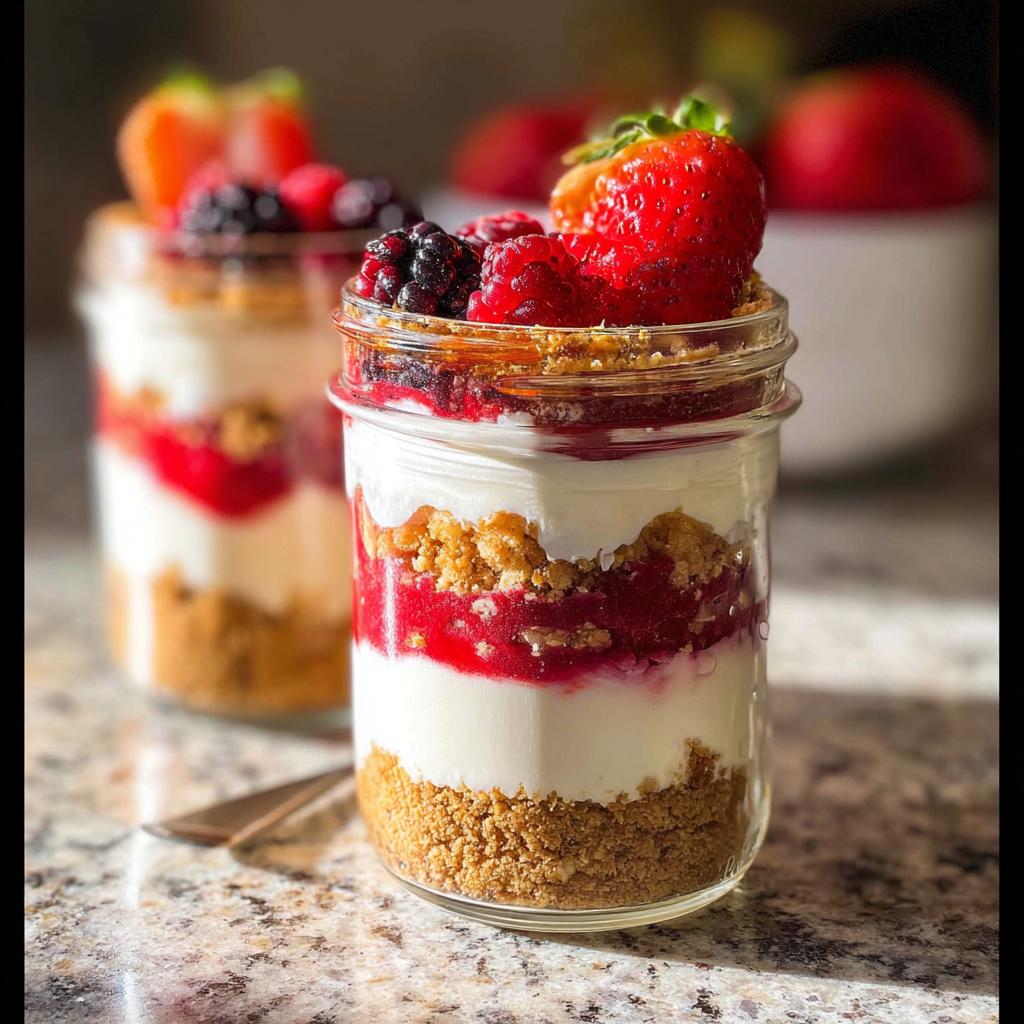
Now for the fun part – building your beautiful little jars! Grab your clean jars. We’re going to layer things up. Start with a good spoonful of those crushed graham crackers at the bottom. Then, spoon a generous layer of our creamy cheesecake mixture right on top. Add another sprinkle of graham crackers, followed by a lovely pile of fresh berries! Finish off with one last swirl of that amazing cheesecake filling.
 For extra neat layers, you can use the back of a spoon to gently press down each layer as you go. It makes them look so professional! You can find more delicious ideas like this on this page.
And that’s pretty much it! Seriously, how easy was that? If you want to get fancy, you can totally add more berries on top before serving, or just dive right in.
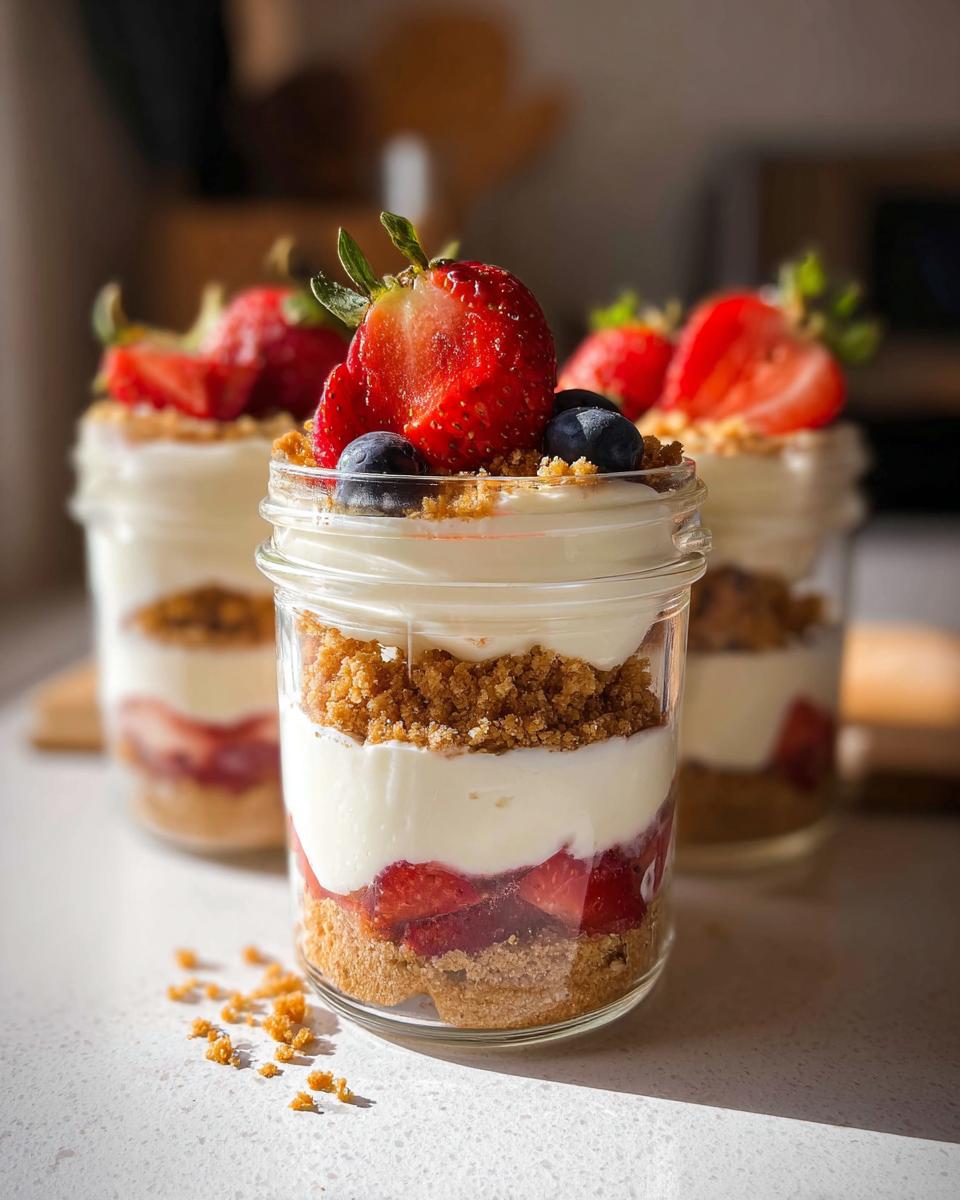 These are great served immediately, but chilling them for just a few minutes makes them even more delightful. It’s like a little reward for being so clever in the kitchen!
Tips for Perfect High Protein Cheesecake Jars Every Time
Okay, so you’ve made these awesome High Protein Cheesecake Jars, and you want them to be absolutely perfect every single time, right? I totally get that! We all want that perfectly creamy texture and delicious flavor. Let me share a few little secrets that have helped me nail these jars every time. First off, make sure your Greek yogurt and cottage cheese are nice and cold when you start. Warm ingredients can make the mixture a bit… well, less cheesecake-y and more goopy. You want that thick, luscious feel! Also, if you happen to have leftovers (which is rare in my house!), just pop a lid on those jars and pop them in the fridge. They’ll stay good for about 3-4 days. If you’re looking for other no-bake delights, you HAVE to try these healthy no-bake Oreo cheesecake bites – they’re a game changer too! And for a quick, fruity snack, don’t miss these chocolate strawberry yogurt clusters!
Variations and Serving Suggestions
You know the best part about these High Protein Cheesecake Jars? You can totally make them your own! Don’t be afraid to play around with the flavors. If you’re not a huge berry fan, try other fruits like chopped peaches, mango for a tropical twist, or even a spoonful of sugar-free jam. Adding a splash of vanilla extract or even a drop of almond extract to the cheesecake mixture can really amp up the flavor. And for the crust, if graham crackers aren’t your jam, you can use crushed digestive biscuits, some crushed nuts like almonds or pecans, or even a mix of oats and a little coconut flour if you want to mix things up even more. For the ultimate berry lover, you HAVE to check out this high protein triple berry bake – it’s divine! Serve these little jars up chilled for a perfect pick-me-up any time of day. They’re absolutely lovely with a warm cup of herbal tea or a perfectly brewed coffee.
Nutritional Information for High Protein Cheesecake Jars
So, let’s talk numbers! These High Protein Cheesecake Jars are pretty awesome nutritionally. On average, each jar packs about 459 calories, a solid 30 grams of protein (hello, muscle fuel!), around 62 grams of carbs, and about 10 grams of fat. Keep in mind, these are just estimates, and the exact numbers can tick up or down a bit depending on the specific brands and ingredients you use, especially things like the yogurt and maple syrup. It’s a great way to get your dessert fix guilt-free!
Frequently Asked Questions About High Protein Cheesecake Jars
Alright, let’s dive into some of the questions you might have swirling around about these delicious High Protein Cheesecake Jars! I love hearing from you, and these little gems always spark some great conversations.
Can I use a different type of yogurt?
Totally! While I love the creaminess of full-fat Greek yogurt, you can absolutely use low-fat Greek yogurt if you prefer. Just be aware that it might not be quite as rich and decadent, but it’ll still be delicious and packed with protein. Non-fat yogurt can work too, but your cheesecake jars might be a little thinner.
How long do these last in the fridge?
Good news! These High Protein Cheesecake Jars are pretty sturdy. If you store them in airtight containers or with the lids sealed on your jars, they’ll keep well in the refrigerator for about 3 to 4 days. They’re perfect for prepping ahead of time for snacks or desserts throughout the week!
Can I make them vegan?
Making these totally vegan is going to take a little swap-out, but it’s doable! You’d want to replace the cottage cheese and Greek yogurt with a good quality, thick vegan yogurt alternative (like coconut or cashew-based) and maybe a vegan cream cheese. For the crust, use a vegan graham cracker or crushed nuts. You might need to adjust the sweetener a bit too. For more vegan treat ideas, check out these chocolate mousse brownies or these easy banana bread brownie recipes!
Can I skip the graham cracker crust?
Absolutely! If you’re looking to cut down on carbs even further or just not feeling the crust, you can totally skip it. The cheesecake mixture and berries on their own are still amazing! You could also try a crust made from blended nuts and a little coconut oil if you want some texture without the graham crackers.
Share Your High Protein Cheesecake Jars Creations!
I absolutely LOVE hearing from you all! Have you tried making these High Protein Cheesecake Jars? What did you think? Did you add any fun new variations? Please drop a comment below and let me know! And if you share your creations on social media, tag me – I’d be thrilled to see them! You can always reach out via my contact page too!
High Protein Cheesecake Jars
Ingredients
Equipment
Method
- Add the cottage cheese to a food processor. Blend for 1 to 2 minutes until smooth and creamy. Add the maple syrup and blend again.
- In a mixing bowl, combine the whipped cottage cheese and Greek yogurt using a silicone spatula.
- Layer the jars. Start with a layer of graham crackers, followed by the cheesecake mixture, another layer of graham crackers, berries, and finish with a layer of the cheesecake mixture.
- Garnish with additional berries before serving, or serve immediately.