
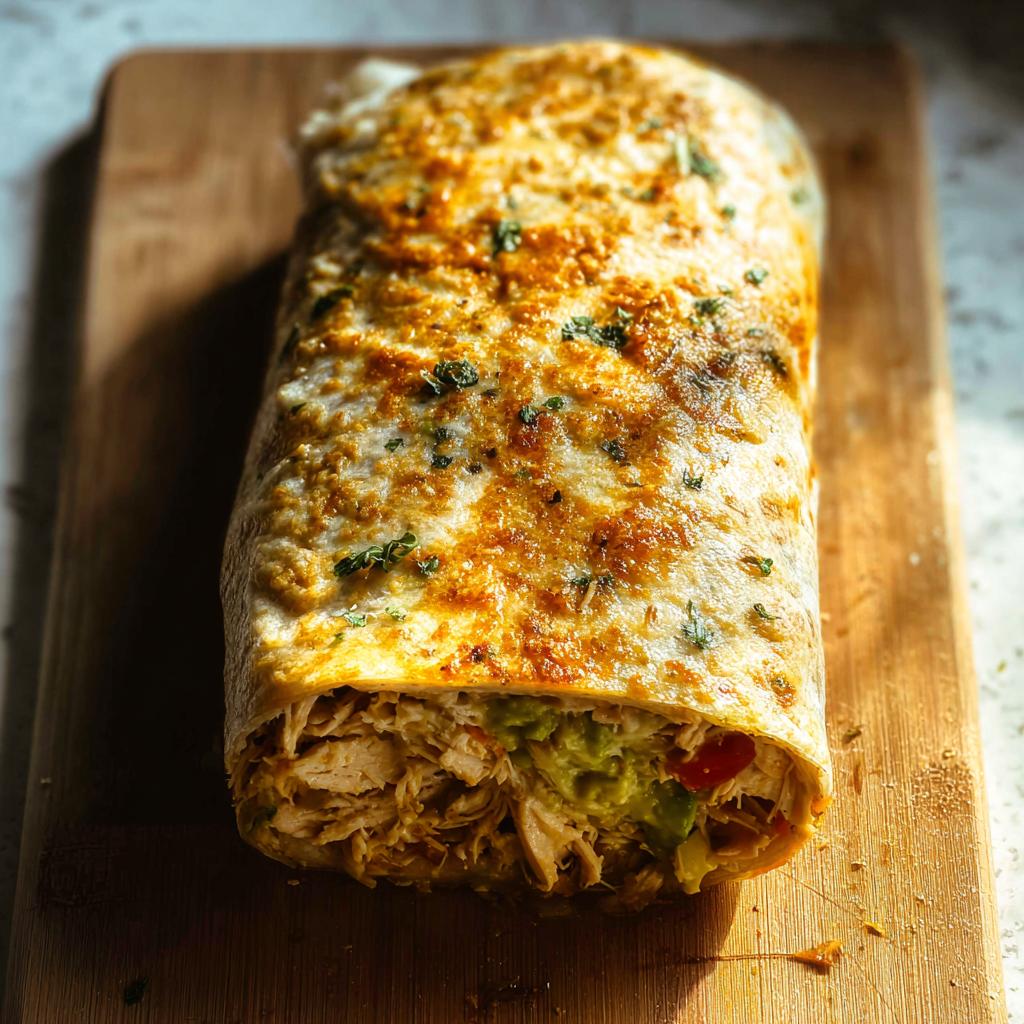
Oh, weeknights! They can be such a whirlwind, right? Between school, soccer practice, and just trying to catch your breath, dinner often feels like wrestling a greased pig. But let me tell you, my family’s absolute favorite saves the day every single time: these incredible Chicken Avocado Ranch Burritos! Seriously, they’re a flavor explosion waiting to happen. We’re talking tender chicken, creamy avocado, and that signature zesty ranch all wrapped up into one perfect, satisfying bite. It’s the kind of meal that’s not only a lifesaver for busy schedules but also totally health-conscious. I remember the first time I threw these together during a particularly hectic week. The kitchen instantly felt brighter with all the colorful ingredients, and seeing my family’s happy faces when they took their first bites made all the difference. It totally proved that even in the middle of chaos, a little bit of deliciousness can bring everyone together.

Why You’ll Love These Chicken Avocado Ranch Burritos
Trust me, these burritos are a game-changer for so many reasons:
- Super Easy to Make: Seriously, the hardest part is mixing everything together! It’s perfect for when you’re short on time.
- Flavor Fiesta: The combo of savory chicken, creamy avocado, and tangy ranch is just *chef’s kiss*.
- Busy Weeknight Hero: Whip these up in no time and serve a crowd-pleaser that everyone will devour.
- Family Favorite: Even the pickiest eaters tend to gobble these up!
- Gluten-Free Friendly: With a little swap of the breadcrumbs, you can easily make this a gluten-free win for your family.
Ingredients for Perfect Chicken Avocado Ranch Burritos
You only need a few simple things to make these amazing burritos come to life! For the main event, we’re starting with 1.5 pounds of ground chicken. This is our base, and it cooks up so tender and juicy. Then, for that perfect binding and flavor, grab 3/4 cup of Italian breadcrumbs (or plain if that’s what you have on hand) and 1/2 cup of grated Parmesan cheese. Yum! Don’t forget your aromatics – 1/3 cup of finely minced yellow onion and 4 cloves of minced garlic will give it a fantastic aroma and taste. We also need one large egg to help hold it all together and 1/4 cup of whole milk for a little extra moisture. To finish off the mix, toss in 2 tablespoons of chopped fresh parsley, 1 teaspoon of salt, and 1/2 teaspoon of black pepper. And for that gorgeous golden topping, you’ll want 1/2 cup of shredded Parmesan cheese and another tablespoon of fresh chopped parsley.
How to Make Chicken Avocado Ranch Burritos
Alright, let’s get these amazing Chicken Avocado Ranch Burritos into the oven! It’s really straightforward, and soon you’ll have a delicious meal ready for your family. Following these simple steps ensures a perfectly cooked, flavorful dish every time. For a recipe that’s similar in its ease and deliciousness, check out this easy Tuscan chicken recipe.
Step 1: Prepare the Oven and Loaf Pan
First things first, get that oven preheated to 350°F (that’s 175°C). While your oven is warming up, grab a loaf pan – a standard 9x5x2-inch size works perfectly. Give it a good spray with nonstick cooking spray so nothing sticks later on. Easy peasy!
Step 2: Combine Ingredients for Chicken Avocado Ranch Burritos
Now for the fun part – mixing! In a big ol’ mixing bowl, toss in your ground chicken, Italian breadcrumbs, that yummy grated Parmesan cheese, the minced yellow onion, and all those fragrant garlic cloves. Crack in your egg, pour in the milk, add the fresh parsley, salt, and pepper. The best way to do this is with clean hands – just gently combine everything until it’s all nicely mixed. You don’t want to overmix, just get it all incorporated!
Step 3: Form and Top the Loaf
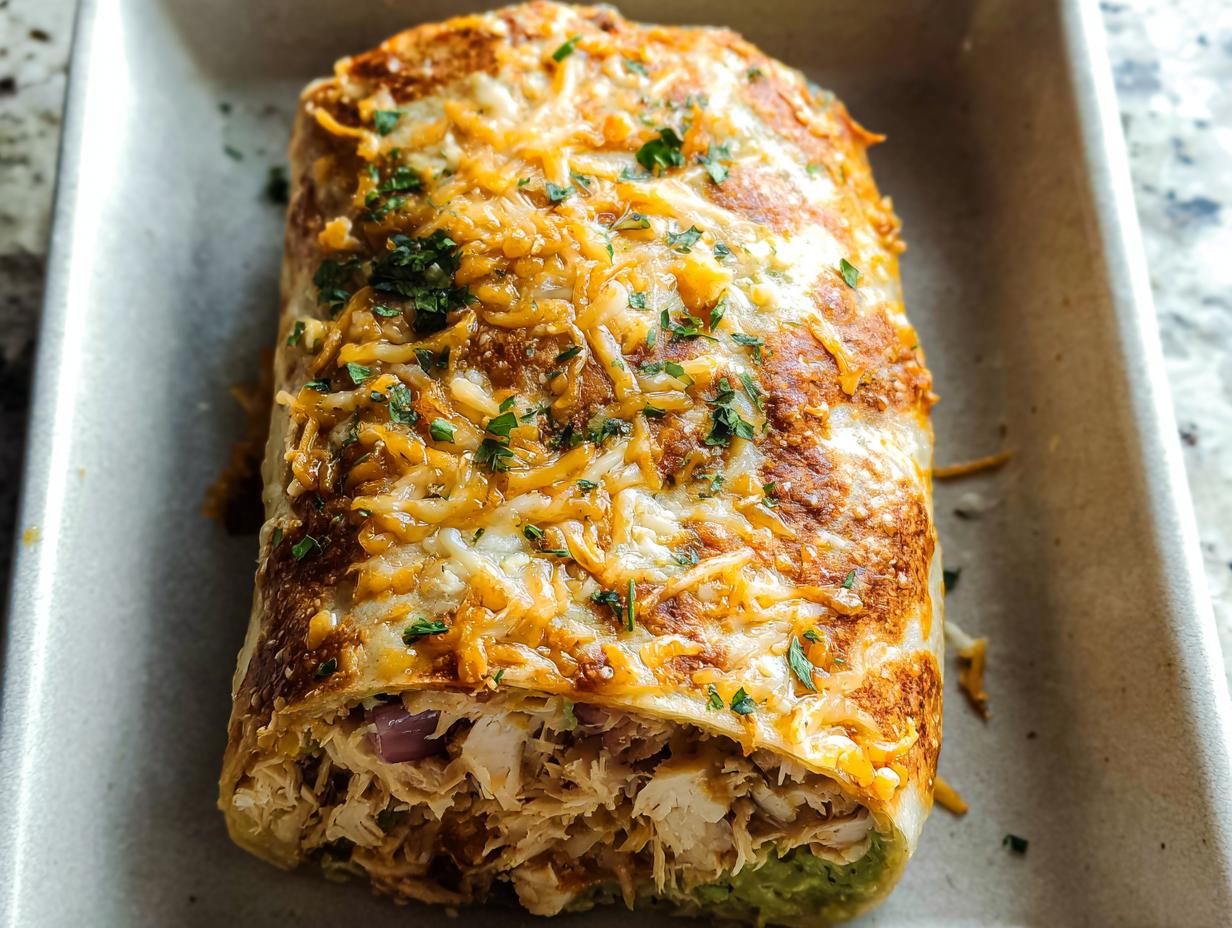
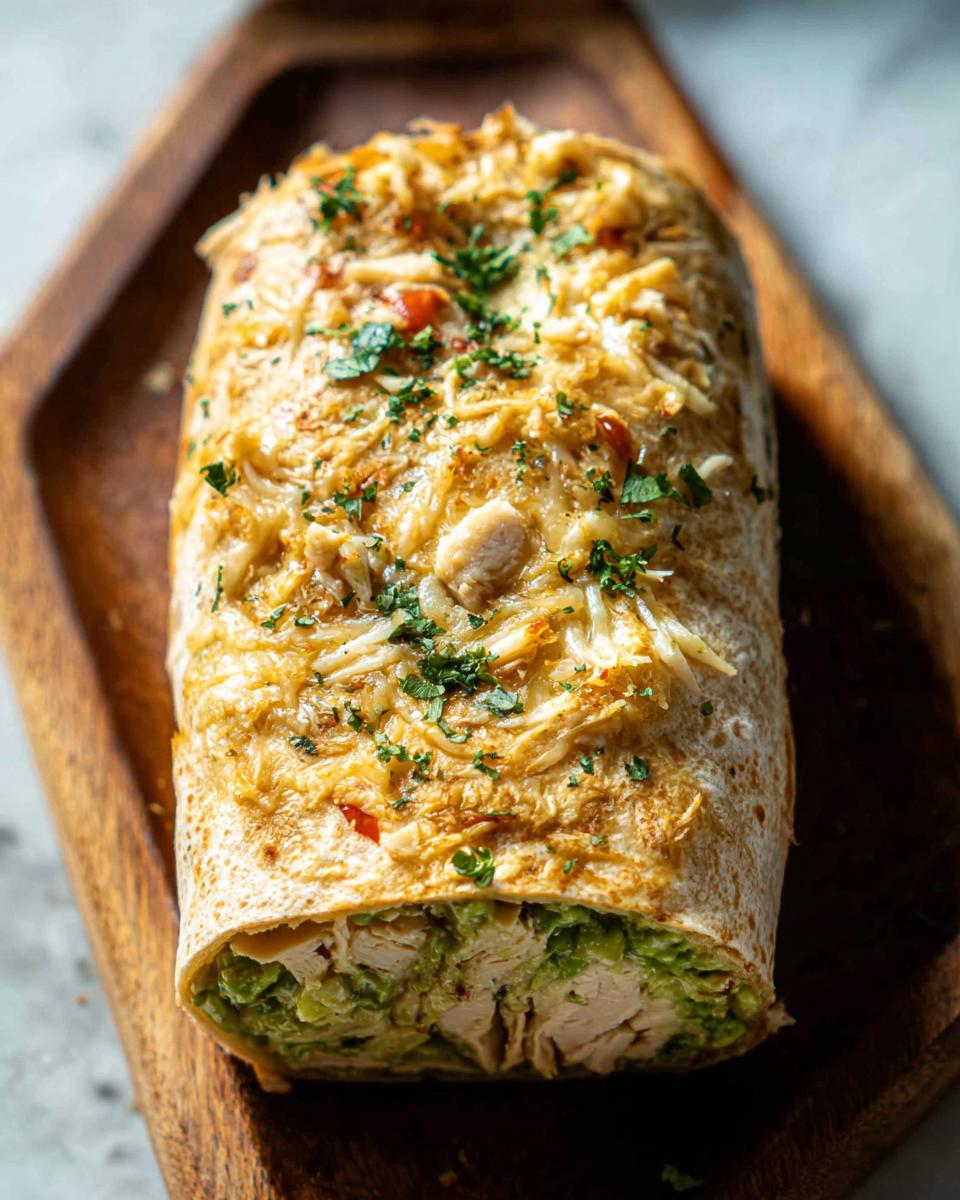
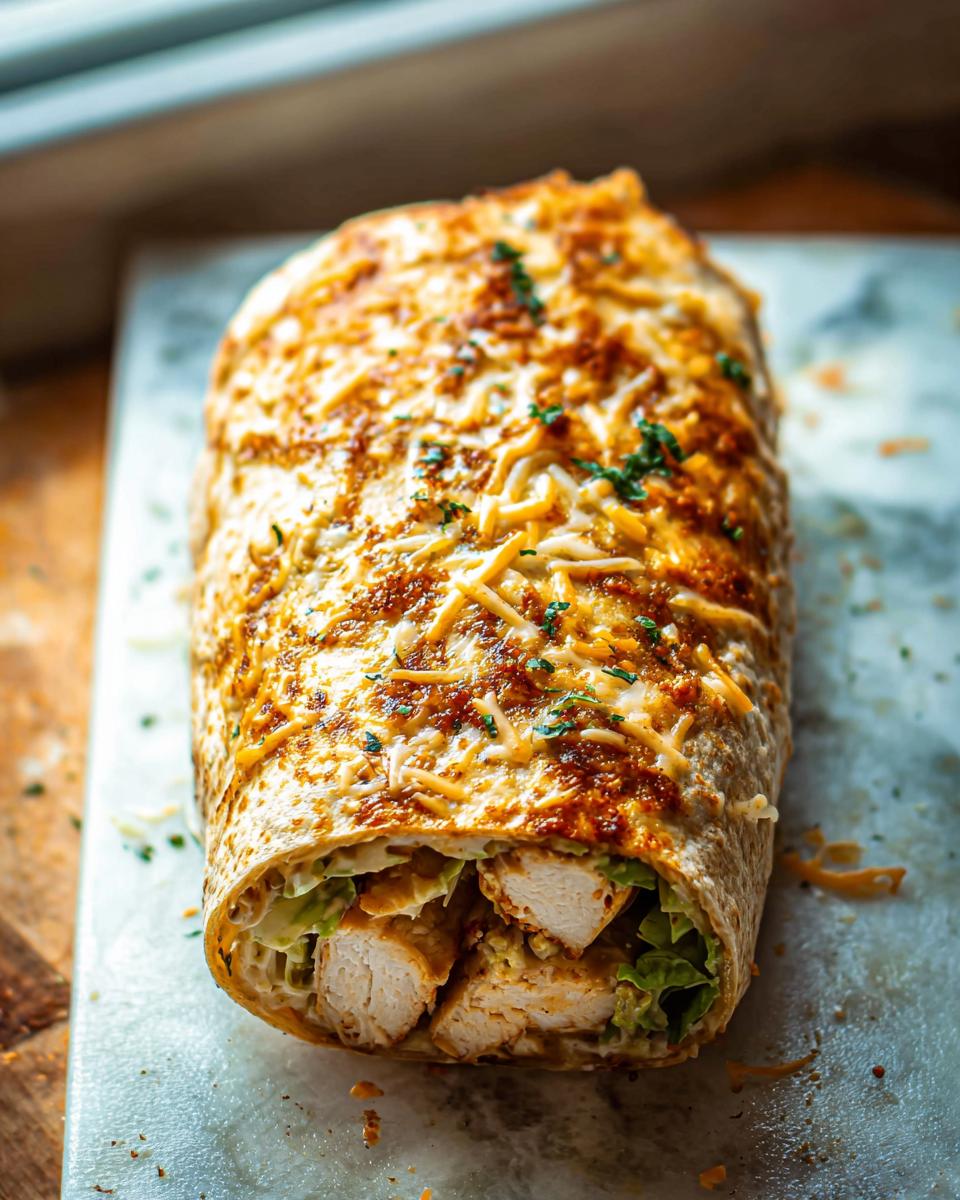
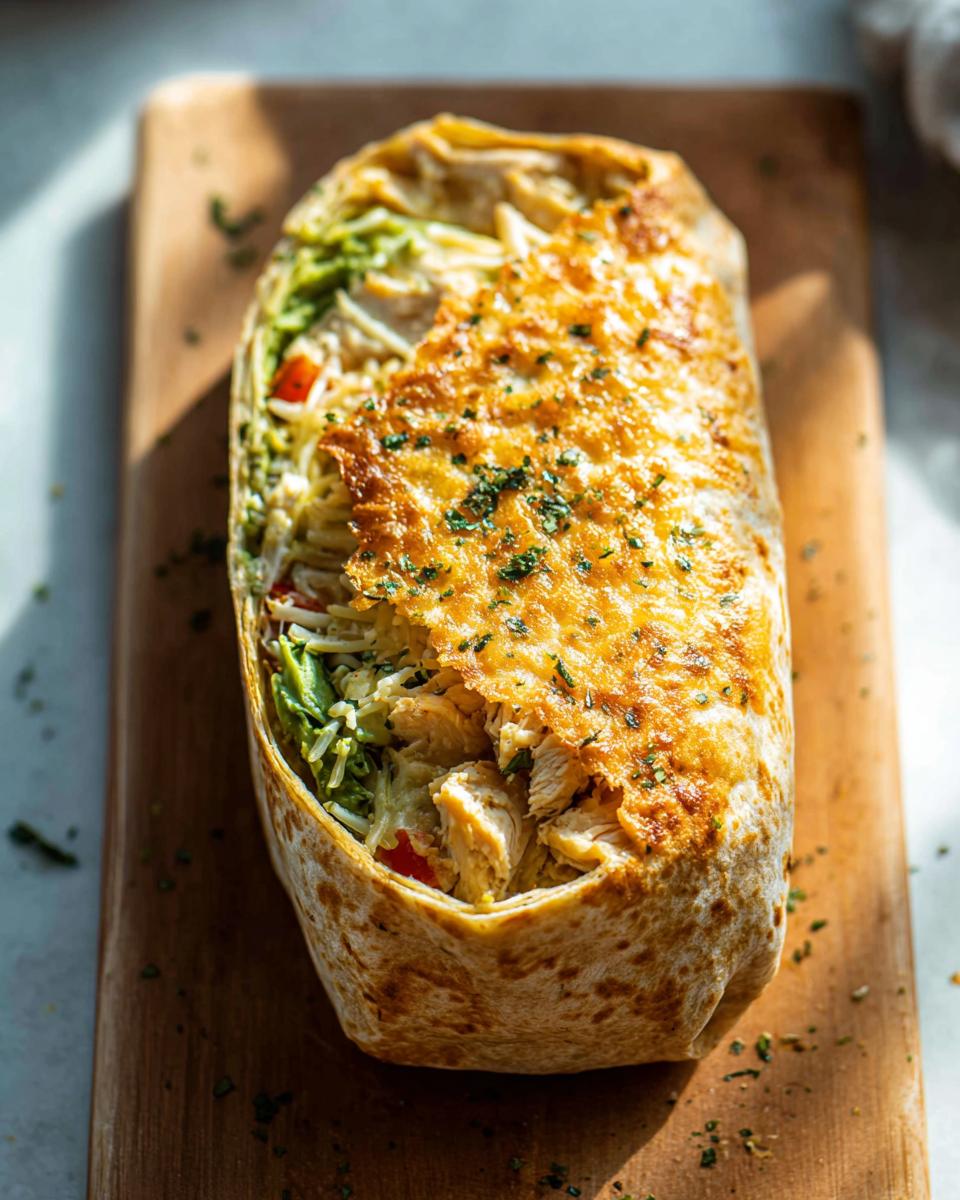
Time to shape it up! Gently form the meat mixture into a nice loaf shape right inside your prepared pan. Think of it like sculpting, but way tastier! Then, sprinkle that shredded Parmesan cheese all over the top, followed by the remaining fresh chopped parsley. It looks so pretty even before it goes in the oven!
Step 4: Bake and Broil Your Chicken Avocado Ranch Burritos
Pop that pan into your preheated oven and let it bake for about 1 hour. This is where all those lovely flavors meld together. For that irresistible golden-brown finish, you’ll want to turn on the broiler for the last 2 minutes. Keep a super close eye on it though – broilers are feisty and can go from golden to burnt in a blink! If you’re looking for other great chicken loaf ideas, this garlic Parmesan chicken meatloaf is a fantastic option.
Tips for Making the Best Chicken Avocado Ranch Burritos
Okay, so you’ve got this fantastic recipe for Chicken Avocado Ranch Burritos, but let’s talk about how to make them absolutely *perfect* every single time. It’s all in the little details, you know? First off, don’t be tempted to overmix the chicken mixture. Seriously, just gentle hands until everything is combined. Overmixing makes the meat tough, and ain’t nobody got time for a tough burrito! Also, if you can swing it, using fresh garlic and parsley makes a world of difference compared to the dried stuff. It just adds a brighter, fresher flavor that really shines through. And for that beautiful topping, make sure your Parmesan is shredded nicely so it melts evenly. If you’re ever in a pinch for time on a weeknight, check out these quick chicken recipes – they’re lifesavers!
Ingredient Notes and Substitutions for Chicken Avocado Ranch Burritos
When you’re whipping up these fantastic Chicken Avocado Ranch Burritos, don’t be afraid to play around a little! The breadcrumbs are pretty forgiving. If you don’t have Italian breadcrumbs, plain ones work just fine, or even panko for a little extra crunch. For anyone keeping things gluten-free, trust me, finely crushed gluten-free crackers or even oat flour (if you’re not sensitive to oats) can totally work in a pinch! The Parmesan cheese is key for that salty, umami kick, but if you’re not a fan or just don’t have it, a sharp cheddar cheese would be a tasty alternative. The goal is just to add a little something extra to that lovely ground chicken.
Serving Suggestions for Your Chicken Avocado Ranch Burritos
Now that you’ve got these delicious Chicken Avocado Ranch Burritos, what should you serve alongside them? I love keeping it light and fresh! A simple side salad with a bright vinaigrette is always a winner. Or, for something a little more substantial, how about some homemade black beans or a quick corn salsa? If you’re looking for more easy veggie ideas that are super fast, check out these veggie sides recipes – they’re perfect for rounding out your meal!
Storage and Reheating Instructions
Leftovers are the best, aren’t they? To keep this delicious meal fresh, let your Chicken Avocado Ranch Burritos cool completely first. Then, wrap them up super tight in plastic wrap, and tuck them into an airtight container. They’ll hang out happily in the fridge for about 3 to 4 days. If you want to save some for even longer, wrap them extra well in plastic wrap and then foil, label them nicely, and they’re good to go in the freezer for a couple of months. Just thaw them overnight in the fridge before you’re ready to reheat.
Nutritional Information for Chicken Avocado Ranch Burritos
Just so you know, the nutritional info can change a bit depending on the exact ingredients you use, but here’s a good estimate per serving for our Chicken Avocado Ranch Burritos: around 313 calories, 14g of carbs, 29g of protein, and 16g of fat. It’s a pretty balanced meal!
Frequently Asked Questions About Chicken Avocado Ranch Burritos
Got questions about making these fantastic Chicken Avocado Ranch Burritos? You’re in the right place! We’ve rounded up some common queries to help you nail this recipe every single time.
Is this recipe truly gluten-free?
The base recipe uses Italian breadcrumbs, which typically contain gluten. However, it’s super easy to make these Chicken Avocado Ranch Burritos gluten-free! Just swap them out for gluten-free breadcrumbs, almond flour, or crushed gluten-free crackers. For more tips on gluten-free eating, check out this guide on creating a gluten-free diabetic meal plan.
Can I substitute the ground chicken?
Absolutely! Ground turkey works wonderfully as a substitute for ground chicken in these burritos; it’s a lean and flavorful option. Ground beef is another popular choice, though it might change the flavor profile slightly. Just use the same amount and follow the same steps!
How can I ensure my Chicken Avocado Ranch Burritos are moist?
The trick to keeping your Chicken Avocado Ranch Burritos super moist is not to overmix the ingredients when you combine them – just mix until they’re incorporated. Also, be careful not to overbake them! Baking for the specified hour and then broiling briefly should give you a perfectly cooked, juicy result.
Share Your Chicken Avocado Ranch Burritos Creations!
Alright, my friends, now it’s YOUR turn to shine! I really hope you give these incredible Chicken Avocado Ranch Burritos a try. Once you whip them up, I’d absolutely *love* to hear all about it! Did your family devour them? Any fun twists you added? Please, spill the beans in the comments below – tell me everything! And if you’re feeling extra inspired, snap a pic and share it on social media, tagging me so I can see your masterpiece. You can also reach out through my contact page with any questions or just to say hi!
Chicken Avocado Ranch Burritos
Ingredients
Equipment
Method
- Preheat your oven to 350°F. Spray a 9x5x2-inch loaf pan with nonstick cooking spray.
- In a large mixing bowl, combine the ground chicken, Italian breadcrumbs, grated Parmesan cheese, minced yellow onion, minced garlic, egg, whole milk, 2 tablespoons of chopped parsley, salt, and black pepper.
- Mix the ingredients with clean hands or a large spoon until they are well combined.
- Form the meat mixture into a loaf shape and place it into the prepared loaf pan. Top with the shredded Parmesan cheese and the remaining 1 tablespoon of fresh chopped parsley.
- Bake in the preheated oven for 1 hour. For a golden brown top, broil for the last 2 minutes, watching closely to prevent burning.
Nutrition
Notes
Tried this recipe?
Let us know how it was!
Certified Gluten-Free Culinary Master
Everything changed in 2017 when I received my celiac diagnosis. After ten years as a traditional pastry chef creating elaborate wedding cakes and French pastries, I suddenly couldn’t even taste my own work. It felt like the end of my culinary world.
Instead, it became my greatest challenge. I had to completely relearn baking – understanding how gluten-free flours behave differently, how they bind, how they absorb moisture. Adding the low-carb requirement? That was like solving a puzzle with half the pieces missing.
My breakthrough came with what I now call my “foundation flour blend system” – different combinations that seamlessly replace wheat flour while maintaining low-carb macros. These techniques have been adopted by culinary schools and have helped countless bakers who thought their favorite treats were gone forever.
That first successful batch of gluten-free, low-carb chocolate chip cookies? Watching my husband close his eyes and smile told me I’d found my true calling. Now, with over 300 tested recipes, I prove daily that dietary restrictions don’t mean culinary limitations.
When I’m not experimenting in my Austin test kitchen, I’m teaching weekend workshops or tending my herb garden with Biscuit, my rescue beagle who’s become an expert at detecting oven timers.