
Ever feel like meal prep is just… sad? Like you spent your Sunday slaving away only to end up with a bland lunch that makes you question all your life choices? I totally get it! Finding Shrimp Recipes Meal Prep That Actually Tastes Great can feel like searching for a unicorn, especially when you’re juggling a busy life and trying to stick to gluten-free or low-carb eating. That’s exactly why I created this Honey Garlic Shrimp recipe – it’s proof that meal prep doesn’t have to be boring! Seriously, the aroma alone will make you excited for lunch. As Chef Maria Rodriguez, Founder & Executive Recipe Developer, I pour my heart into creating dishes that are not only convenient but super flavorful, because everyone deserves a delicious meal, no matter how packed their schedule is.
Why You’ll Love These Shrimp Recipes Meal Prep That Actually Tastes Great
Okay, so why is this particular meal prep recipe a total game-changer? Well, let me tell you!
- Flavor Explosion: Forget bland! This recipe is packed with sweet honey and savory garlic, making every bite a delight. Trust me, your taste buds will thank you.
- Super Convenient: You make it once, and then you’ve got delicious lunches or dinners ready to go all week. Talk about a time-saver!
- Diet-Friendly Hero: It’s naturally gluten-free and low-carb, so you can fuel your body with something amazing without ditching your diet goals. Perfect for conscious eaters!
- Banish Blandness Forever: Seriously, who said meal prep has to be boring? This recipe proves you can have healthy, prepped meals that are just as exciting as something you’d order at a restaurant.
Chef Maria’s Honey Garlic Shrimp Meal Prep: A Flavorful Journey
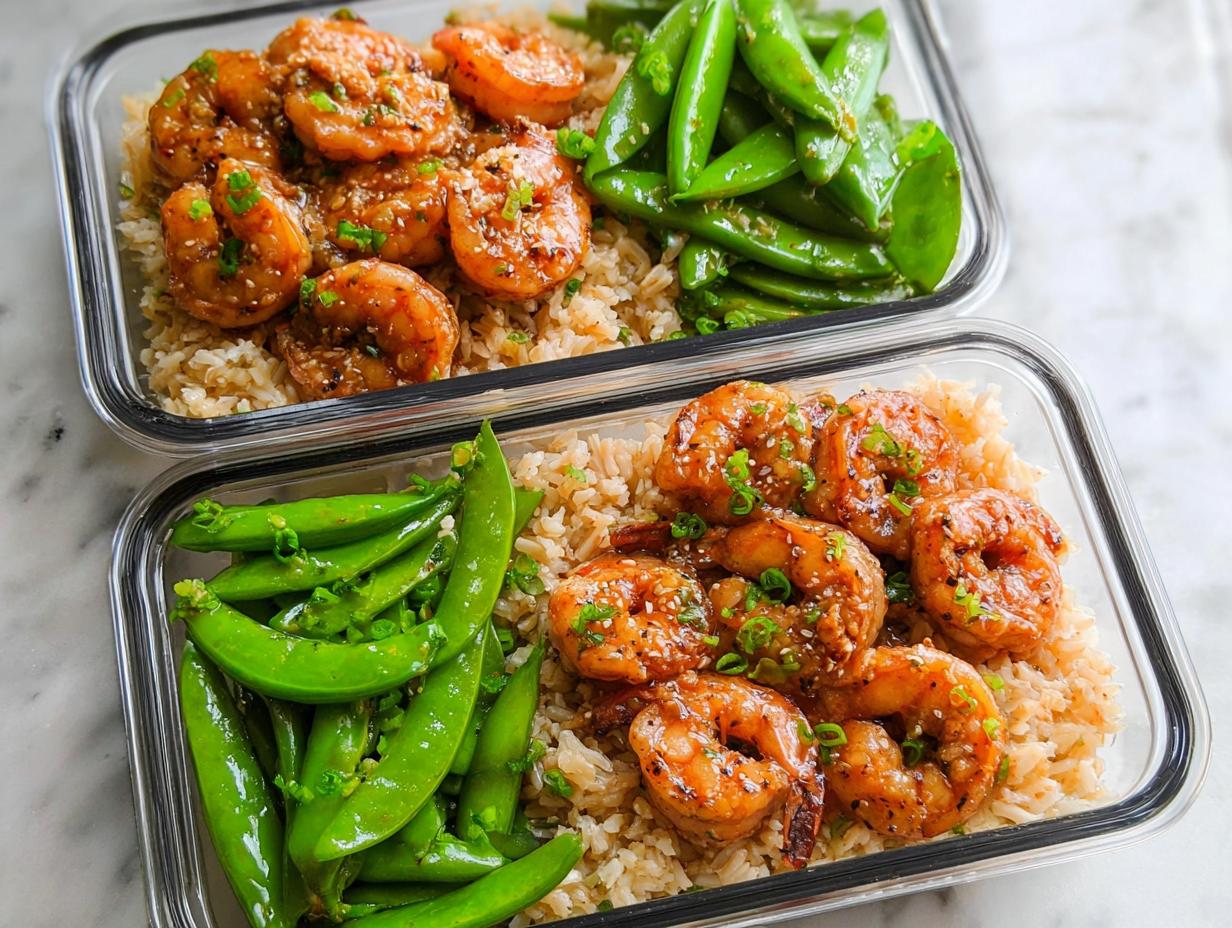
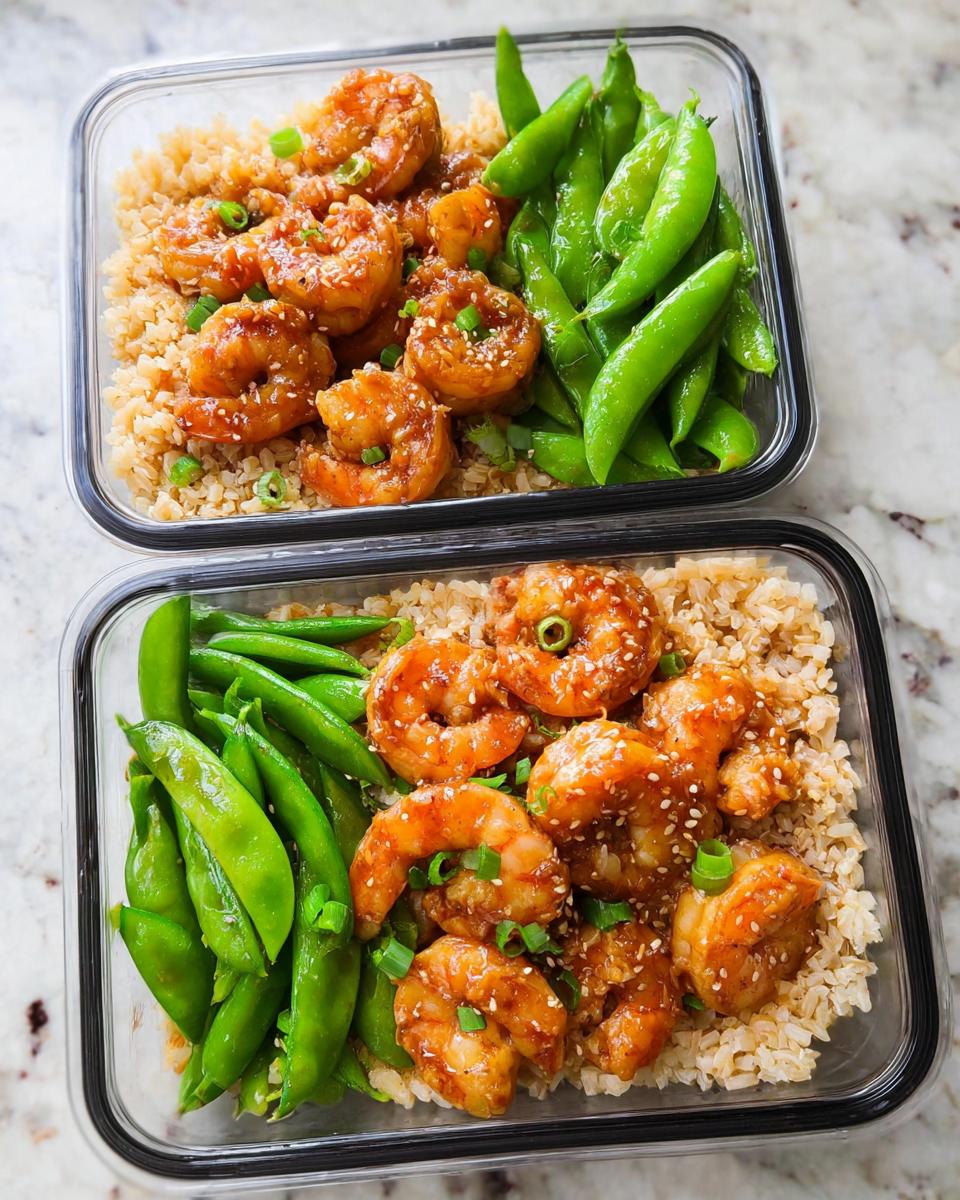
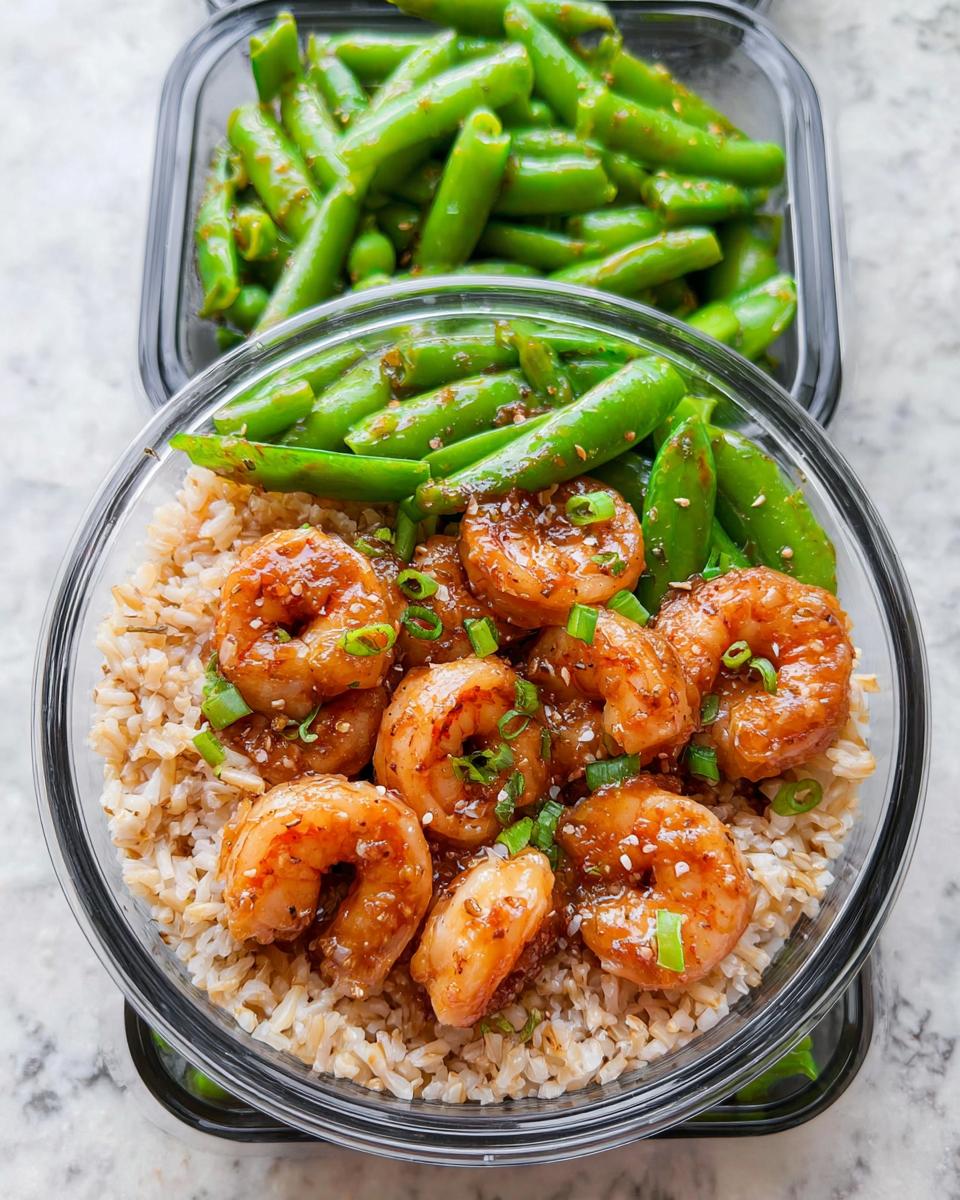
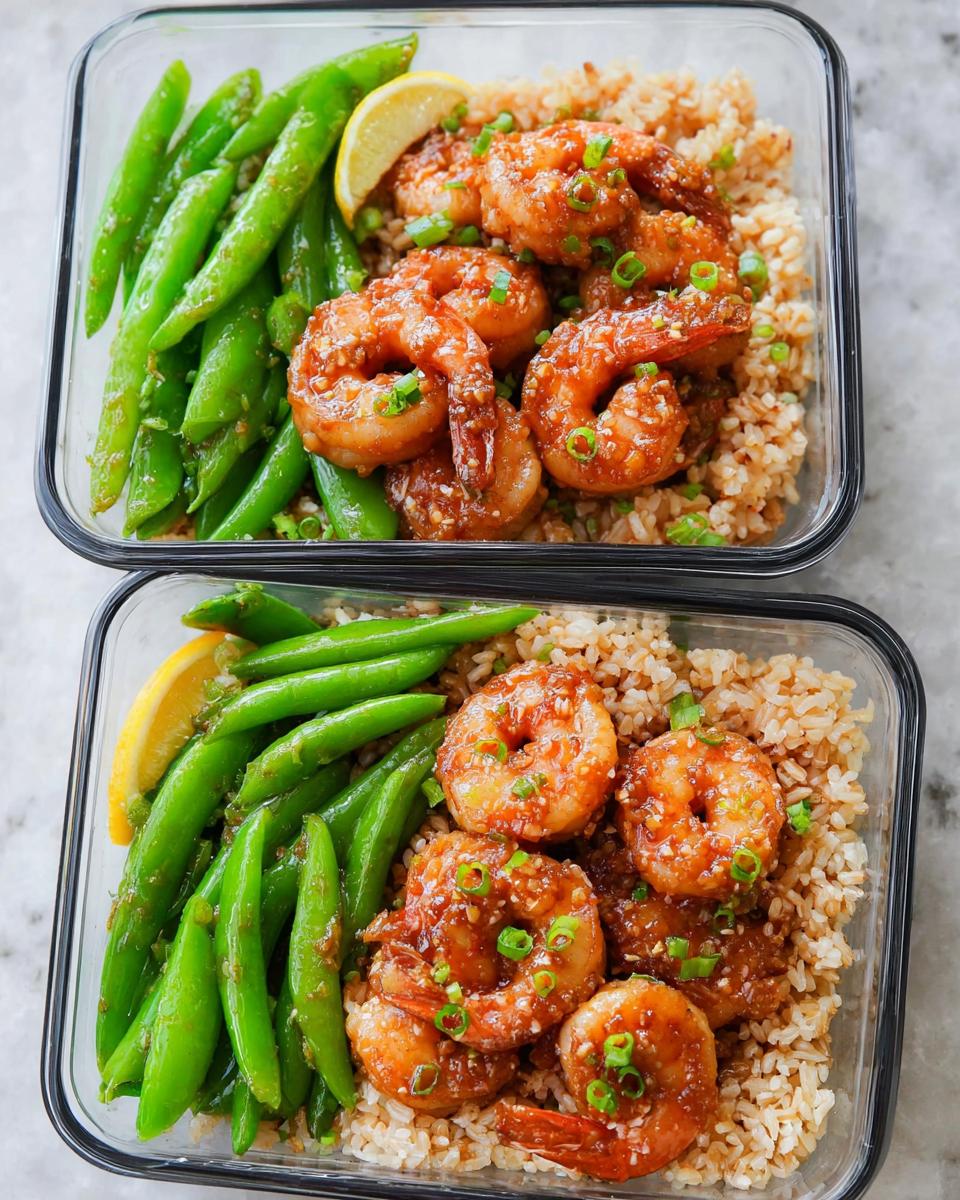
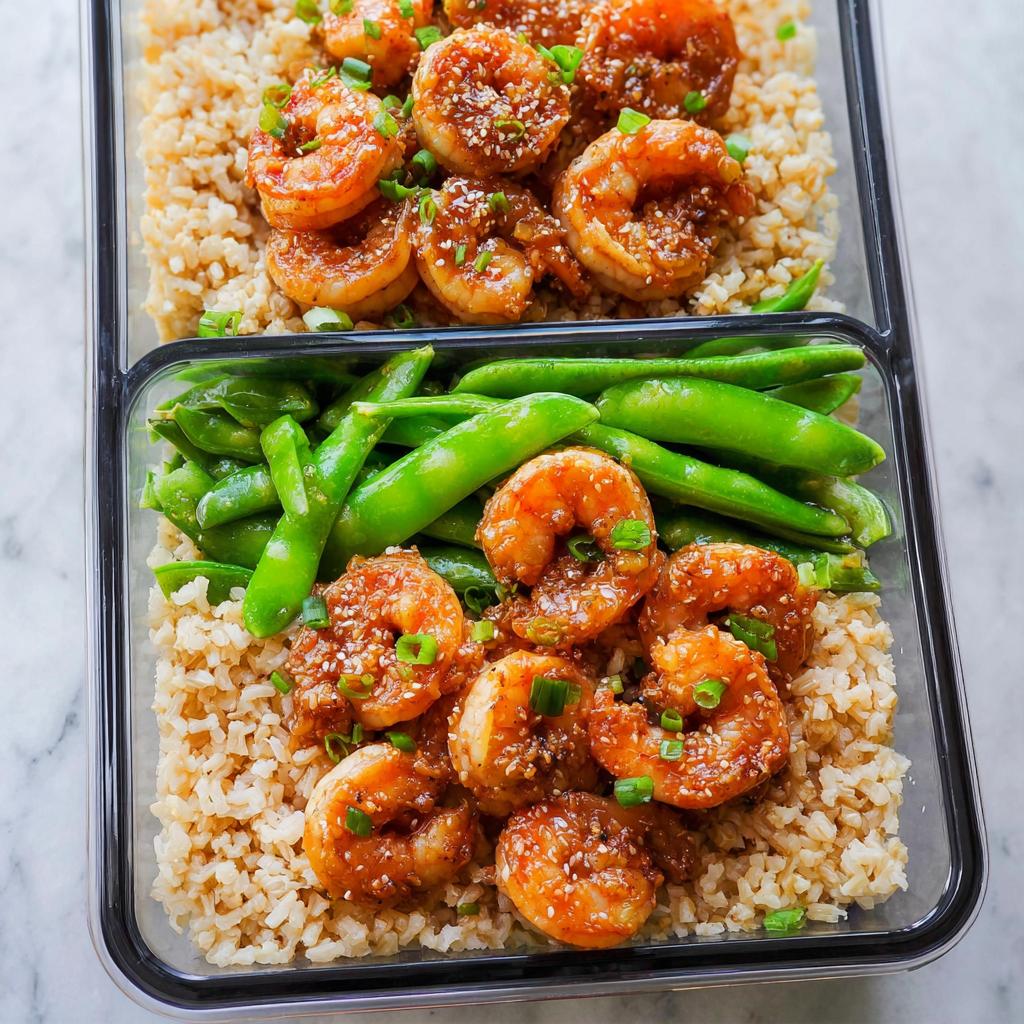
Alright, let’s dive into the star of the show: my Honey Garlic Shrimp Meal Prep! This isn’t just *any* shrimp dish; it’s my go-to for busy weeks that still demand incredible flavor. Imagine plump, juicy shrimp coated in a sticky, sweet-and-savory honey garlic sauce, all nestled next to fluffy brown rice and crisp, vibrant snap peas. It’s a complete, satisfying meal packed into perfectly portioned containers. As a chef, I love creating dishes that deliver big on taste without sacrificing convenience, and this one is a prime example of that philosophy in action. You can find more amazing inspiration for shrimp meal prep over at a sweet pea chef!
Gather Your Ingredients for Delicious Shrimp Recipes Meal Prep
Alright, let’s get cooking! To make these amazing Shrimp Recipes Meal Prep That Actually Tastes Great, you’ll need a few things. Don’t worry, they’re all pretty standard and easy to find. I always say the secret to perfect meal prep starts with having everything ready to go, so let’s round up our goodies. You can find tons of other great recipes over at my recipe page, too!
For The Honey Garlic Shrimp
- 2 tablespoons low sodium soy sauce
- 1 teaspoon raw honey
- 3 cloves garlic, minced
- 1 teaspoon fresh ginger, minced
- ½ teaspoon crushed red pepper flakes (optional, for a little kick!)
- 1 teaspoon rice vinegar
- 1 lb large shrimp, peeled & deveined
- ½ teaspoon olive oil
For the Instant Pot Brown Rice
- 1 ½ cups brown rice, uncooked
- 2 cups water
For the Lemon Sugar Snap Peas
- 1 tablespoon olive oil
- 1 lb fresh sugar snap peas
- 1 teaspoon lemon zest freshly grated
- ½ teaspoon sea salt
- ¼ teaspoon ground black pepper
Step-by-Step Guide to Making Shrimp Recipes Meal Prep That Actually Tastes Great
Alright, let’s get this shrimp meal prep party started! Follow these steps and you’ll have delicious, ready-to-go meals in no time. Remember, the key is doing things in a logical order so you’re not running around like a headless chicken! You can find more quick lunch ideas over at my site, too!
Cook the Brown Rice
First things first, let’s get that brown rice going. It usually takes the longest. Pop the uncooked brown rice into your Instant Pot, add the water, give it a quick stir, and seal the lid. Set it to cook on high pressure using the RICE setting. Once it’s done, carefully vent the steam, open it up, and fluff that rice with a fork. You want it to cool down a bit before we pack it, so set it aside.
If you don’t have an Instant Pot, no worries! Just add your brown rice and water to a pot on the stove, bring it to a simmer over medium heat, and let it cook for about 25-30 minutes until all the water is absorbed. Then, fluff it up and let it cool.
Prepare the Honey Garlic Sauce
While the rice is doing its thing, let’s whip up that magical honey garlic sauce. Grab a small mixing bowl and whisk together the soy sauce, honey, minced garlic, ginger, crushed red pepper flakes (if you’re using them!), and the rice vinegar. Just stir it all up until it’s nice and smooth. Easy peasy!
Cook the Shrimp
Now for the star of the show! Grab your large skillet and heat up that ½ teaspoon of olive oil over medium-high heat. Add your peeled and deveined shrimp. You just want to cook them until they turn pink and look cooked through, which only takes about 2-3 minutes per side. Don’t overcook them! Once they’re pink, pour in that prepared honey garlic sauce. Let it bubble and thicken just a bit, coating those gorgeous shrimp, for another 2-3 minutes until everything is heated through and smells amazing.

Sauté the Sugar Snap Peas
Let’s not forget our crunchy veggies! In the same skillet (or a clean one if you prefer), heat the other tablespoon of olive oil over medium-high heat. Toss in the fresh sugar snap peas. Give them a quick toss for about 2 minutes, just until they start to brighten up. Then, sprinkle in the lemon zest, sea salt, and black pepper. Keep tossing them for another 3-5 minutes until they’re tender but still have that nice crisp bite. We don’t want mushy peas here!
Assemble Your Meal Prep Containers
Okay, the moment of truth! Grab your meal prep containers. Divide the cooled brown rice evenly between them. Then, add a good portion of those delicious lemon sugar snap peas to one side of each container. Finally, spoon the honey garlic shrimp and thatluscious sauce over the top. Seal those containers up tight so your delicious Shrimp Recipes Meal Prep That Actually Tastes Great stays fresh for the week ahead. You can check out more tips for making your lunch boxes stay fresh at this link!
Tips for Success with Your Shrimp Recipes Meal Prep
You know, making meal prep taste amazing is all about a few little tricks! For this Honey Garlic Shrimp, I always stress using the freshest ingredients possible. Trust me, those plump, bright pink shrimp make all the difference. And don’t overcrowd that skillet when you’re cooking them – give them space so they actually sauté and don’t just steam. That way, they get that perfect texture. Also, make sure your rice is totally cooled before you pack it up. A little patience here prevents soggy meals later! If you’re looking for more speedy ideas, check out some one-pot wonders right here!
Ingredient Notes and Substitutions for Shrimp Recipes Meal Prep
Sometimes you might be missing an ingredient or need to tweak things a bit for your diet, and that’s totally okay! For this shrimp meal prep, let’s talk substitutions. If you need to keep it strictly low-carb, you can swap the honey for a sugar-free syrup or a liquid stevia blend – just adjust to your sweetness preference. And for the low-sodium soy sauce, tamari or coconut aminos are fantastic gluten-free and soy-free alternatives that give you that same savory punch.
Storing and Reheating Your Delicious Shrimp Meal Prep
Alright, so you’ve prepped these amazing meals, and now you need to know how to keep them fresh and tasty for the week, right? No problem! Just pop those sealed containers into the fridge. They’ll stay perfectly good for about 3 to 4 days, which is ideal for your busy schedule. When you’re ready to eat, just pop them in the microwave with the lid slightly ajar for about 1.5 to 2 minutes, or until everything is good and warm. You can also gently reheat in a skillet if that’s more your jam! Need more tips or have questions? Feel free to reach out!
Frequently Asked Questions About Shrimp Recipes Meal Prep
Got questions about making this amazing shrimp meal prep? You’re in the right place! I’ve rounded up some common ones to make things super clear. For more general tips on low-carb meal prep, check out this guide!
Can I use frozen shrimp for this recipe?
Absolutely! Just make sure to thaw your frozen shrimp completely before cooking. You can do this by placing them in a bowl of cold water for about 15-20 minutes, or leaving them in the fridge overnight. Pat them really dry before cooking so they get a nice sear!
How long does this shrimp meal prep last in the fridge?
These delicious shrimp recipes will stay fresh in your fridge for about 3 to 4 days when stored in airtight containers. It’s perfect for prepping Sunday and enjoying through Wednesday or Thursday!
Is this recipe gluten-free and low-carb?
Yes, it is! By using low-sodium soy sauce (or tamari/coconut aminos) and honey (or a low-carb sweetener alternative), it fits beautifully into a gluten-free and low-carb lifestyle. The brown rice adds carbs, but you can easily swap it out!
Can I substitute brown rice with cauliflower rice?
You sure can! If you want to make this recipe even lower in carbs, cauliflower rice is a fantastic substitute for brown rice. Just prepare it according to package directions or sauté it yourself, and portion it into your meal prep containers.
Nutritional Information for Honey Garlic Shrimp Meal Prep
Alright, let’s talk nutrition! Keeping track of what goes into our bodies is important, especially when we’re trying to eat healthy with our meal prep. For one serving of this delicious Honey Garlic Shrimp Meal Prep, you’re looking at roughly:
- Calories: Around 317
- Carbohydrates: About 57g (if you use brown rice)
- Protein: Approximately 9g
- Fat: Around 6g
Remember, these are just estimates! They can change based on the exact ingredients you use and the portion sizes. If you’re looking for more meal planning ideas, especially for gluten-free and diabetic-friendly options, you should definitely check out this guide!
Share Your Creations!
Okay, so you’ve made it through! I’m so excited for you to try these shrimp recipes meal prep! Once you whip up a batch, I’d absolutely love to hear all about it. Did you try it? Did everyone love it? Drop a comment below and tell me your experience, or even give it a star rating right here! And hey, if you shared it on social media, tag me! Finding out what works for you guys is the best part of my job. You can learn more about me and my kitchen adventures over at my About page!
Honey Garlic Shrimp Meal Prep
Ingredients
Equipment
Method
- Start with the brown rice, as it takes the longest. Add uncooked brown rice to the Instant Pot. Pour in water and stir. Seal the lid and select the RICE option on high pressure. When done, carefully remove the lid and fluff the brown rice with a fork. Allow the rice to cool.
- Alternatively, cook rice in a pot on the stove: add rice to a deep pot, heat to a simmer over medium heat, then cook for 25-30 minutes, or until water is absorbed.
- While rice cooks, prepare the shrimp and snap peas. For the shrimp sauce, whisk together honey, soy sauce, minced garlic, minced ginger, red pepper flakes, and rice vinegar in a mixing bowl. Set aside.
- Heat olive oil in a large skillet over medium-high heat. Add shrimp and cook until pink, about 2-3 minutes per side. Pour in the sauce and cook for another 2-3 minutes until shrimp is cooked through and sauce is heated.
- For the snap peas, heat olive oil in a skillet over medium-high heat. Add snap peas and toss to coat. Cook for 2 minutes, stirring frequently. Add lemon zest, sea salt, and black pepper. Cook for an additional 3-5 minutes until crisp-tender.
- Divide the cooled rice into 4 meal prep containers. Add snap peas to one side and top with honey garlic shrimp and sauce. Seal containers tightly and store in the refrigerator for up to 4 days.
Nutrition
Notes
Tried this recipe?
Let us know how it was!
Certified Gluten-Free Culinary Master
Everything changed in 2017 when I received my celiac diagnosis. After ten years as a traditional pastry chef creating elaborate wedding cakes and French pastries, I suddenly couldn’t even taste my own work. It felt like the end of my culinary world.
Instead, it became my greatest challenge. I had to completely relearn baking – understanding how gluten-free flours behave differently, how they bind, how they absorb moisture. Adding the low-carb requirement? That was like solving a puzzle with half the pieces missing.
My breakthrough came with what I now call my “foundation flour blend system” – different combinations that seamlessly replace wheat flour while maintaining low-carb macros. These techniques have been adopted by culinary schools and have helped countless bakers who thought their favorite treats were gone forever.
That first successful batch of gluten-free, low-carb chocolate chip cookies? Watching my husband close his eyes and smile told me I’d found my true calling. Now, with over 300 tested recipes, I prove daily that dietary restrictions don’t mean culinary limitations.
When I’m not experimenting in my Austin test kitchen, I’m teaching weekend workshops or tending my herb garden with Biscuit, my rescue beagle who’s become an expert at detecting oven timers.