
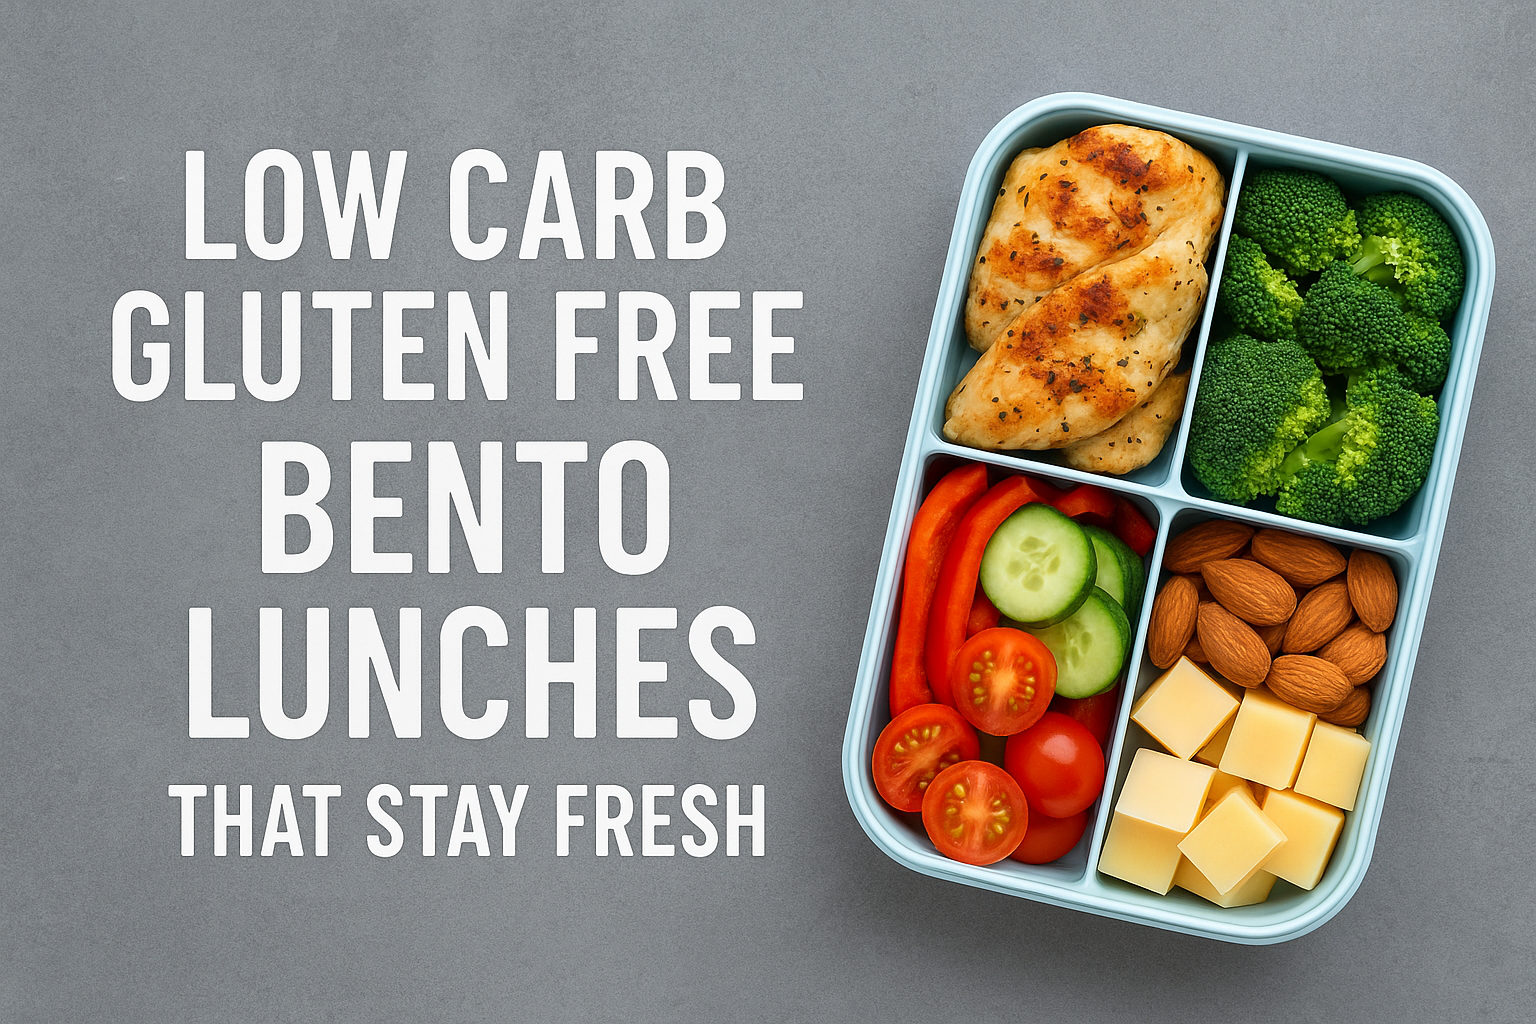
Packing gluten free lunches gets old fast. Same combinations every day. Same boring finger foods.
Bento boxes fix this problem. Simple compartments keep everything organized. No heating required. Works great for kids and adults.
Gluten-free school lunches seem harder than regular ones. They’re not. Just need the right ideas. Bento boxes handle portions perfectly and add variety. Good containers cost around $29.95 with lifetime warranty. Worth it.
Pack three lunches daily or just need backup options? These 27 ideas keep meals fresh until lunchtime. Quick to put together. No more lunch box boredom.
Charcuterie Snack Box

Image Source: The Edgy Veg
Classic charcuterie board works great as a portable lunch. Way more interesting than regular sandwiches. Good balance of protein and fresh stuff.
Charcuterie Snack Box ingredients
For a solid gluten free lunch box:
- Meats: I go with nitrate-free salami or prosciutto. Turkey works if you skip pork. Most cured meats are gluten free but always check labels.
- Cheese: One hard cheese like aged cheddar, one soft variety. Dairy-free options work fine too. Get certified gluten free cheese.
- Gluten free crackers: Simple Mills Almond Flour Crackers are my favorite. Mary’s Gone Super Seed Crackers or rice crackers work too.
- Fresh produce: Cucumber spears, cherry tomatoes, berries, grapes, apple slices. Whatever adds color.
- Extras: Small portions of nuts, olives, dried fruits. I use silicone cups for honey.
Charcuterie Snack Box preparation
Pretty straightforward to put together. Keep each thing separate so flavors don’t mix. Use silicone cups for small items. Store spreads like mustard in leak-proof containers.
For looks, put contrasting colors next to each other. Dark jam beside light crackers works well. Add mini forks or cheese knives if needed.
Charcuterie Snack Box storage tips
Keep it cold. Perishable stuff shouldn’t sit out more than two hours. Always pack with ice packs.
Store assembled boxes in the fridge before transport. Keep crackers separate from wet ingredients or they get soggy. I wrap cheeses in parchment paper instead of plastic.
For longer storage, cured meats last 5-7 days, hard cheeses 1-2 weeks, soft cheeses 3-5 days. Still tastes best within a day of making it.
Peanut Butter Banana Roll Ups

Image Source: Veggie Fun Kitchen
Overall, simple three-ingredient lunch that works great. Kids love these. Adults too.
Peanut Butter Banana Roll Ups ingredients
Just three things needed:
- Gluten free tortillas/wraps: BFree Multigrain Wraps work well or brown rice tortillas
- Peanut butter: I use smooth natural peanut butter. For nut-free schools, sunflower seed butter works perfectly
- Bananas: Pick ripe but still firm bananas
Add cinnamon or mini chocolate chips if you want. Chia seeds boost nutrition.
Peanut Butter Banana Roll Ups preparation
Warm the tortilla for 10 seconds first. Makes rolling easier. Spread 2 tablespoons peanut butter across the whole surface, leaving small edges.
Place banana at one edge. I put it at the bottom third – rolls better with gluten free tortillas.
Roll tightly around the banana. Slice into 1-inch rounds with a sharp knife.
Peanut Butter Banana Roll Ups storage tips
Make these the morning you’ll eat them. Best results that way.
Add a tiny bit of lemon juice to prevent browning. I wrap them tight in parchment paper right after making.
Pack sliced pieces close together to reduce air exposure. For nut-free places, just swap in sunflower seed butter.
These last through the school day but don’t make them days ahead. Bananas get soft and dark.
DIY Pizza Lunchables

Image Source: Strength and Sunshine
Pizza Lunchables, but better. This homemade version beats store-bought every time. Kids love the build-your-own concept.
DIY Pizza Lunchables ingredients
Keep it simple:
- Pizza base: Mini naan bread works great. Udi’s pizza crust or Bob’s Red Mill mix if you want homemade
- Sauce: 2-3 tablespoons pizza sauce. Rao’s or Classico are good options
- Cheese: ¼ cup shredded mozzarella. Dairy-free works too
- Toppings: Mini pepperoni, turkey pepperoni, whatever you like
- Extras: Add fruit or nuts to fill the box
DIY Pizza Lunchables preparation
For store-bought bases, just cut to lunch size. For homemade crusts, follow the package directions, then cut into mini rounds with a mason jar lid.
Separate everything into different compartments. Pizza bases in the big section, sauce in a leak-proof container, cheese in another spot, toppings in the fourth.
Making Bob’s Red Mill crusts? Bake at 425°F for 8-9 minutes, flip, then 5-10 minutes more until golden. Cool completely before packing.
DIY Pizza Lunchables storage tips
Keep components separate until eating time. Otherwise everything gets soggy. Store in the fridge until transport.
Include an ice pack. These last about 4 days in the fridge when stored right.
Make crusts in bulk and freeze extras for busy mornings. Pack a spoon for the sauce and napkins for messy hands.
Mini Spaghetti Pies

Image Source: Southern Living
Nice twist on regular spaghetti. These mini pasta cups work great for lunch boxes and stay fresh until mealtime.
Mini Spaghetti Pies ingredients
For these little pasta treats:
- Gluten free spaghetti: 8-12 oz package – cook slightly underdone
- Binding agents: 2-3 large eggs and 1/4 cup grated Parmesan for the “crust”
- Cheese options: Mix ricotta, mozzarella, and cottage cheese (about 1/2 cup total)
- Sauce: 2 cups marinara sauce – jarred works fine
- Optional protein: Ground chicken, turkey, or beef (3/4 lb)
- Seasonings: Italian herbs, garlic, salt, pepper
Mini Spaghetti Pies preparation
Cook your gluten free spaghetti about 2 minutes less than package directions. Drain well. Excess water makes them soggy.
Preheat oven to 350°F. Oil mini muffin tins generously. Mix cooked pasta with eggs and Parmesan – every strand should get coated.
Twirl pasta into muffin cups with a fork. Press against bottom and sides to make little nests. Fill each cup about 3/4 full.
Add 1-2 tablespoons ricotta mixture to each nest. Top with marinara and mozzarella. Bake 20-25 minutes until golden.
Mini Spaghetti Pies storage tips
Cool completely before removing from pans. I use a small spoon to loosen edges.
These keep 3-4 days refrigerated in airtight containers. Freeze them in single layers, then bag for up to one month.
Reheat frozen ones at 350°F for 10-15 minutes. They hold their shape really well when packed properly.
Greek Salad Skewers

Image Source: Low Carb Hoser –
Nice Mediterranean lunch option. Fresh and naturally gluten free. Works great for kids and adults.
Greek Salad Skewers ingredients
Keep it simple:
- Cucumber: Persian or English cucumbers work best. Cut into ½-inch rounds.
- Cherry tomatoes: Use firm ones that won’t fall apart
- Feta cheese: Block feta is better than pre-crumbled. Better texture.
- Kalamata olives: Get the pitted ones. Saves time.
- Wooden skewers: 6-inch bamboo skewers work perfectly
For dressing:
- Olive oil and red wine vinegar
- Dried oregano
- Garlic if you want it
Greek Salad Skewers preparation
Wash everything first. Cut cucumbers into rounds. Cut feta into cubes.
Thread them on skewers. I put cherry tomato first, then olive, feta, cucumber. This way they stand up nice on the plate.
Be gentle with the feta. It cracks easy. Keep everything about the same size.
Greek Salad Skewers storage tips
Make them up to 24 hours ahead. Store in the fridge in airtight containers.
Don’t add dressing until eating time. Pack it separate or everything gets soggy.
They stay fresh 3 days. Good for meal prep. Always pack with ice packs.
Tuna Salad with Crackers

Image Source: Simply Taralynn
Classic tuna and crackers. Simple and filling. This combo works great for lunch boxes.
Tuna Salad with Crackers ingredients
For basic tuna salad, you need:
- Tuna: Chunk white albacore in water
- Creamy base: ¼-½ cup mayonnaise or Greek yogurt
- Crunch elements: Diced celery, chopped red onion or scallions
- Flavor enhancers: Lemon juice, Dijon mustard, salt, pepper
- Optional mix-ins: Chopped walnuts, dill, capers, grapes, dried cranberries
- Gluten free crackers: About 20 crackers per serving
- Fresh vegetables: Mini peppers or celery sticks
I add extra celery for crunch. Makes it better.
Tuna Salad with Crackers preparation
Drain tuna really well. Watery tuna salad is terrible. Mix with mayo or Greek yogurt in a bowl.
Add celery, onions, and seasonings. Taste and adjust. I usually need more lemon juice.
Pack about 1 cup tuna salad in lunch container. Keep crackers separate or they get soggy. Use different compartments.
Tuna Salad with Crackers storage tips
Tuna salad lasts 3-4 days in the fridge. Use airtight containers.
Always pack with ice pack. Perishable foods can’t sit out more than 2 hours.
Watch for spoilage:
- Mold or dark spots
- Bad smell
- Slimy texture
Greek yogurt version has same shelf life but follow the 2-hour rule. Keep it cold.
Zucchini Noodle Caprese

Image Source: Downshiftology
Light, fresh, and no cooking required. Zucchini noodles work great for lunch boxes. I use a spiralizer on medium setting.
Zucchini Noodle Caprese ingredients
For this lunch option:
- Zucchini: 2-4 medium zucchini (about 8 cups spiralized)
- Cherry tomatoes: 1 cup, halved
- Fresh mozzarella: 8 ounces – small pearls or larger balls cut up
- Fresh basil: 1/2 cup, chopped
- Dressing: Basil pesto or simple vinaigrette with olive oil, balsamic vinegar, lemon juice
Zucchini Noodle Caprese preparation
Spiralize the zucchini first. No spiralizer? Use a julienne peeler. I cut the strands in half – easier to eat.
Pat zucchini noodles dry with paper towels. This prevents watery salad. Halve the cherry tomatoes and prep your mozzarella.
For dressing, I make simple vinaigrette – whisk olive oil, balsamic, lemon juice, seasonings. Add dressing right before serving.
Zucchini Noodle Caprese storage tips
Store spiralized zucchini in glass containers with paper towels. Absorbs moisture. Stays fresh 4-5 days.
Pack dressing separately. Zucchini gets watery over time. Include ice pack for transport.
It’s delicious but eat within a day or two for best texture.
Smoked Salmon Pinwheels

Image Source: Downshiftology
Fancy lunch without the fuss. These salmon pinwheels look impressive but take minutes to make. Great protein and healthy fats.
Smoked Salmon Pinwheels ingredients
For these pinwheels, you need:
- Gluten free wraps: Burrito-sized spinach wraps work best. Check they’re certified gluten free.
- Cream cheese: 4-6 ounces softened
- Fresh herbs: 1 tablespoon chopped dill, 2 teaspoons chopped chives
- Seasonings: Pinch of garlic powder
- Spinach: 2-3 cups baby spinach leaves
- Smoked salmon: 4-6 ounces thinly sliced
Can add feta cheese, bacon bits, or Dijon mustard if you want.
Smoked Salmon Pinwheels preparation
Mix softened cream cheese with herbs and garlic powder. Spread on wraps, leaving half-inch margin on most edges. Go all the way to one edge – this seals the roll.
Layer spinach evenly. Add salmon slices. Roll tight, tucking ends as you go. Tight rolling keeps everything together when you slice.
Use serrated knife to cut into half-inch rounds. Get about 7-8 pinwheels per wrap.
Smoked Salmon Pinwheels storage tips
Make ahead works great. Store wrapped in fridge for 3-4 days. Actually better if you make them day before – just slice right before serving.
I prepare the cream cheese mixture separately for quick assembly later. Always pack with ice pack for lunch boxes.
Egg and Cheese Protein Box

Image Source: Against All Grain
Good protein option for lunch boxes. Simple to put together. I add extra cheese for my kids.
Egg and Cheese Protein Box ingredients
For your protein box:
- Hard-boiled eggs: 2 eggs per box for protein
- White cheddar cheese: Cut into rectangles or cubes
- Fresh fruit options: Apple slices and grapes work well
- Gluten free crackers: Skip the muesli bread. Use certified gluten free crackers instead
- Peanut butter: 2 tablespoons per box
- Everything bagel seasoning: Makes eggs taste better
Gets you about 22g protein per serving. Pretty filling.
Egg and Cheese Protein Box preparation
Hard-boil eggs first. Single layer in saucepan, cover with cold water by 1 inch. Bring to rolling boil, remove from heat, cover. Let sit 9-12 minutes depending on egg size.
Wash fruit thoroughly. For apples, slice into wedges and add lemon juice to prevent browning. Remove grapes from stems and rinse.
I slice cheese from a block rather than buying pre-crumbled. Better texture. Put peanut butter in small containers with lids so it doesn’t leak.
Egg and Cheese Protein Box storage tips
Refrigerate right after assembly. Stays fresh 3-4 days when stored properly. I make enough for 2-3 days max.
Don’t slice eggs until ready to eat. They dry out quickly when cut. Can peel them ahead of time though.
Always pack with ice packs. Perishable foods shouldn’t sit at room temperature more than two hours.
Use bento-style containers with separate compartments. Glass containers work best – they don’t absorb odors.
Mini Pancake Brunch Box

Image Source: Nourishing Amy
Mini pancakes make lunch fun again. Kids love them. Adults too.
Mini Pancake Brunch Box ingredients
For homemade gluten free mini pancakes:
- Gluten free flour: All-purpose gluten free flour creates the lightest, fluffiest pancakes
- Baking powder: Ensures proper rise and contributes to fluffiness
- Milk alternatives: Almond, cashew, soy, oat or coconut milk work perfectly for dairy-free options
- Eggs: Room temperature eggs provide best results
- Unsalted butter: Adds richness and flavor
- Maple syrup: Adds natural sweetness to the batter
Add hard-boiled eggs, cheese cubes, fresh berries, and banana slices for a complete meal.
Mini Pancake Brunch Box preparation
Whisk dry ingredients in a bowl. Add wet ingredients and whisk until just combined. Don’t overmix.
Heat griddle over medium heat. Drop batter by teaspoonful for mini pancakes. When bubbles appear and pop, flip and cook until golden.
Use a squeeze bottle or ziplock bag with corner snipped for easier mini pancake formation. Cool completely before packing with separate compartments for toppings.
Mini Pancake Brunch Box storage tips
Refrigerate cooked mini pancakes between parchment paper layers for 3-5 days. Freeze for up to 2-3 months.
Stack with parchment paper between each layer when freezing. Remove air to prevent freezer burn.
Include small containers of maple syrup for dipping. Pack with ice pack. Mini pancakes taste great at room temperature.
Falafel Lettuce Wraps

Image Source: Tesco Real Food
Middle Eastern flavors make great lunch box options. These falafel lettuce wraps pack well and taste fresh.
Falafel Lettuce Wraps ingredients
For these wraps, gather:
- Falafel patties: Homemade from chickpeas, onion, garlic, cumin, salt, lemon juice, and baking powder or store-bought gluten free options
- Lettuce leaves: Butter lettuce, romaine, or iceberg work best as the “wrap”
- Fresh vegetables: Cherry tomatoes, cucumber slices, shredded carrots, and red onion provide color and crunch
- Herb options: Fresh parsley, dill, mint, or cilantro add bright flavors
- Sauce choices: Tahini sauce (made from tahini, lemon juice, garlic, salt) or hummus
Check that all components are certified gluten free, especially pre-made falafels.
Falafel Lettuce Wraps preparation
For homemade falafels, pulse onion and garlic in a food processor until finely chopped. Add chickpeas and pulse briefly. Mix in egg, breadcrumbs, cumin, salt, lemon juice, baking powder, and pepper until just combined.
Form into small patties. Bake at 400°F for 15-20 minutes until golden brown. Store-bought gluten free falafels save time.
Place 2-3 falafel patties in each lettuce cup. Add sliced vegetables and herbs. Pack sauce separately to prevent sogginess.
Falafel Lettuce Wraps storage tips
Store everything separately for lunch boxes. Keeps falafels, vegetables, and sauces from getting soggy.
Wash and dry lettuce thoroughly. Store between paper towels in airtight containers. Pack lettuce away from warm or moist ingredients.
These wraps stay fresh in the refrigerator when properly stored. Include ice packs for lunch boxes. Refresh wilted lettuce by soaking briefly in icy water.
Chickpea Salad Bento

Image Source: Yummy Mummy Kitchen
Nice protein-packed option. Chickpea salad bento boxes work great for both kids and adults. Keeps well all day.
Chickpea Salad Bento ingredients
For the chickpea salad base:
- 1 can chickpeas (15 oz), drained and rinsed
- ¼ cup mayonnaise or vegan mayonnaise
- 1 teaspoon dried dill
- 1 teaspoon Dijon mustard
- 1 tablespoon lemon juice
- 2 ribs celery, finely chopped
- ¼ cup red onion, finely chopped
- Salt and pepper to taste
For the bento box:
- Gluten free crackers or rice cakes
- Fresh vegetables like carrot sticks and celery
- Grapes or berries for natural sweetness
- Optional romaine lettuce leaves for wraps
Chickpea Salad Bento preparation
Drain and rinse chickpeas well to remove excess sodium. Mash with a fork until mostly crushed but still chunky. I leave some texture.
Add mayo, dill, mustard, lemon juice, celery, onion, salt, and pepper. Mix until combined. Taste and adjust seasonings.
Pack chickpea salad in one compartment. Keep crackers separate to prevent sogginess. Add fruits and vegetables in other sections.
Chickpea Salad Bento storage tips
Stays fresh 4-5 days in the fridge when stored properly. I make it a few hours ahead so flavors can blend.
Always pack with ice pack for lunch boxes. Great for weekend meal prep.
Can prep vegetables separately and store up to 2 days. This protein-rich meal beats regular sandwiches.
Turkey and Hummus Box

Image Source: One Lovely Life
Simple turkey and hummus wraps work great for lunch boxes. Protein-packed and easy to customize.
Turkey and Hummus Box ingredients
Basic components:
- Gluten free tortilla/wrap: Brown rice wraps work well
- Hummus: 1½-2 tablespoons, any flavor
- Turkey: 2-3 slices deli turkey
- Fresh vegetables: Tomatoes, cucumber, bell peppers, whatever you like
- Greens: Spring mix or spinach
- Optional: Vinegar for extra flavor
- Seasonings: Salt and pepper
Turkey and Hummus Box preparation
Warm the tortilla for 10-15 seconds if cold. Makes rolling easier. Spread hummus across the surface, leave small border.
Layer turkey on one side. Add vegetables and season with salt and pepper. Place greens in center, drizzle with vinegar if using.
Roll from turkey side, fold ends in first. Or just pack everything separately in compartments.
Turkey and Hummus Box storage tips
Wrap tightly if making ahead. Keeps one day max – tortilla gets soggy otherwise.
For longer storage, keep components separate. Greens stay crisp when stored alone. Always pack with ice pack.
Glass containers work better than plastic. Less moisture buildup.
DIY Brunchable with Sausage

Image Source: Family Fresh Meals
Breakfast for lunch works great. Kids love these DIY brunchables with sausage patties. Sweet and savory combo that actually fills them up.
DIY Brunchable with Sausage ingredients
For a complete brunchable, you need:
- Mini pancakes: Certified gluten free pancakes work best
- Breakfast sausage patties: Gluten free sausage patties, about 2-4 per box
- Cheese: American cheese cut into quarters or other gluten free options
- Fresh fruit: Strawberries add color and sweetness
- Yogurt: Strawberry yogurt for dipping
Finding certified gluten free breakfast sausage is key. I make my own using ground pork with brown sugar, sage, salt, pepper, marjoram, red pepper flakes, and cloves.
DIY Brunchable with Sausage preparation
Cook sausage patties per package directions. For homemade, mix seasonings with ground pork, form small rounds, cook until 160°F. Cool completely before packing.
Put each component in separate compartments. Keeps flavors from mixing. For kids, cut pancakes and sausage into smaller pieces.
Takes minutes to assemble. Prep components ahead for quick morning setup.
DIY Brunchable with Sausage storage tips
Store cooked sausage patties in sealed containers in the fridge for about 3 days. Freeze longer with parchment paper between layers in freezer bags.
Keep air exposure minimal for freshness. Assembled boxes stay good in the fridge for 3 days.
Pack with ice packs. Don’t refreeze sausage – affects taste and texture. Nice change from regular gluten free lunch options.
Vegetarian Club Sandwich

Image Source: Quorn
Nice sandwich idea. Triple-decker works well for gluten free bread. I add extra spread to prevent sogginess.
Vegetarian Club Sandwich ingredients
For a complete vegetarian club sandwich, gather:
- Gluten free bread: 6 slices of toasted seeded gluten free bread per 2 sandwiches
- Spreads: 2 tablespoons vegan mayonnaise or cream cheese, optionally mixed with 1 tablespoon pesto
- Protein elements: Roasted potatoes, vegan cheese slices, or white bean hummus with rosemary for substance
- Fresh vegetables: Sliced tomatoes, shredded lettuce or arugula, cucumber slices, avocado, and red onion
- Crunchy additions: Crispy eggplant bacon, bell peppers, and shredded cabbage for texture
I season with black pepper and garlic powder. Makes a big difference.
Vegetarian Club Sandwich preparation
Toast bread until crisp. Not too dark. Spread mayo on every slice – this stops the vegetables from making bread soggy.
Start with lettuce on bottom slice. Add tomatoes and roasted potato slices. I sauté cabbage, bell peppers, onions and carrots until slightly tender. Still want some crunch.
Add middle bread slice spread-side down. More lettuce and the vegetable mixture. Top with final slice. Use sandwich picks. Cut diagonally.
Vegetarian Club Sandwich storage tips
Vegetarian sandwiches last longer than meat ones. These keep 4-5 days in fridge. But eat within 24 hours for best texture.
Use paper towel between wet vegetables and bread. Store tomatoes separate if possible. Add right before eating.
Wrap in parchment paper, not plastic. Prevents condensation. Keep in coldest part of fridge.
Mini Corn Dog Muffins

Image Source: Autumn Enloe Nutrition
Perfect for kids and adults. These mini corn dog muffins taste like carnival favorites but travel better.
Mini Corn Dog Muffins ingredients
Simple ingredients:
- Gluten free cornbread mix (Bob’s Red Mill or Krusteaz work great)
- 1 large egg
- ⅓ cup milk (any kind)
- 2 tablespoons melted butter (skip if you want)
- 4-6 gluten free hot dogs (always check labels)
- Mini muffin pan
- Cooking spray
Watch out for wheat flour in regular mixes. Many brands make certified gluten free versions now.
Mini Corn Dog Muffins preparation
Heat oven to 375°F. Spray mini muffin pan well. Mix cornbread mix, egg, and milk until just combined. Keep it lumpy.
Cut hot dogs into 1-inch pieces. Each dog makes about six pieces.
Fill muffin cups halfway with batter. Push one hot dog piece into center of each cup, halfway down.
Bake 10-12 minutes until golden. Cool in pan for five minutes.
Mini Corn Dog Muffins storage tips
Store in fridge up to 5 days in airtight container. Freeze for up to 3 months.
Reheat in 300°F oven or air fryer until warm. Microwave works too – 20-30 seconds.
Make them the night before. Or freeze and thaw overnight. Easy school lunch option.
Keto Ham & Cheese Roll Ups

Image Source: Peace Love and Low Carb
Low-carb lunches work great for gluten free meal planning. These keto ham and cheese roll-ups hit the spot. Just 2 net carbs per serving. Perfect for kids and adults on specialized diets.
Keto Ham & Cheese Roll Ups ingredients
Simple version needs basics:
- Thinly sliced deli ham (10-12 slices)
- Mozzarella cheese sticks or sliced Swiss cheese
- Butter for frying (optional)
For fathead dough roll-ups:
- ¼ cup blanched almond flour and 3 tablespoons coconut flour
- 1½ cups mozzarella cheese plus additional cheddar for filling
- 4 tablespoons butter and 2 tablespoons cream cheese
- 1 large egg
- Seasonings like garlic powder and onion powder
Keto Ham & Cheese Roll Ups preparation
Quick version: wrap ham around cheese sticks. Done. Fry in butter for better flavor until browned. Takes minutes.
Fathead dough version takes more work:
- Melt mozzarella, butter and cream cheese together
- Mix in almond flour, coconut flour and egg until combined
- Spread dough into thin rectangle
- Layer with cheddar cheese and ham slices
- Roll tightly lengthwise, seam side down
- Slice into 1-inch pieces and bake at 375°F for 20-25 minutes
Keto Ham & Cheese Roll Ups storage tips
These work hot or cold in lunch boxes. Simple version keeps 5 days in the fridge. Fathead dough version lasts 3-4 days refrigerated or freeze for longer storage.
Make double batches for meal prep. Reheat in air fryer or oven at 350°F for 8-10 minutes if you want them warm. Pack with ice pack for food safety.
Fruit and Yogurt Parfait Box

Image Source: Healthy Gluten-Free Family
Overall, nice option for sweet lunch cravings. This make-ahead parfait combines protein-rich yogurt with fresh fruits and crunchy toppings for balanced nutrition.
Fruit and Yogurt Parfait Box ingredients
For a nutritious parfait lunch box, gather these components:
- Yogurt base: Greek yogurt provides extra protein, making it ideal for filling lunches. Plain yogurt works well with added honey for customizable sweetness
- Fresh berries: Blueberries, raspberries, strawberries (sliced), and blackberries offer antioxidants and natural sweetness
- Gluten free granola: Ensure certified gluten free granola or try homemade versions with nuts, chia seeds, and ancient grains
- Optional additions: Unsweetened flaked coconut, honey drizzle, or nut butter for extra flavor and nutrition
I would choose leak-proof containers with separate compartments to keep ingredients fresh until lunchtime.
Fruit and Yogurt Parfait Box preparation
Bento-style lunchboxes with multiple compartments work best for keeping ingredients separate. Wash and thoroughly dry all berries. Excess moisture makes granola soggy. Slice larger fruits like strawberries into bite-sized pieces.
For pre-assembled parfaits, layer strategically: yogurt at the bottom, followed by berries, then top with granola just before eating. I pack components separately for assembly at lunchtime.
Fruit and Yogurt Parfait Box storage tips
Keep all ingredients separate until eating time. Store granola in a separate compartment to prevent sogginess.
Include ice packs when transporting. For convenience, freeze the yogurt cup overnight—it’ll thaw perfectly by lunch while keeping everything else cool.
Whole fruits stay fresher longer than cut varieties. Use airtight containers to preserve freshness.
These parfait boxes stay fresh for 3-4 days when properly stored. Granola will soften to a chewy consistency if mixed with yogurt ahead of time.
Conclusion
Overall, solid lunch options that work. These 27 ideas solve the gluten-free lunch problem without drama.
Bento containers make everything easier. Keep things separated. Pack with ice packs. Done.
No more boring lunch boxes. These recipes stay fresh and taste good. Much better than the same old sandwich routine.
FAQs
Q1. What are some easy gluten-free lunch options that stay fresh all day?
Some great gluten-free lunch options include charcuterie snack boxes, zucchini noodle caprese, falafel lettuce wraps, chickpea salad bento, and mini corn dog muffins. These options are not only delicious but also maintain their freshness and texture until lunchtime when properly stored.
Q2. How can I make a gluten-free lunch box more interesting for kids?
To make gluten-free lunches more appealing for kids, try fun options like DIY pizza for lunch, mini pancake brunch boxes, or peanut butter banana roll-ups. These interactive and visually appealing meals can make lunchtime more exciting while still adhering to gluten-free dietary needs.
Q3. Are there any protein-rich gluten-free lunch ideas for adults?
Yes, there are several protein-packed gluten-free lunch options suitable for adults. Consider trying the egg and cheese protein box, smoked salmon pinwheels, or keto ham and cheese roll-ups. These options provide ample protein to keep you satisfied throughout the day.
Q4. What are some vegetarian gluten-free lunch ideas?
For vegetarian gluten-free lunches, you can try options like the vegetarian club sandwich, Greek salad skewers, or zucchini noodle caprese. These meals offer a good balance of nutrients and flavors without compromising on dietary restrictions.
Q5. How long do gluten-free lunch box meals typically stay fresh?
Most gluten-free lunch box meals, when properly stored, can stay fresh for 3-5 days in the refrigerator. However, it’s best to consume items like sandwiches or wraps within 24 hours for optimal texture. Always include an ice pack when transporting perishable items to maintain food safety until lunchtime.