
You know, I used to think serving vegetables was just… well, a chore. Something you *had* to do. But then something amazing happened. It was a crazy weeknight, and I’d prepped this tray of colorful veggies ahead of time, all ready to go. The aroma of garlic and herbs roasting just filled the kitchen, and when I served it, my kids, who are usually *so* picky, actually dove right in! That’s when I realized that delicious, healthy veggie sides are totally doable, even when life is chaotic. That’s the magic behind Why Everyone Loves This Veggie Sides Recipes (+ Make-Ahead Tips). It’s all about making cooking enjoyable and serving food that nourishes your family, without all the stress!
Here at my kitchen, we believe that every meal should be special, and that includes your veggie sides! Forget boring steamed broccoli (unless that’s your jam, of course!). We’re talking about vibrant, flavorful dishes that can actually be prepped ahead of time, saving your sanity on those busy weeknights. Imagine pulling something out of the fridge that just needs a quick toss or a gentle reheat, and it tastes like you spent hours on it. That’s the goal! It’s about making your home cooking shine, one delicious veggie side at a time.
Why Everyone Loves This Veggie Sides Recipes (+ Make-Ahead Tips)
You know what makes a meal truly sing? It’s not always the main event! Sometimes, it’s those incredible veggie sides that steal the show. We’re talking about dishes that are bursting with flavor, packed with goodness, and, best of all, totally doable for busy home cooks. These aren’t just recipes; they’re lifesavers! They transform a simple weeknight dinner into something special and make entertaining so much easier. Plus, thinking seasonally means you’re always using the freshest, most delicious produce available. That’s the real secret to why Why Everyone Loves This Veggie Sides Recipes (+ Make-Ahead Tips) becomes a go-to. They offer that perfect blend of health, taste, and pure convenience!
As a chef, I’ve seen firsthand how a fantastic veggie side can elevate any plate. The magic lies in understanding how to coax the best out of simple ingredients, and honestly, making them ahead of time is a game-changer. That’s where this recipe really shines! Check out some other great ideas for make-ahead sides for when you need them!
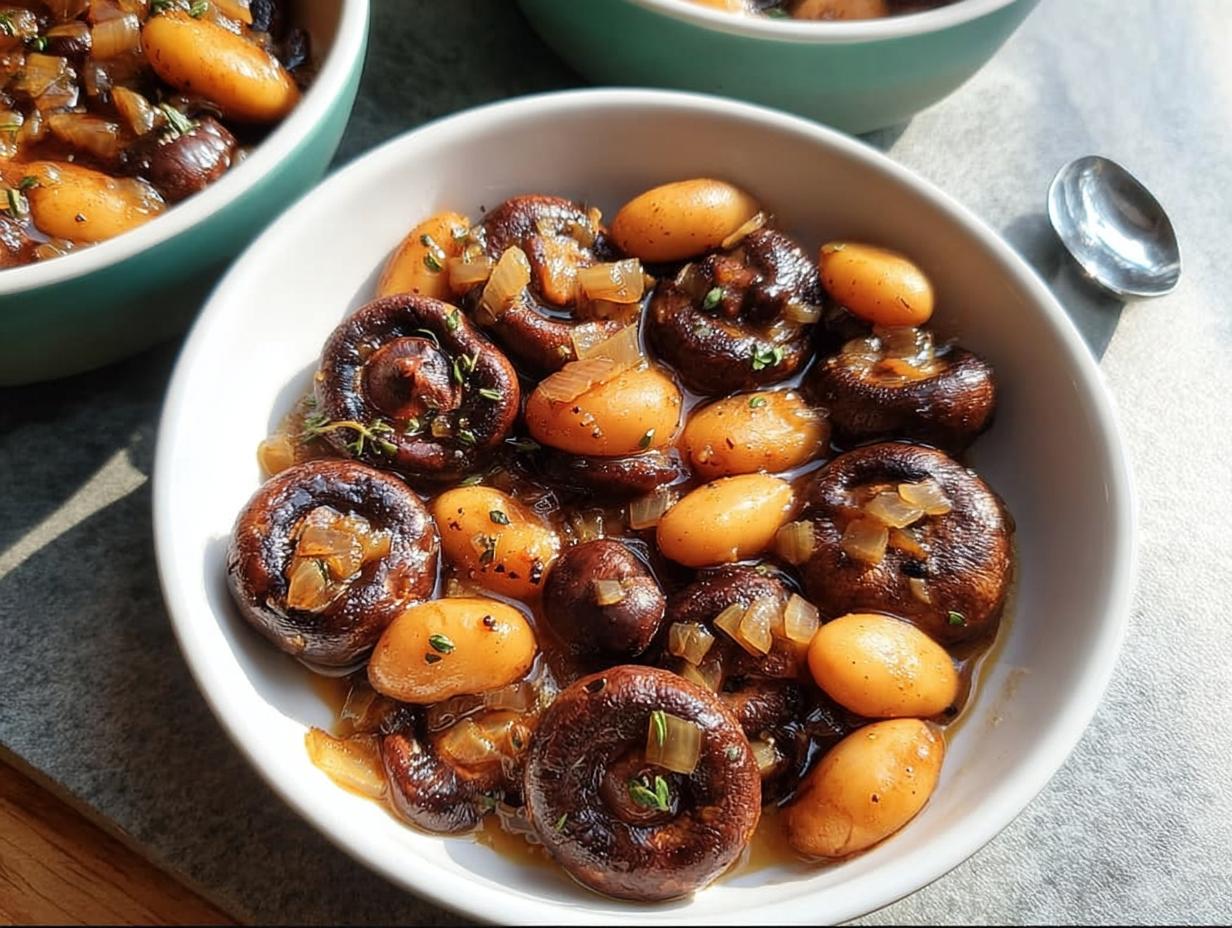
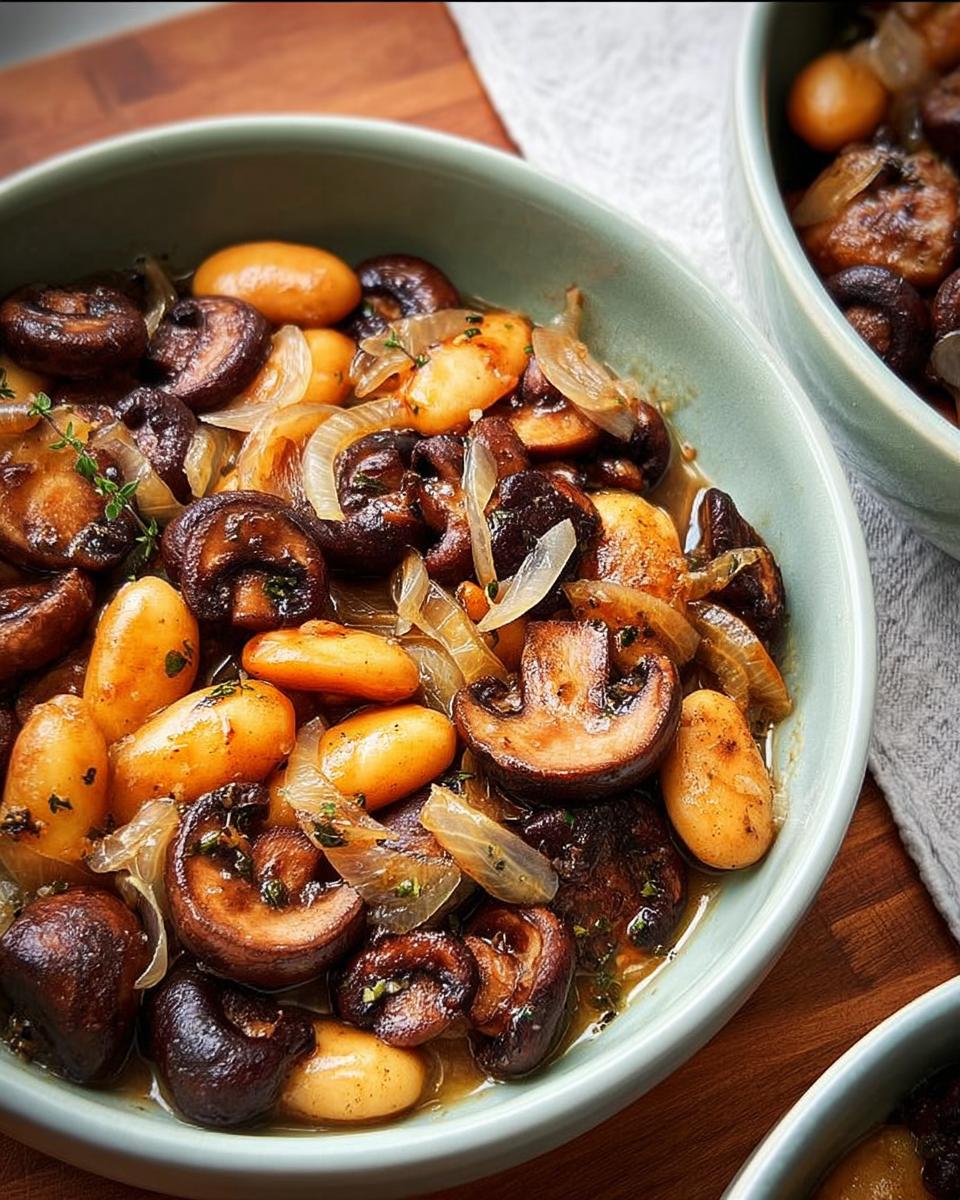
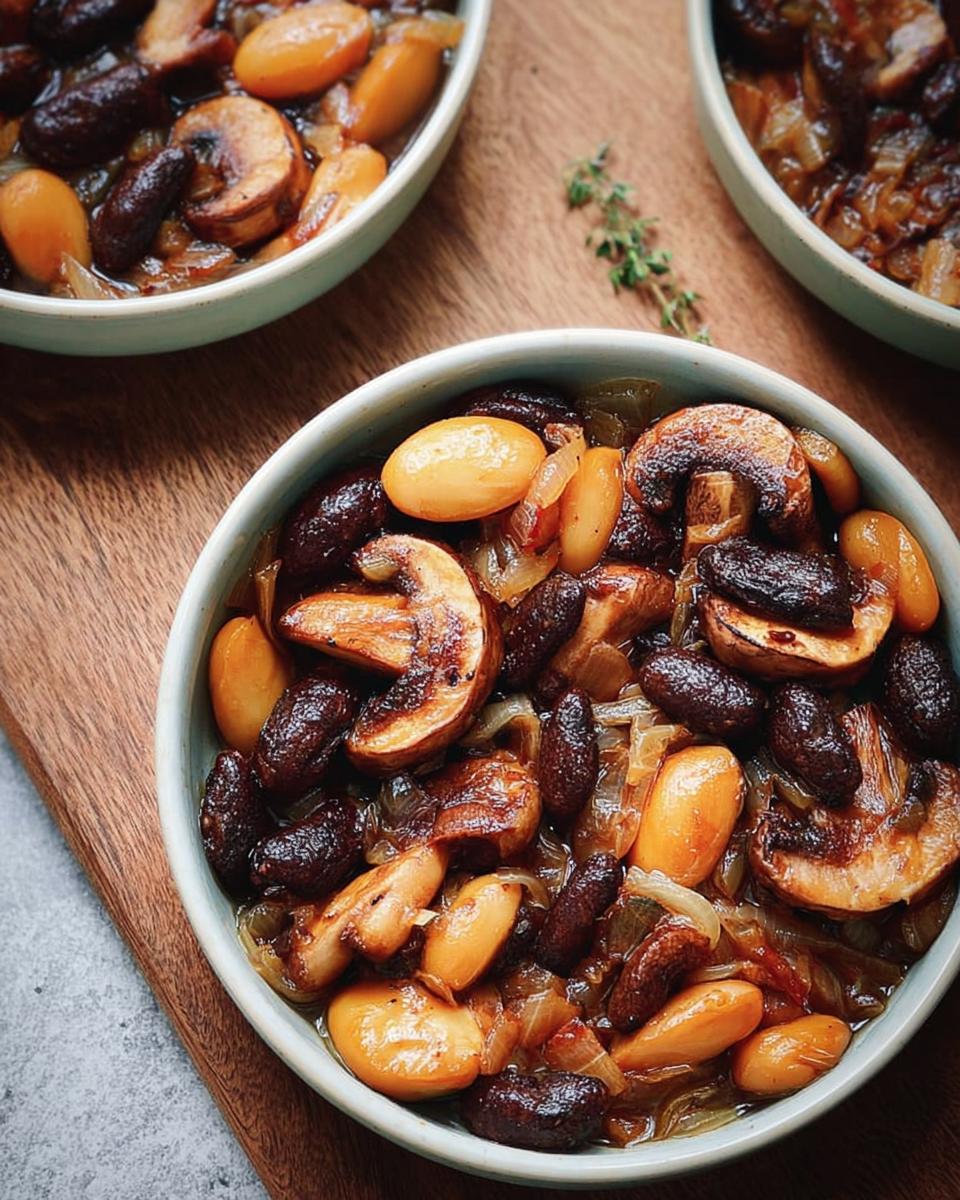
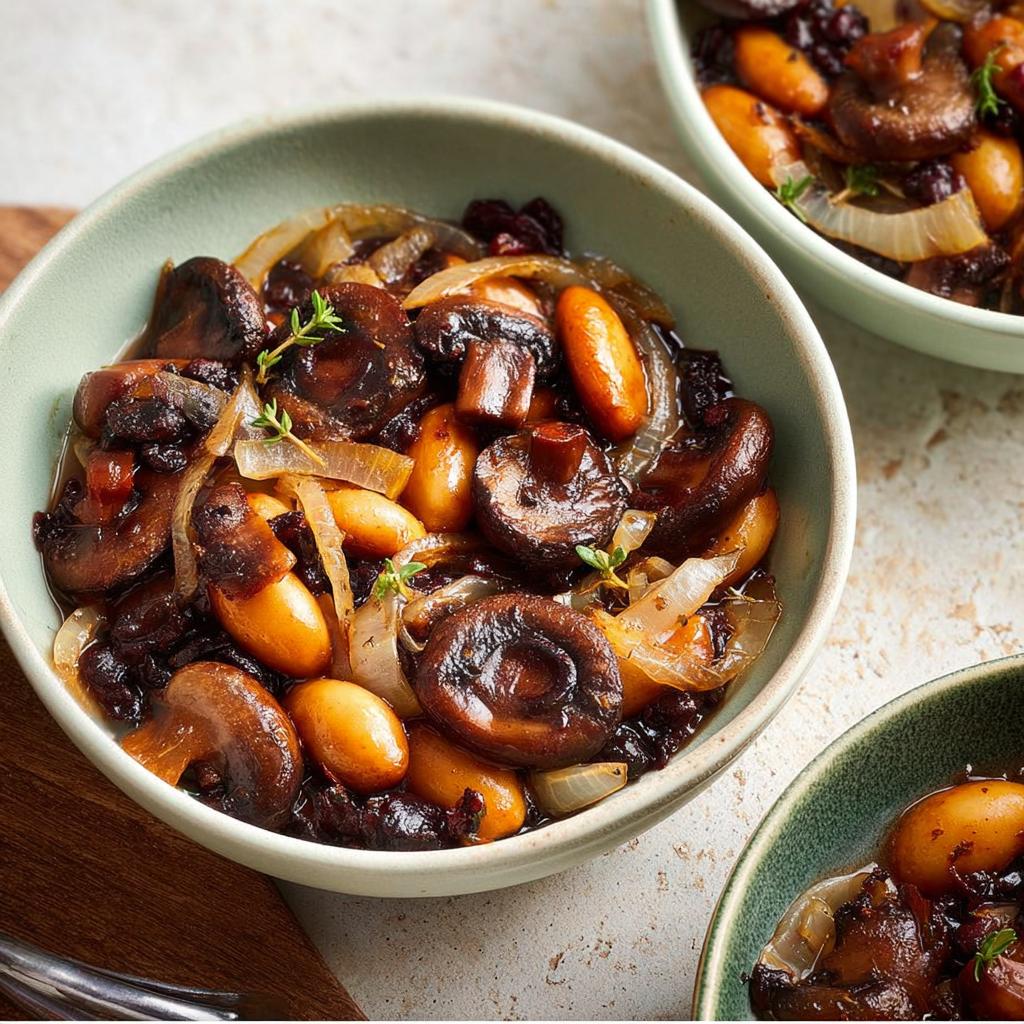
The Magic of Roasted Mushrooms with Shallots and Thyme
Let me tell you, these mushrooms are something else. When they hit the oven, the whole kitchen fills with this amazing aroma of earthy mushrooms, sweet shallots, and fragrant thyme. They get these lovely little browned edges, a perfect tender texture, and they soak up all those delicious dressing flavors. It’s so simple, but it feels incredibly fancy! The shallots get soft and sweet, the garlic just melts in, and a tiny pinch of cayenne gives it just a whisper of warmth. Seriously, it’s the perfect way to make a simple vegetable side dish feel like a gourmet treat.
Gather Your Ingredients for Roasted Mushrooms
Alright, let’s get cooking! To whip up these unbelievably tasty roasted mushrooms, you’ll need just a few things. I love using a mix of mushrooms for the best flavor and texture – think crimini, shiitake, oyster, or even some fancy trumpet mushrooms if you can find them! It makes such a difference.
- For the Mushrooms:
- 4 pounds mushrooms (a mix is great!), cleaned and cut into bite-sized pieces
- 1 tablespoon grapeseed oil
- 1 pinch salt
- 1 pinch freshly ground black pepper
And for that zippy dressing that just makes everything pop:
- For the Dressing:
- 2 cloves garlic, minced (don’t skimp here!)
- 1/2 pound shallots, cleaned and sliced nice and thin
- 1 splash olive oil
- 2 tablespoons chopped fresh thyme (fresh is key!)
- 1/4 teaspoon cayenne pepper (just a little kick!)
- 2 teaspoons red wine vinegar
Ingredient Notes and Substitutions
If you can’t find grapeseed oil, no worries! A neutral oil like avocado or even a light olive oil will work just fine. And if you’re not a big fan of thyme, rosemary is a pretty fantastic substitute, or you could even go with a little bit of dried Herbes de Provence if that’s what you have on hand. The cayenne pepper is optional, but I seriously recommend it for that subtle warmth!
How to Prepare This Delicious Veggie Sides Recipe
Okay, now for the fun part! Getting these amazing roasted mushrooms from your kitchen to the table is super straightforward. First things first, crank up that oven to 400°F (200°C). While it’s heating up, make sure your mushrooms are nice and clean. If you’ve got some big guys, just chop them into bite-sized pieces so they cook evenly. Toss all those lovely mushrooms into a big bowl.
Now, let’s get them ready for their roast! Drizzle in that grapeseed oil, sprinkle in your salt and pepper, and give everything a good toss so each mushroom piece is coated. Spread them out on a baking sheet – and try to do it in a single layer if you can, that’s key for getting them nicely roasted and not steamed. Pop them in the oven for about 20 to 25 minutes. Give them a stir about halfway through to make sure they get beautifully browned all over.
While your mushrooms are doing their thing in the oven, let’s whip up that dreamy dressing. In a small bowl, combine the minced garlic, those thinly sliced shallots, a splash of olive oil, the fresh thyme, that little pinch of cayenne pepper for warmth, and the red wine vinegar. Give it a good stir!
As soon as those roasted mushrooms are tender and smelling heavenly, take them out of the oven. Transfer those hot mushrooms right into your serving bowl and pour that fantastic dressing over them. Toss it gently. The heat from the mushrooms will lightly cook the garlic and shallots, softening them up and making the flavors sing. Let it all sit for about 10 minutes to let those amazing flavors meld together beautifully. It’s almost too good to wait, but trust me, it’s worth it!
Need some one-pot meal ideas? This recipe is a winner, but sometimes you just need quick sides!
Tips for Perfect Roasted Mushrooms
Don’t overcrowd your baking sheet! Giving those mushrooms space is super important for achieving that lovely roasted texture instead of getting them all steamy. Also, using a mix of mushroom varieties really does add a depth of flavor that you just can’t get with just one kind. And remember, the heat from the finished mushrooms is what really helps marry the flavors in the dressing, so don’t let them cool down too much before you combine them!
Make-Ahead Magic for Your Veggie Sides Recipes
One of the best things about this roasted mushroom dish, and honestly, a huge part of why I love sharing these kinds of veggie sides, is how incredibly make-ahead friendly they are! Life gets so busy, right? So, knowing you can get a head start is a total lifesaver. You can totally roast the mushrooms ahead of time and keep them in an airtight container in the fridge for up to two days. The dressing? Yup, that can be mixed up separately and stored in its own little container. Then, right before you’re ready to serve, just toss them together! The residual heat from the mushrooms will warm up the dressing perfectly, or you can let them mellow out at room temperature for about 30 minutes before combining. How easy is that?
It’s those little conveniences that make healthy eating feel totally achievable, even on the craziest days. Seriously, having delicious veggies ready to go makes such a difference. If you’re looking for more make-ahead ideas, I’ve got more tricks up my sleeve!
Frequently Asked Questions About Veggie Sides
Got questions about these amazing veggie sides? I’ve got you! It’s totally normal to wonder about substitutions or how to make things work best for your lifestyle.
Can I use different mushrooms?
Absolutely! I love a mix because it gives you different textures and subtle earthy flavors, but feel free to use your favorite. Cremini are always a winner, and shiitake mushrooms add a wonderful depth. Just make sure to cut them into similar bite-sized pieces so they cook evenly!
How long do these last?
This dish is fantastic for make-ahead! You can store the roasted mushrooms and the dressing separately in airtight containers in the refrigerator for up to 2 days. Combine them and dress the mushrooms about 30 minutes before serving to let the flavors meld, or serve them at room temperature.
Can I make this vegan?
This recipe is pretty much vegan as is! Grapeseed oil and olive oil are plant-based, and there’s no dairy or animal products involved. Just double-check your cayenne pepper is pure, and you’re good to go. Enjoy your delicious vegan veggie side!
What can I serve this with?
Oh, the possibilities are endless! This mushroom dish is amazing with pretty much anything. Think roasted chicken, grilled steak, salmon, or even as a hearty addition to a pasta dish. It’s a versatile side that adds a gourmet touch to any meal. If you need more main dish ideas, feel free to reach out!
Serving and Storing Your Roasted Mushrooms
This dish is so versatile! I usually serve my roasted mushrooms warm, right after they’ve had a little time for the flavors to meld. The sweet shallots and savory mushrooms are just divine this way. They’re also fantastic at room temperature, making them perfect for potlucks or when you’re entertaining. They pair beautifully with almost anything – think grilled chicken, a nice piece of salmon, or even a hearty steak. They really do elevate even the simplest main course!
Leftovers? No problem! Just pop them into an airtight container and they’ll keep in the fridge for a good 2-3 days. When you’re ready to enjoy them again, you can let them come to room temperature for about 30 minutes, or give them a gentle warm-up in a low oven or even a quick sauté on the stovetop. They’re still delicious either way! For more main dish ideas, check out this Tuscan Chicken recipe – it’s a favorite!
Estimated Nutritional Information
Now, I always like to give you a heads-up that these numbers are just estimates, okay? Since we all use slightly different ingredients or maybe a different splash of this or that, your exact nutrition might vary a bit. But generally, this dish is pretty wholesome! It’s loaded with good stuff from the mushrooms and veggies. For a more detailed look, you can always check out resources for low-carb meal planning!
Share Your Culinary Creations!
Okay, now that you’ve (hopefully!) made these amazing roasted mushrooms, I want to hear ALL about it! Did you try different mushroom varieties? Any fun twists you added? Please, leave a comment below and tell me what you thought – a star rating would be amazing too! And if you snap a pic, tag me on social media! I love seeing what you create in your own kitchens. You can learn more about me and my kitchen adventures here!
Roasted Mushrooms with Shallots and Thyme
Ingredients
Equipment
Method
- Preheat your oven to 400°F (200°C). Clean the mushrooms and cut any larger ones into bite-sized pieces. Place them in a large bowl.
- Add the grapeseed oil, salt, and pepper to the mushrooms. Toss to coat evenly.
- Spread the mushrooms in a single layer on a baking sheet.
- Roast for 20-25 minutes, or until tender and lightly browned, stirring halfway through.
- While the mushrooms are roasting, prepare the dressing. In a small bowl, combine the minced garlic, sliced shallots, olive oil, chopped thyme, cayenne pepper, and red wine vinegar. Stir well.
- Once the mushrooms are done roasting, remove them from the oven. Transfer the hot mushrooms to a serving bowl. Pour the dressing over the hot mushrooms and toss gently to combine. The heat from the mushrooms will lightly cook the garlic and shallots.
- Let the dish cool for about 10 minutes before serving. This allows the flavors to meld.
- Serve warm as a delicious side dish. This recipe can be made ahead and served at room temperature or gently reheated.
Notes
Tried this recipe?
Let us know how it was!
Certified Gluten-Free Culinary Master
Everything changed in 2017 when I received my celiac diagnosis. After ten years as a traditional pastry chef creating elaborate wedding cakes and French pastries, I suddenly couldn’t even taste my own work. It felt like the end of my culinary world.
Instead, it became my greatest challenge. I had to completely relearn baking – understanding how gluten-free flours behave differently, how they bind, how they absorb moisture. Adding the low-carb requirement? That was like solving a puzzle with half the pieces missing.
My breakthrough came with what I now call my “foundation flour blend system” – different combinations that seamlessly replace wheat flour while maintaining low-carb macros. These techniques have been adopted by culinary schools and have helped countless bakers who thought their favorite treats were gone forever.
That first successful batch of gluten-free, low-carb chocolate chip cookies? Watching my husband close his eyes and smile told me I’d found my true calling. Now, with over 300 tested recipes, I prove daily that dietary restrictions don’t mean culinary limitations.
When I’m not experimenting in my Austin test kitchen, I’m teaching weekend workshops or tending my herb garden with Biscuit, my rescue beagle who’s become an expert at detecting oven timers.