
Oh, the sheer joy of biting into a perfectly crispy, flavor-packed chicken wing! It’s like a party in your mouth, right? But if you’re new to the kitchen, the idea of making them yourself might feel a little… daunting. Trust me, I get it! I still remember the first time I attempted to make chicken wings for a gathering. My friends and I had planned a game night, and I wanted to impress them with a batch of homemade wings. Armed with nothing but a random recipe I found online, I nervously watched as they baked in the oven. To my surprise, they turned out crispy and delicious, and my friends devoured them within minutes! That experience ignited my passion for cooking and taught me that anyone can whip up mouth-watering dishes that bring people together. That’s exactly why I put together The Ultimate Chicken Wings Recipes Guide for Beginners – to show you just how easy and rewarding it can be!
Why You’ll Love The Ultimate Chicken Wings Recipes Guide for Beginners
So, why should you dive into this guide? Well, it’s designed with YOU in mind! Forget complicated steps and ingredient lists that look like a science experiment. Here, you get:
- Super Simple Instructions: We break everything down so even a total newbie can follow along and get amazing results.
- Deliciously Crispy Wings: Get ready for that satisfying crunch every time. We’ll show you how!
- Confidence Boost: Cooking shouldn’t be scary! You’ll walk away feeling like a kitchen rockstar, totally ready to host your next game day.
Essential Tools for Crispy Chicken Wings
Alright, let’s talk gear! You don’t need a fancy restaurant kitchen to make killer wings. A few simple tools will make all the difference in getting that perfect, crispy exterior. Grab a good **deep fryer** – it’s honestly a game-changer for achieving that even, golden crunch. You’ll also want a sturdy **large bowl** for tossing those wings and getting them perfectly coated. And, of course, a reliable set of **measuring cups** and **measuring spoons** are your best friends for getting those seasonings just right. Finally, have some **tongs** handy for safely moving those hot wings, and plenty of **paper towels** to soak up any extra oil. Trust me, having these basics ready makes the whole process way smoother!
The Ultimate Chicken Wings Recipes Guide for Beginners: Ingredients You’ll Need
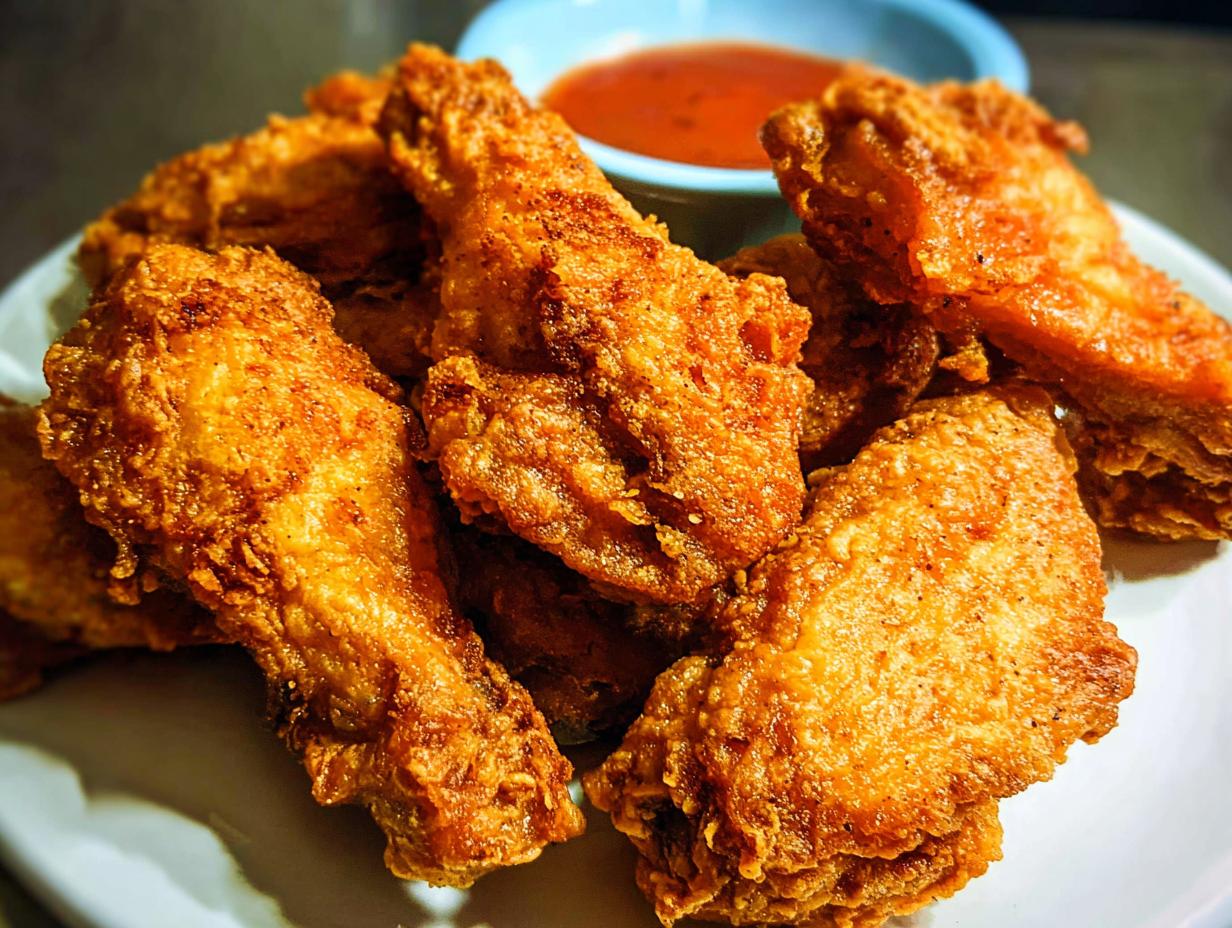
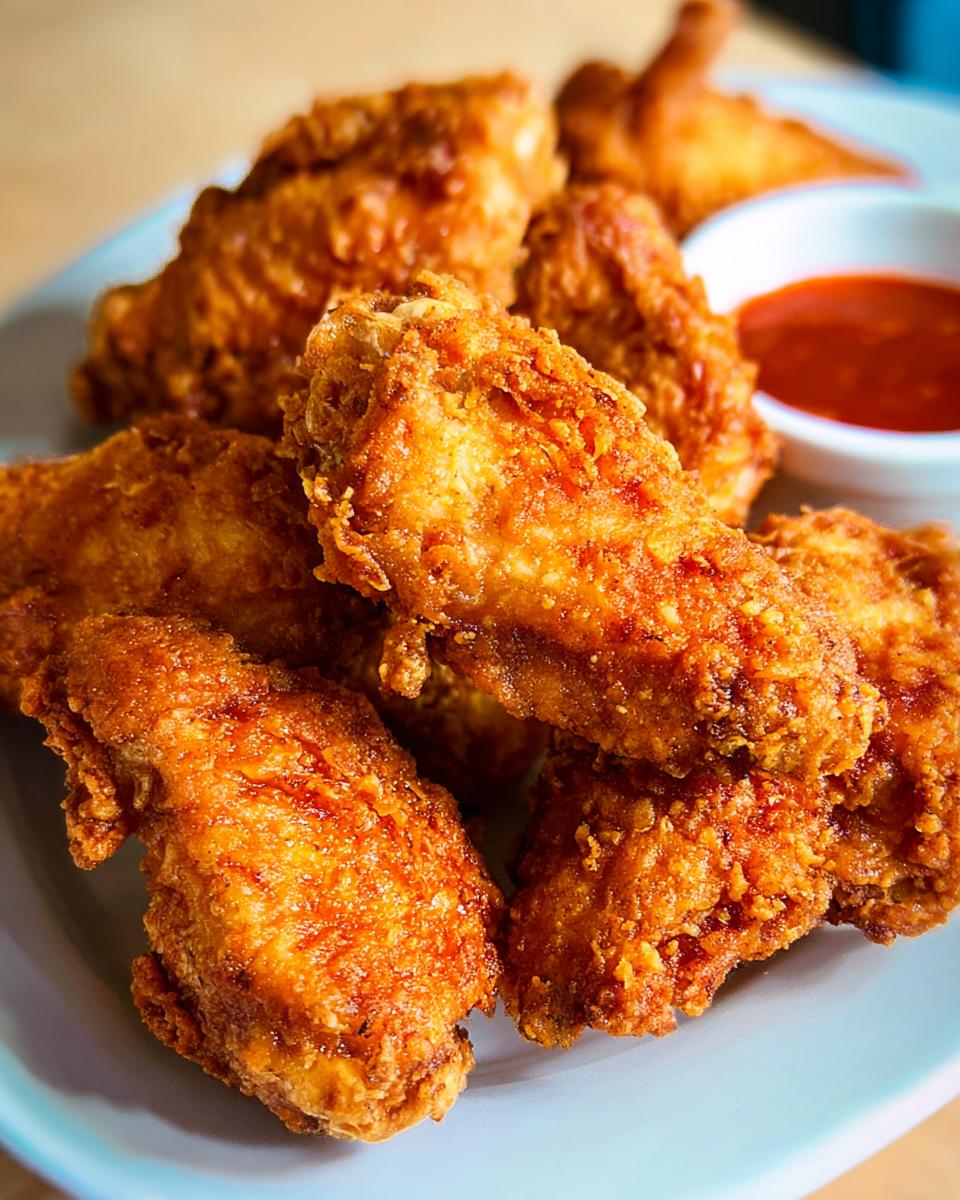
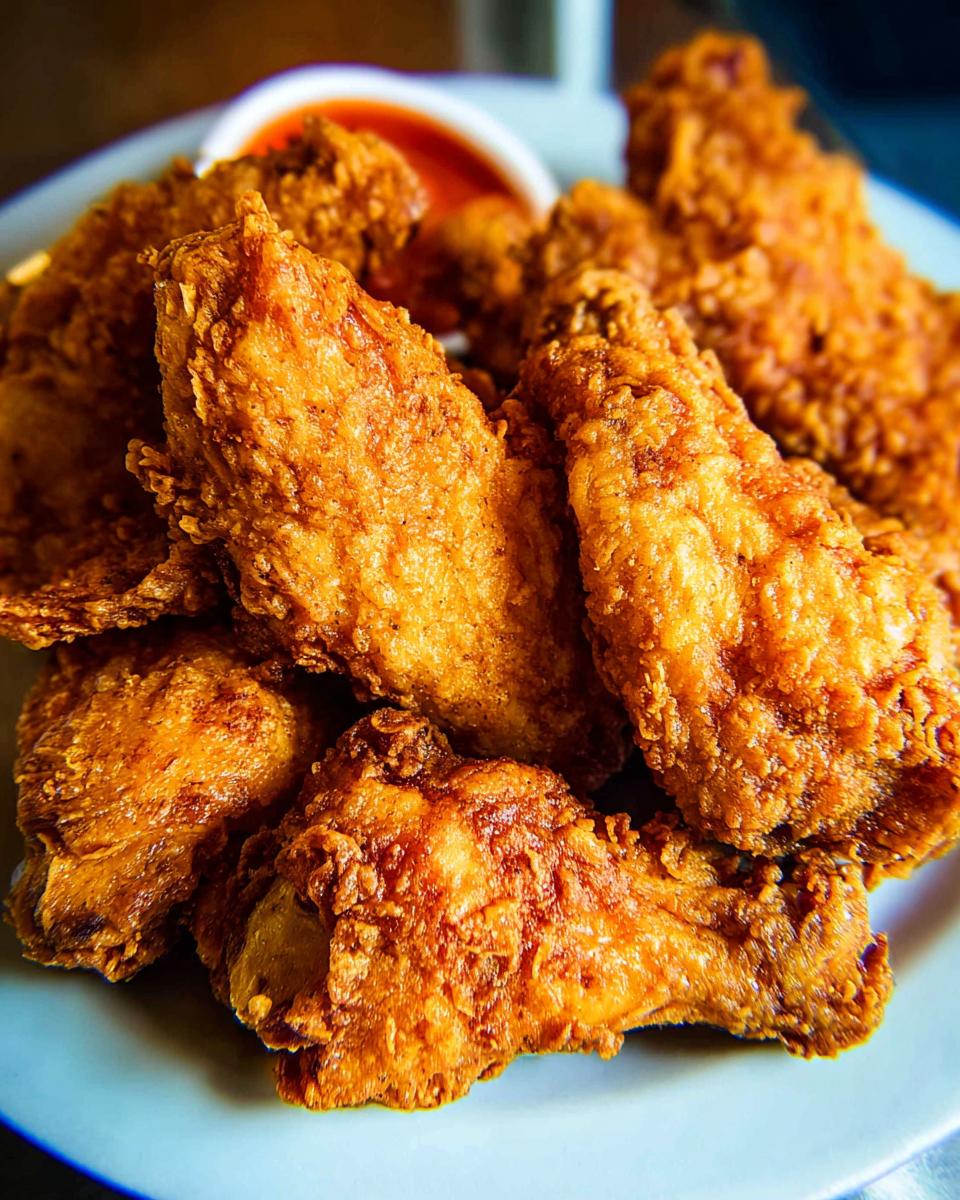
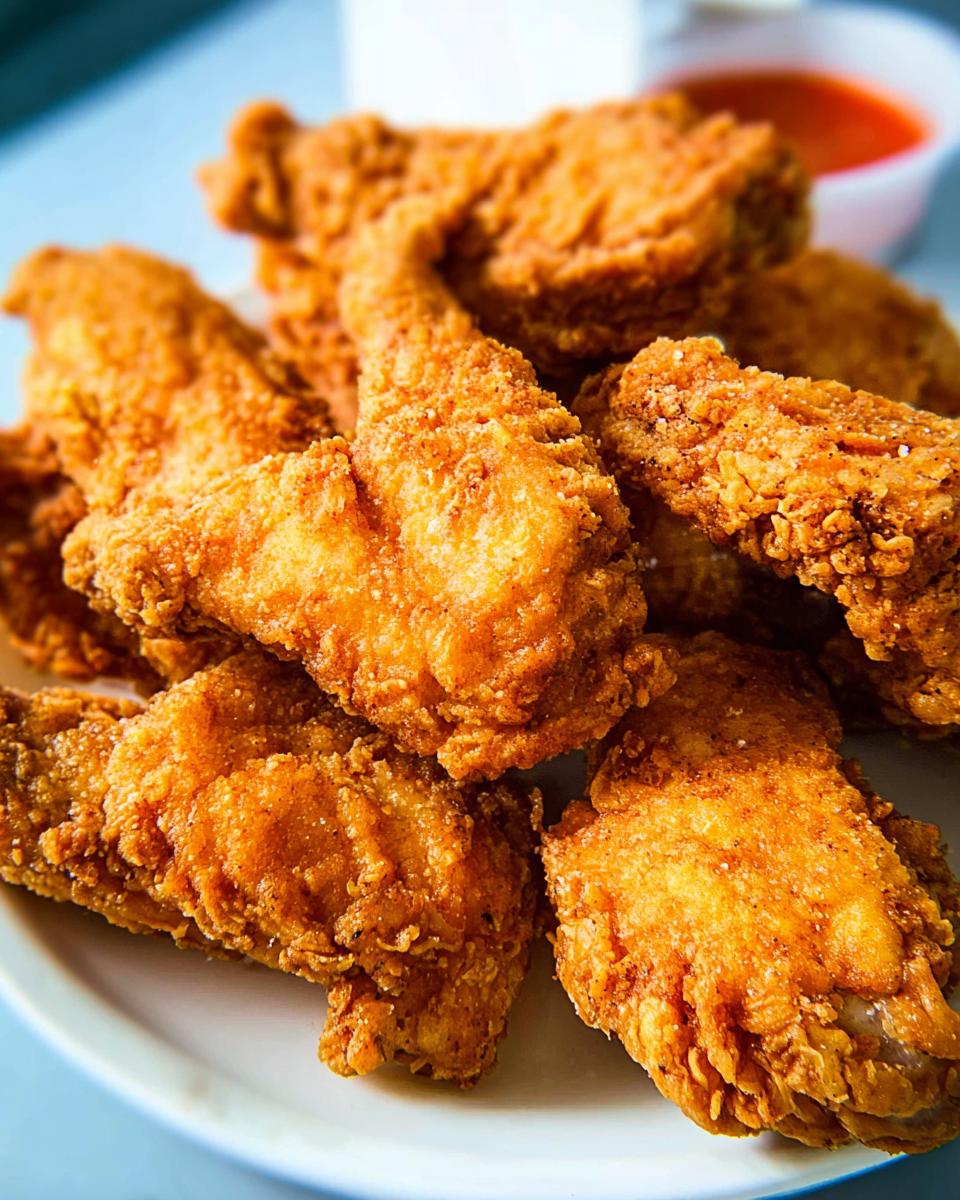
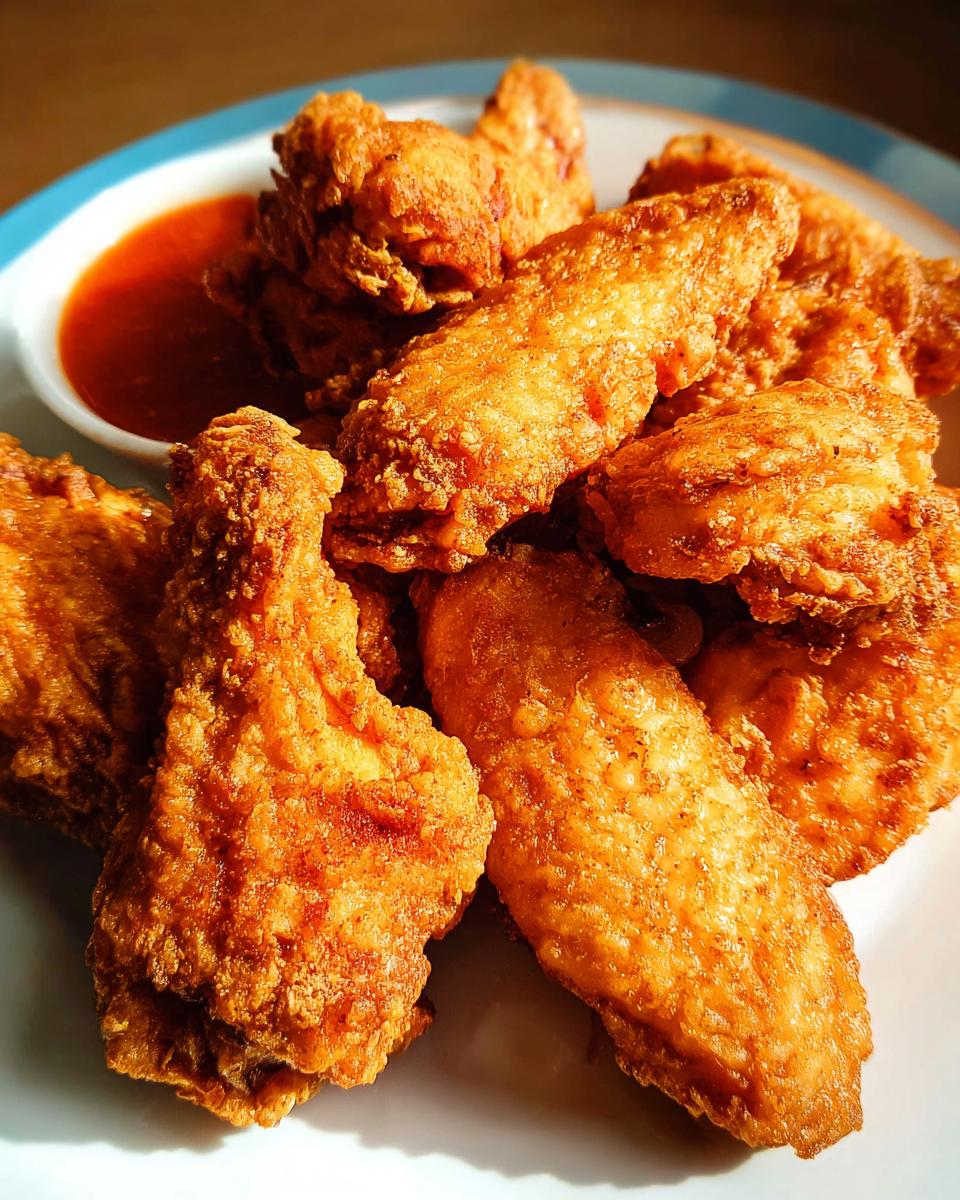
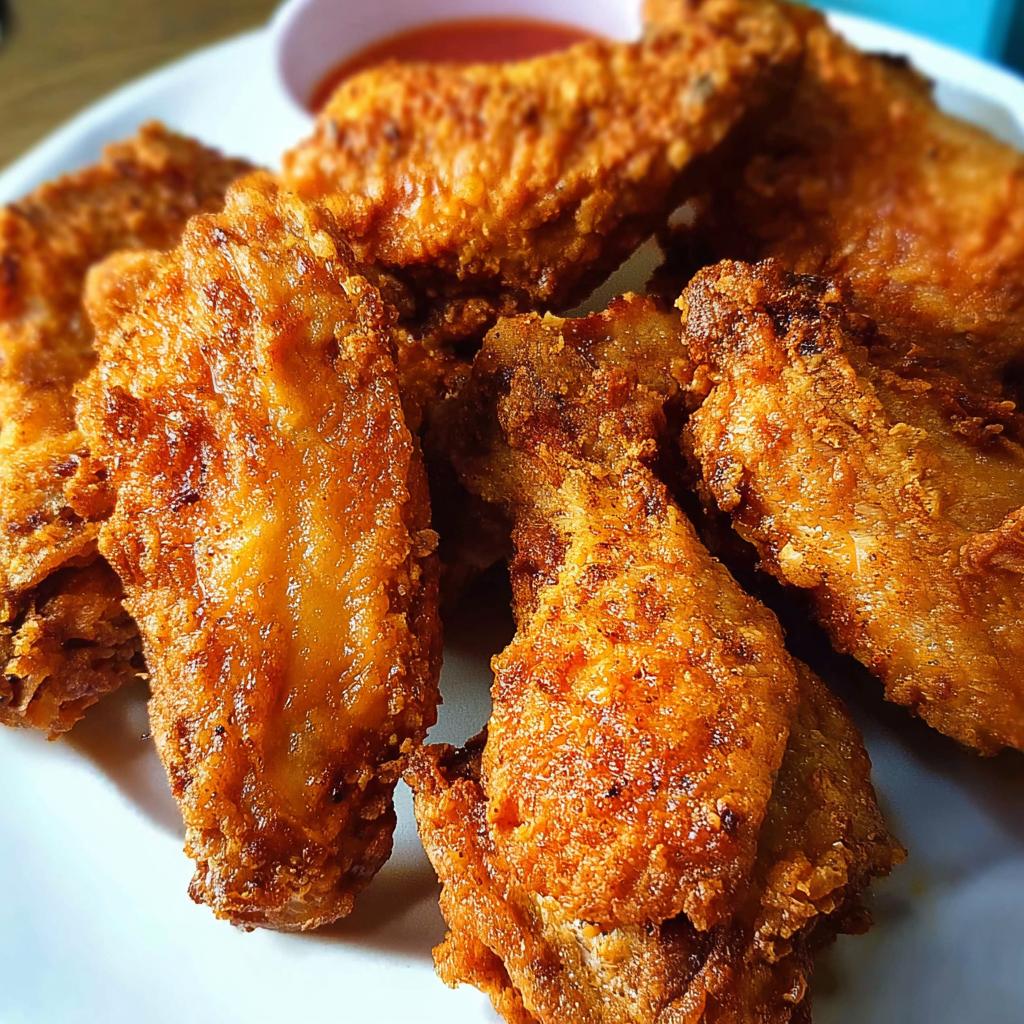
Okay, let’s get down to the nitty-gritty: the ingredients! For this base recipe, we’re keeping it simple but oh-so-delicious. You’ll need about 6 cups of canola oil for that gorgeous deep-frying, enough to get nice and bubbly. For the wings themselves, grab 2 pounds of chicken wings – make sure they’re drumettes and wings separated, so you get about 12 pieces total. Now, for the magic coating: you’ll need 3/4 teaspoon of kosher salt (we’ll divide this, so keep that in mind!), then 1/2 cup of all-purpose flour, 1 teaspoon of paprika for that lovely color, 1/2 teaspoon of garlic powder, 1/4 teaspoon of onion powder, and a pinch of black pepper and cayenne pepper. Using good quality ingredients really makes a difference, trust me!
Step-by-Step Instructions for The Ultimate Chicken Wings Recipes Guide for Beginners
Alright, rookie chefs, get ready to make some magic! Making these chicken wings is way easier than you think. Just follow these simple steps, and you’ll have perfectly crispy, crave-worthy wings in no time. First things first, grab some paper towels and really pat those chicken wings dry. Seriously, this is crucial! The drier they are, the crispier they’ll get. Don’t rush this part – it makes a huge difference for your amazing chicken wings.
Next, in a big bowl, let’s whip up our dry coating. Toss in the all-purpose flour, paprika, garlic powder, onion powder, black pepper, cayenne pepper, and about 1/4 teaspoon of that kosher salt. Give it all a good mixy-mix until everything is beautifully combined. Now, dump those nice and dry chicken wings right into that bowl of deliciousness. Toss ’em around until every single wing is evenly coated. You want them looking nicely seasoned!
Time for the fun part – frying! Heat up your canola oil in your deep fryer to a nice, hot 375°F (190°C). Once it’s shimmering and ready, carefully, and I mean *carefully*, add your coated chicken wings to the hot oil. If you have a ton of wings, it’s better to do them in batches so they don’t get all crowded and sticky. Fry them for about 8 to 10 minutes. You’re looking for that perfect golden-brown color and knowing they’re cooked all the way through. For more tips on perfect frying, you can check out this guide.
Once they’re looking amazing, use your tongs to gently lift the wings out of the oil. Place them on a plate lined with a few layers of paper towels. This is just to catch any extra oil so they stay perfectly crispy. Right away, while they’re still piping hot, sprinkle on the rest of your kosher salt, about 1/2 teaspoon. And that’s it! Serve them up immediately and watch ‘em disappear!
Pro Tips for The Ultimate Chicken Wings Recipes Guide for Beginners
Alright, wanna-be wing wizards, listen up! Chef Maria here, dropping some insider knowledge to make your wings absolutely *chef’s kiss* perfect. First off, that oil temperature? It’s your best friend for getting them super crispy. If it’s not hot enough, your wings will get greasy. Too hot, and they’ll burn on the outside before they’re cooked inside. Stick to that 375°F (190°C) like glue! Also, remember how I said to fry in batches? Don’t skip that! Overcrowding the fryer is a surefire way to bring down the oil temperature and end up with soggy wings. We want *crispy*, remember? Finally, don’t be afraid to give those wings a little shake in the basket while they’re frying. It helps them cook evenly and get that beautiful, all-over golden crunch that makes this guide so special!
Flavor Variations to Elevate Your Chicken Wings
So, you’ve mastered the crispy base (yay!), but don’t stop there! The real fun starts *after* they’re out of the fryer. Think of your perfectly cooked wings as a blank canvas, just waiting for their flavor masterpiece. It’s super easy to dress them up, and it’s where you can really let your personality shine. You can find tons more recipe ideas over at this site, but here are a few tried-and-true flavor combos that even a beginner can nail:
Classic Buffalo Kick
You can’t go wrong with Buffalo! Melt about 1/2 cup of your favorite hot sauce (like Frank’s RedHot!) with 2-3 tablespoons of melted butter. Toss your hot wings in this glorious mixture until they’re beautifully coated. A little ranch or blue cheese dip on the side? Yes, please!
Tangy BBQ Bliss
For a smoky-sweet kick, grab about 1/2 cup of your favorite BBQ sauce. Warm it up a little in a saucepan, or even just in the microwave for a few seconds. Toss those crispy wings in until they’re glistening. So good!
Garlicky Parmesan Goodness
Craving something savory? Melt 3 tablespoons of butter, then stir in about 2-3 cloves of minced garlic (or garlic powder if you’re in a pinch!) and 1/4 cup of grated Parmesan cheese. A little pinch of parsley adds a pop of color, too. Toss your wings in this cheesy, garlicky goodness right before serving. So satisfying!
Frequently Asked Questions about The Ultimate Chicken Wings Recipes Guide for Beginners
Got questions? I’ve got answers! Cooking shouldn’t feel like a mystery, especially when it comes to making these awesome chicken wings. Here are a few things beginners often ask:
Can I bake these wings instead of frying?
Absolutely! While frying gives you that classic crispy texture, baking works too. You won’t get quite the same crunch, but it’s still delicious. Just pop those coated wings onto a baking sheet lined with parchment paper (that makes cleanup a breeze!). Bake at 400°F (200°C) for about 35-45 minutes, flipping them halfway through, until they’re golden brown and cooked through. Remember, patting them super dry before coating is still your secret weapon for crispiness, even when baking!
How do I know my chicken wings are cooked through?
This is super important! A good rule of thumb is to look for that golden-brown color all over. The juices should run clear when you pierce the thickest part with a fork or knife. Another tip is to use that meat thermometer you might have – the internal temperature should reach 165°F (74°C). But honestly, if they look fully cooked and the juices are clear, you’re golden. Remember, we’re aiming for perfectly cooked, not burnt!
What if I don’t have a deep fryer? Can I pan-fry them?
No deep fryer? No problem! You can totally pan-fry these, but you’ll need a heavy-bottomed pot or Dutch oven. Fill it with enough oil so the wings can be mostly submerged, and heat it to 375°F (190°C). Fry in batches, just like you would in a deep fryer, to avoid lowering the oil temperature. And of course, always be super careful when working with hot oil! Safety first, always!
My wings aren’t very crispy. What did I do wrong?
Okay, don’t beat yourself up! There are a few common culprits. The most likely reason is not drying the wings *really* well before coating. Moisture is the enemy of crispiness! Also, make sure your oil is at the right temperature (375°F / 190°C) – too cool and they get greasy, not crispy. Frying in batches is key too; don’t overcrowd the pan! If you’re still having trouble, check out this contact page for more personalized tips.
Serving and Storing Your Delicious Chicken Wings
Alright, now that you’ve got these amazing, crispy chicken wings, what do you serve with them? So many good things! Classic ranch or blue cheese dip is always a winner, obviously. You could also whip up some quick celery and carrot sticks for a fresh crunch. Looking for something a bit more substantial? Check out these easy sides – they pair perfectly!
Got leftovers? Lucky you! Let them cool completely, then pop ’em in an airtight container in the fridge for up to 3 days. To reheat and bring back that glorious crispiness, your best bet is the oven or an air fryer. Pop them in a preheated oven at 375°F (190°C) for about 10-15 minutes, or give them a few minutes in the air fryer. Microwaving tends to make them a bit soft, so try to avoid that if you want that crunch back!
Nutritional Information
Just a heads-up, the nutritional info is an estimate, okay? Things can change depending on the exact brands you use and how much sauce you decide to slather on. But generally, a serving of these foundational crispy chicken wings (remember, this is *before* any sauce!) is roughly around 350-400 calories, with about 20-25g of fat, a solid 25-30g of protein, and maybe 5-10g of carbs from the coating. Pretty straightforward!
Share Your Wing Creations!
Alright, wing masters! Did you give these a whirl? I absolutely *love* seeing what you whip up in your kitchens. Drop a comment below to tell me how they turned out, what flavors you tried, or if you’ve got any awesome tips of your own! And seriously, if you snapped some pics of your amazing wings, tag us on social media! You can see what others are up to on our page. Show off those crispy creations!
The Ultimate Chicken Wings Recipes Guide for Beginners
Ingredients
Equipment
Method
- Pat the chicken wings dry with paper towels. This helps them get crispy.
- In a large bowl, combine the flour, paprika, garlic powder, onion powder, black pepper, cayenne pepper, and 1/4 teaspoon of the kosher salt. Mix well.
- Add the chicken wings to the bowl with the flour mixture. Toss until the wings are evenly coated.
- Heat the canola oil in a deep fryer to 375°F (190°C).
- Carefully add the coated chicken wings to the hot oil, working in batches if necessary to avoid overcrowding the fryer. Fry for about 8-10 minutes, or until golden brown and cooked through.
- Remove the wings from the oil using tongs and place them on a plate lined with paper towels to drain excess oil.
- Sprinkle the remaining 1/2 teaspoon of kosher salt over the hot wings. Serve immediately.
Notes
Tried this recipe?
Let us know how it was!
Certified Gluten-Free Culinary Master
Everything changed in 2017 when I received my celiac diagnosis. After ten years as a traditional pastry chef creating elaborate wedding cakes and French pastries, I suddenly couldn’t even taste my own work. It felt like the end of my culinary world.
Instead, it became my greatest challenge. I had to completely relearn baking – understanding how gluten-free flours behave differently, how they bind, how they absorb moisture. Adding the low-carb requirement? That was like solving a puzzle with half the pieces missing.
My breakthrough came with what I now call my “foundation flour blend system” – different combinations that seamlessly replace wheat flour while maintaining low-carb macros. These techniques have been adopted by culinary schools and have helped countless bakers who thought their favorite treats were gone forever.
That first successful batch of gluten-free, low-carb chocolate chip cookies? Watching my husband close his eyes and smile told me I’d found my true calling. Now, with over 300 tested recipes, I prove daily that dietary restrictions don’t mean culinary limitations.
When I’m not experimenting in my Austin test kitchen, I’m teaching weekend workshops or tending my herb garden with Biscuit, my rescue beagle who’s become an expert at detecting oven timers.