
Oh my goodness, let’s talk about the struggle of eating well when you’re just constantly on the go! I remember those days so clearly – staring into the fridge at 7 AM, wondering what on earth I was going to pack that wouldn’t just be a sad, soggy mess by lunchtime. But then, I found the magic of meal prep! It totally changed everything. You see, having great Sandwich Ideas Recipes Meal Prep That Actually Tastes Great isn’t just a dream; it’s totally doable. This recipe for Sweet Potato and Chickpea Wraps is my absolute go-to. It’s packed with flavor, super satisfying, and preps like a dream, proving that convenience and incredible taste can absolutely go hand-in-hand. Trust me, once you try these, your lunch game will never be the same!
Why You’ll Love These Sandwich Ideas Recipes Meal Prep That Actually Tastes Great
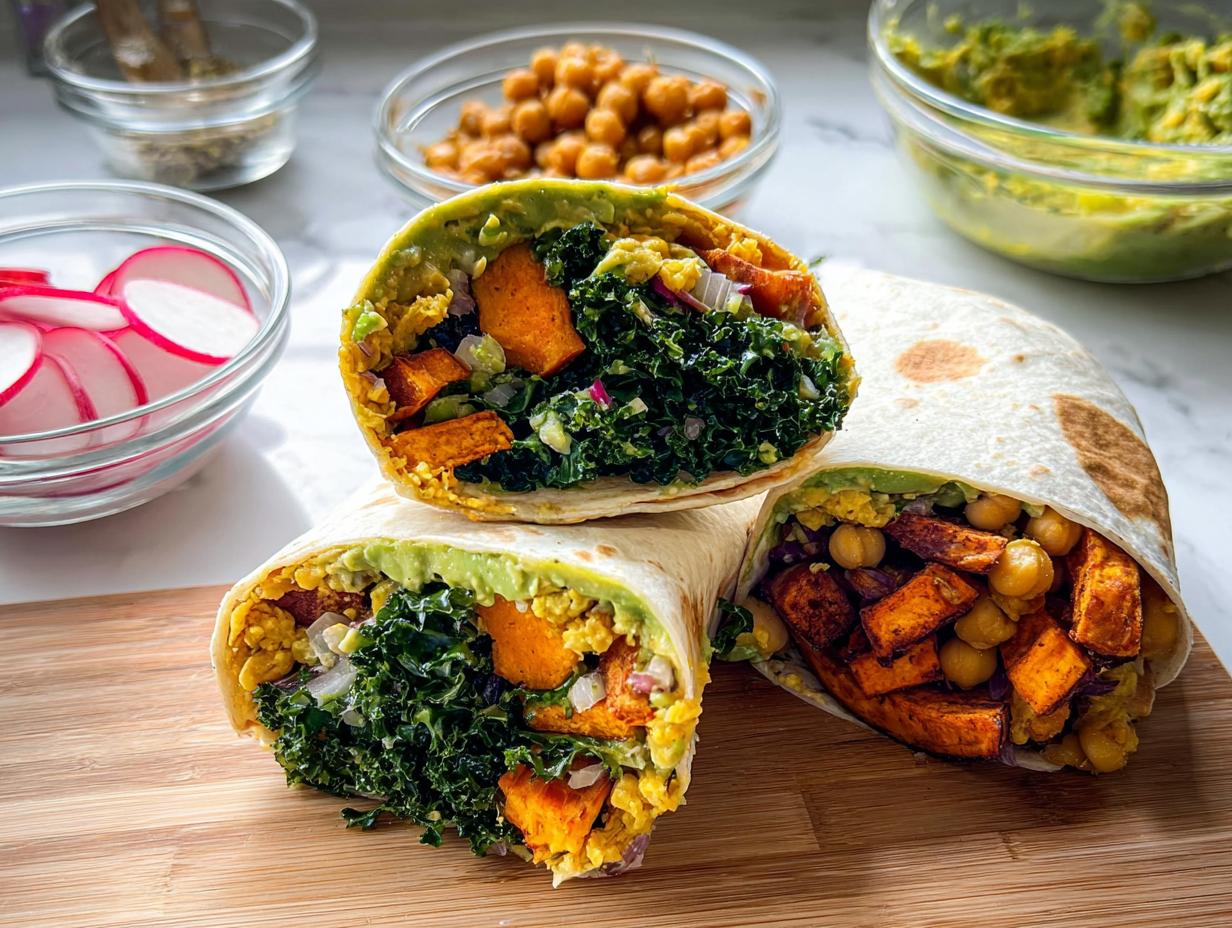
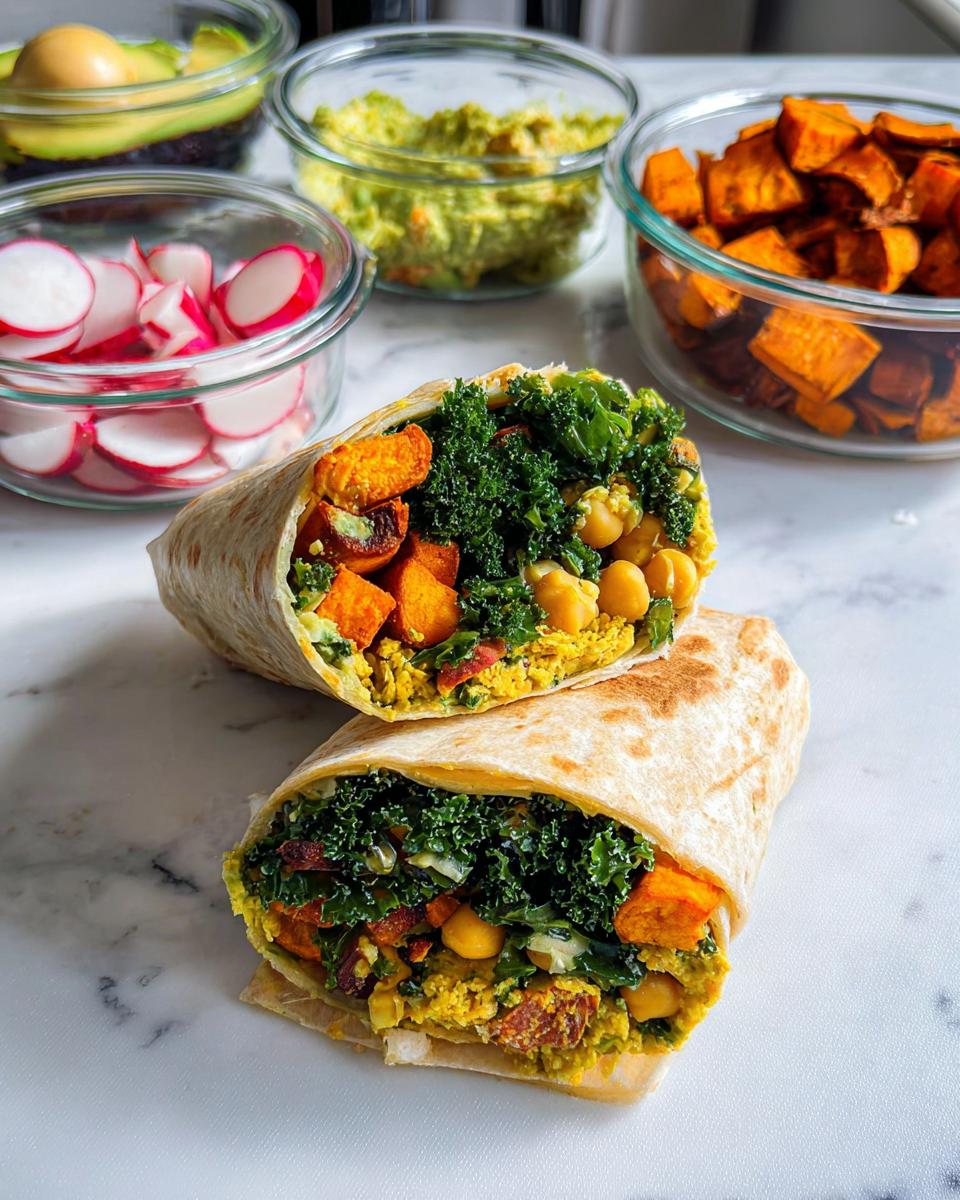
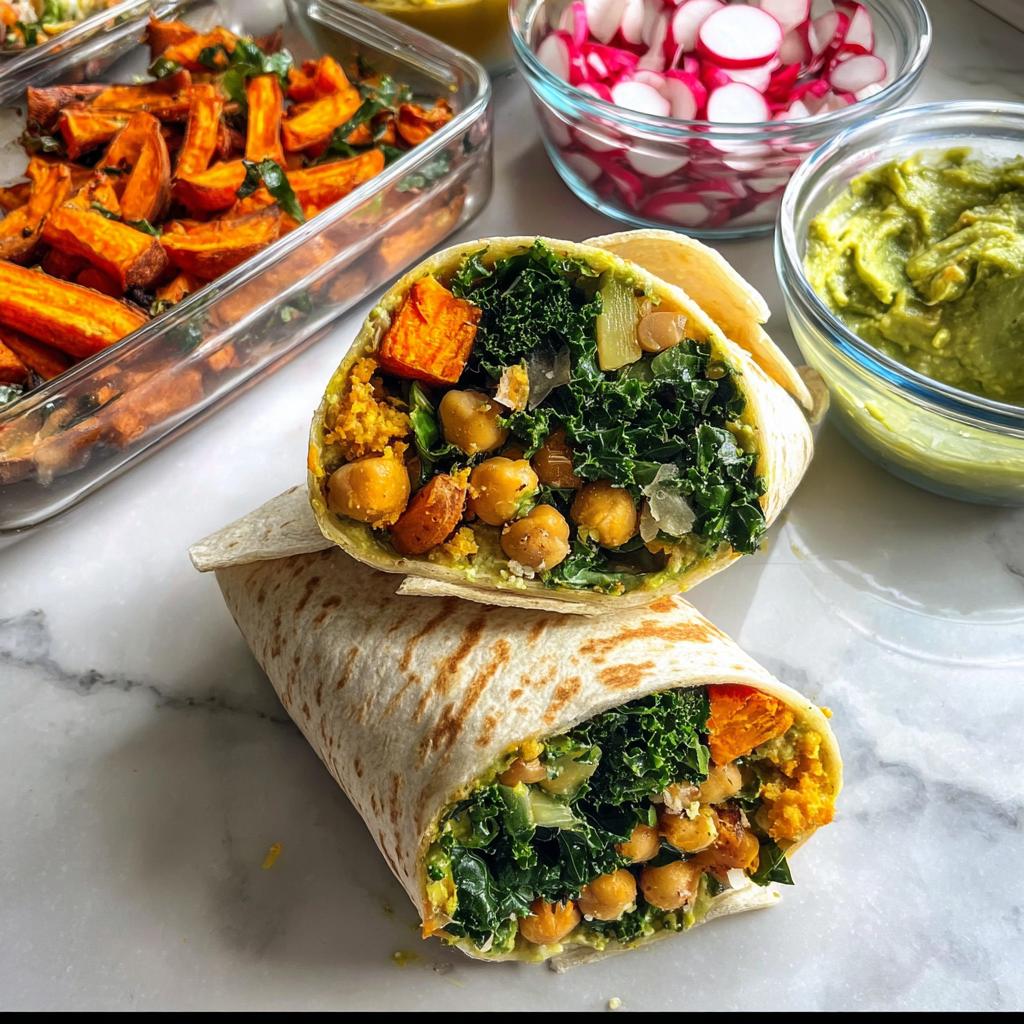
These aren’t just any old sandwiches; they’re little flavor bombs for your week!
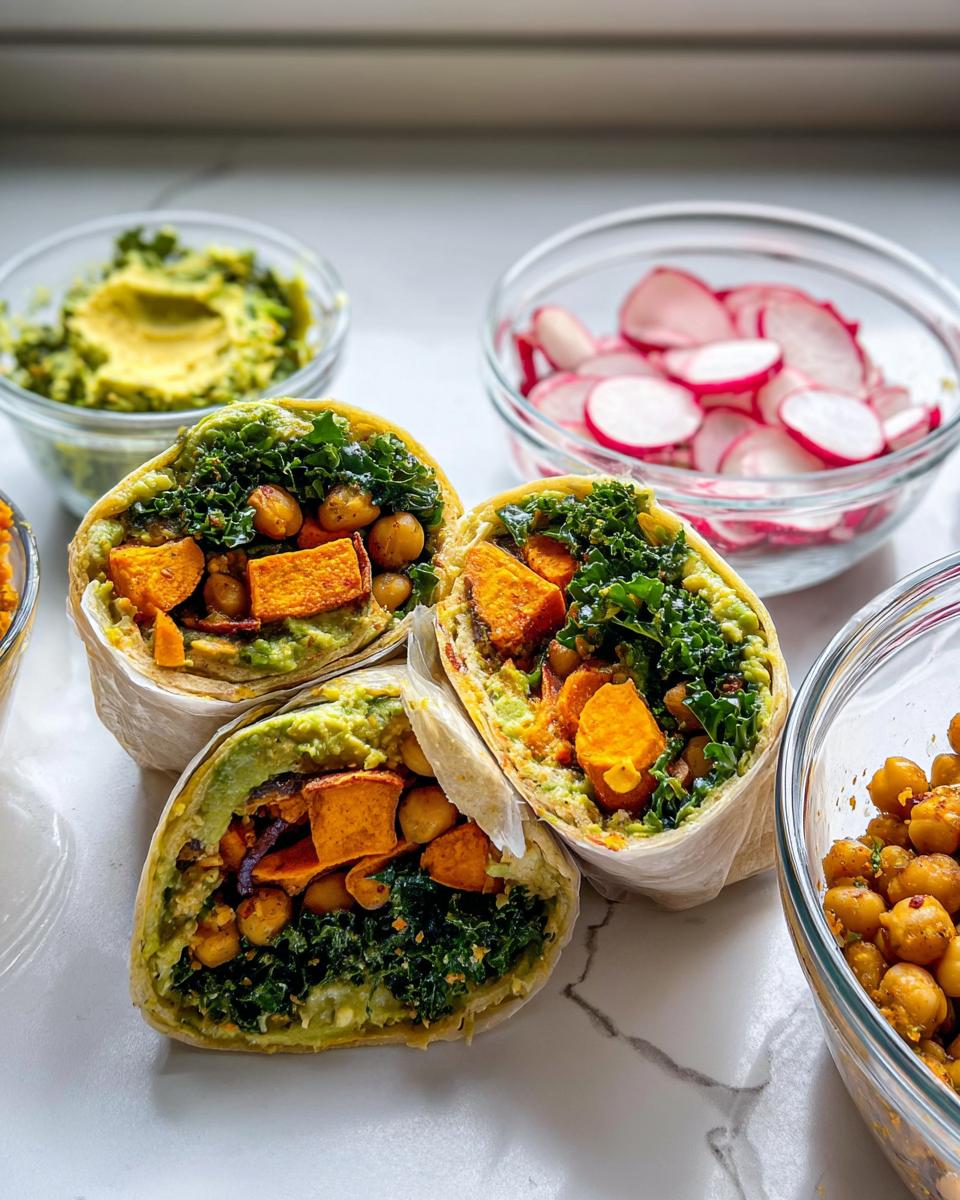
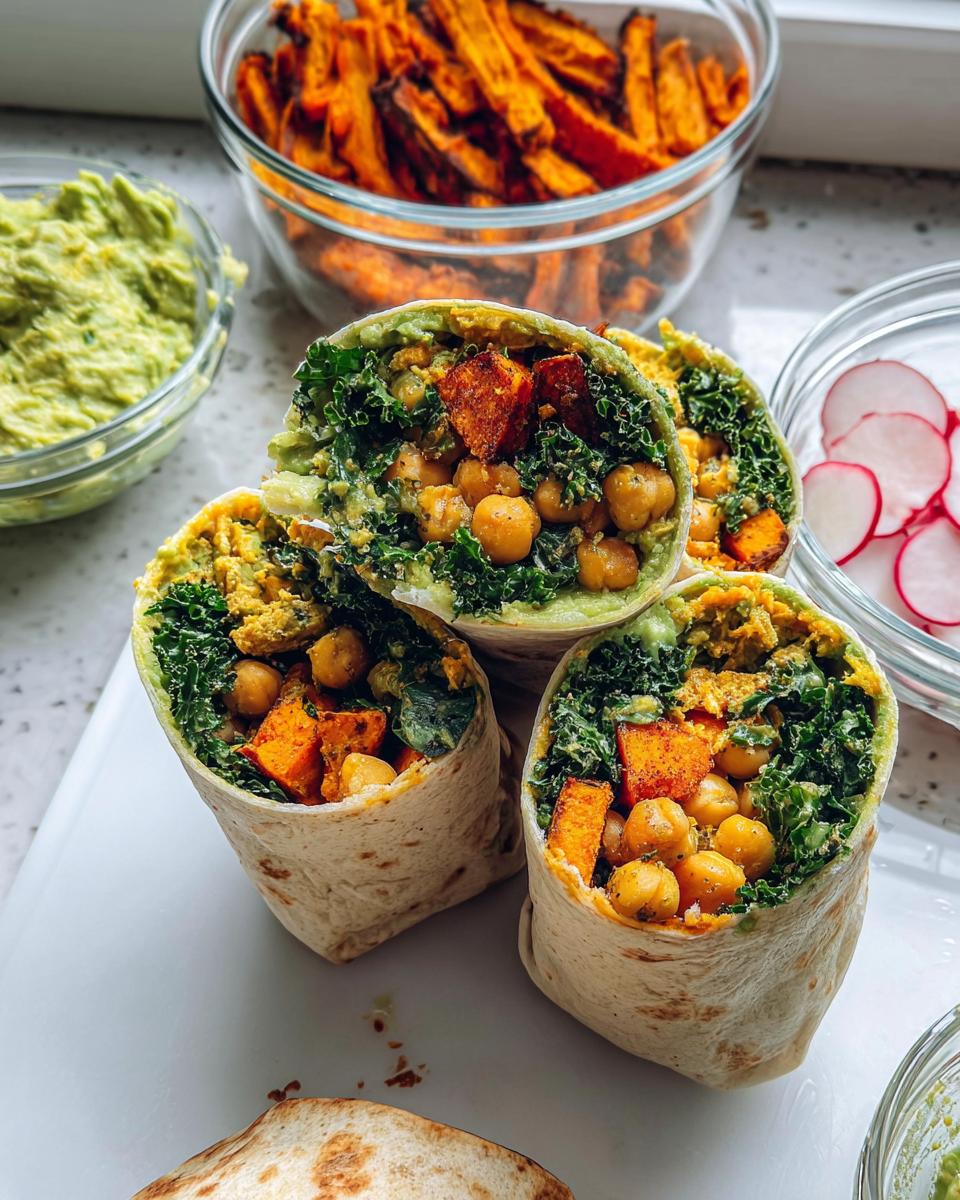
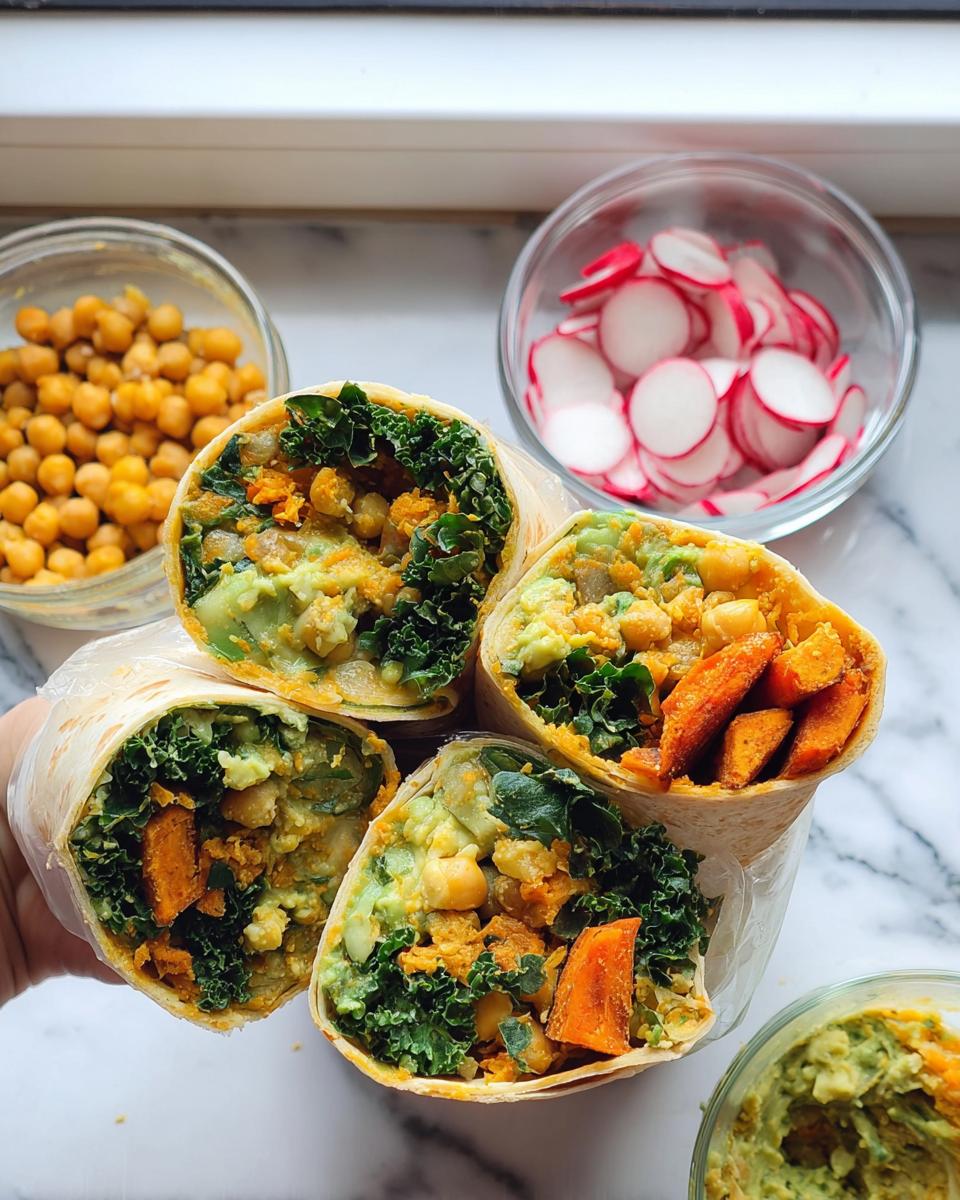
- Seriously Delicious: Sweet potato, spiced chickpeas, creamy avocado – the flavor combo is amazing!
- Total Convenience: Prep them once, and you’ve got lunch sorted for days. So easy!
- Super Healthy: Packed with veggies and plant-based goodness to keep you going.
- Meal Prep Dream: They hold up beautifully in the fridge, no soggy surprises here.
- Customizable: Feel free to swap out greens or add your favorite spices!
Gather Your Ingredients for Delicious Sandwich Ideas Recipes Meal Prep
Alright, let’s get our kitchen prepped for some serious flavor! Here’s what you’ll need to whip up these amazing wraps. Getting everything ready beforehand makes the whole process so much smoother, trust me!
For the Sweet Potato Fries
- 1 medium sweet potato, chopped into thick fries
- 1 tbsp olive oil
- 1 tsp cinnamon
- 1 tsp cumin
- ½ tsp salt
- ¼ tsp ground pepper
For the Spiced Chickpeas
- 1 (15-oz) can chickpeas, rinsed and drained
- 1 tbsp olive oil
- 1 tsp paprika
- 1 tsp curry powder
- Pinch of salt, to taste
For the Wraps
- 3 cups kale, chopped
- 1 large avocado, pitted
- 1 tbsp lemon juice, divided
- 3 large (10-inch) tortillas
- 1 cup hummus
- 6 radishes, chopped in half and sliced
- Hot sauce, optional for serving
Step-by-Step Guide to Making Your Sandwich Ideas Recipes Meal Prep
Okay, let’s get down to business! Making these wraps is easier than you think, and honestly, it’s kind of fun. Just follow these steps, and you’ll have delicious lunches ready in no time. It’s all about a little bit of roasting and a little bit of assembly – totally manageable, even on a busy weeknight! For more great ideas on keeping your lunches fresh, check out these easy gluten-free lunch box ideas.
Roasting the Sweet Potatoes and Chickpeas
First things first, let’s get those veggies going! Preheat your oven to a nice hot 425°F (220°C). Grab a bowl and toss your chopped sweet potato fries with about half of the olive oil, cinnamon, cumin, salt, and pepper. Give them a good mix so they’re all coated. Spread them out on a baking sheet – make sure they have space so they get nice and roast-y, not steamy! Pop them in the oven on a lower rack for about 30-35 minutes. Give them a flip halfway through. While those are roasting, do the same for your chickpeas: toss them with the rest of the olive oil, paprika, curry powder, and a pinch of salt. These just need about 15-20 minutes on a rack above the sweet potatoes. You want them a little crispy and a bit darker. Oh, and super important for meal prep: let both the sweet potatoes and chickpeas cool down completely to room temperature before you start assembling anything. Trust me on this one!
Preparing the Fresh Components
While those goodies are cooling, let’s tackle the fresh stuff. You’ll want a big pot of water to boil – add a few good pinches of salt to it. Have a bowl of ice-cold water ready nearby. Carefully drop in your chopped kale and let it cook for just 1-2 minutes until it’s super bright green. *Quick tip:* This blanching makes it tender and keeps that gorgeous color! Drain it fast and plunge it into that cold water to stop the cooking. Then, lay it out on a clean kitchen towel to dry off really well. Next, mash up your avocado in a small bowl, add half of that lemon juice and a little salt. In another bowl, give those cooked chickpeas a gentle mash – don’t go crazy, just a light mash to break them up a bit. Stir in the remaining lemon juice. Easy peasy!
Assembling Your Flavorful Wraps
Now for the best part – building your masterpieces! Lay a tortilla flat. Spread about a third of your hummus in a horizontal line across the bottom third of the wrap. Neatly layer about a third of your dry kale on top of the hummus. Then add a good layer of those roasted sweet potatoes. Next, spoon on about a third of your mashed avocado over the potatoes. Follow that up with a generous portion of your lightly mashed chickpeas and finally, top it all off with those sliced radishes for a nice crunch. To roll it up, fold the bottom flap up and over the filling. Then, fold in the sides. Now, starting from the bottom, roll it up tightly away from you, tucking everything in as you go. You want it snug! Repeat with the rest of the fillings and tortillas. Check out these meal prep sandwich ideas for more inspiration on rolling and packing.
Tips for Perfect Sandwich Ideas Recipes Meal Prep
Alright, let’s jazz up these wraps even more! For the freshest flavor, always try to roast your sweet potatoes and chickpeas *just* before you plan to assemble your wraps for the week. If you’re feeling adventurous, don’t be afraid to tweak the spices – maybe a little cayenne for heat in the chickpeas, or add some toasted nuts for extra crunch. When you’re rolling, think of it like wrapping a present; keep it snug! If you want even more quick meal ideas, you’ll love these quick gluten-free lunch ideas that are ready in a flash.
Ingredient Notes and Substitutions for Your Sandwich Meal Prep
Don’t have kale on hand? No worries! Spinach or even a sturdy arugula would work beautifully in these wraps, though you might not need to blanch them. If hummus isn’t your jam, a dollop of tahini mixed with a little lemon juice or even a creamy cashew-based spread would be delicious. And that avocado? If you’re not an avocado fan, a thin layer of mashed black beans seasoned with a little lime could be a fun alternative. For a bit more protein, feel free to add some shredded chicken or a sprinkle of your favorite seeds. For more amazing gluten-free options, check out this easy Tuscan chicken recipe!
Make-Ahead and Storage for Your Sandwich Ideas Recipes Meal Prep
Okay, so you’ve made these gorgeous wraps, and now you want them to last, right? Fantastic! For the best results, let everything cool completely before you even *think* about wrapping them up. Pop your finished wraps into an airtight container. They’ll stay yummy in the fridge for up to four days. Sadly, these aren’t the best candidates for the freezer – they can get a little sad and soggy. Now, if you’re using gluten-free tortillas, here’s a little trick: store the filling and the tortillas separately. Then, just wrap everything up right before you’re ready to eat. This really helps prevent them from breaking apart. For more awesome meal prep strategies, check out my 5-day low-carb meal plan!
Frequently Asked Questions About Sandwich Ideas Recipes Meal Prep
Got questions about these amazing wraps? I’ve got you covered!
Can I make these wraps ahead of time?
Absolutely! That’s the whole beauty of them. Just follow the steps for assembling and storing, and you’ll have delicious lunches ready to go for up to four days. For the crispiest result, especially with gluten-free tortillas, consider storing the filling and tortillas separately and assembling them right before you eat.
What are some other filling ideas for meal prep sandwiches?
Oh, the possibilities are endless! Beyond these sweet potato and chickpea wonders, think about layering things like seasoned lentils, roasted veggies (zucchini and bell peppers are great!), a smear of pesto, some hearty grains, or even some grilled chicken or tofu. The key is to choose fillings that hold up well and won’t get soggy. Don’t forget to check out our contact page for more personalized tips!
Are these wraps gluten-free?
The recipe itself uses regular tortillas, so it’s not inherently gluten-free on its own. However, it’s super easy to make them gluten-free! Just swap out the standard tortillas for your favorite gluten-free wraps. As I mentioned, just be mindful of storing them separately if you’re meal prepping them for a few days, as gluten-free tortillas can sometimes get a bit fragile when pre-wrapped.
Estimated Nutritional Information
Keep in mind these numbers are just estimates, and they can change depending on the brands you use and exactly how you pile everything in! But for one of these delicious Sweet Potato and Chickpea Wraps, you’re looking at roughly:
- Calories: Around 450-500
- Fat: About 20-25g
- Protein: Roughly 12-15g
- Carbohydrates: Around 50-60g
It’s a packed meal, full of good stuff! For more ideas on eating well with specific dietary needs, you might find this guide to gluten-free diabetic meal plans really helpful.
Share Your Delicious Sandwich Creations
Alright, now that you’ve got the lowdown on these amazing wraps, I’d LOVE to hear from you! Did you give them a try? How did they turn out? Drop a comment below with your thoughts, any fun twists you added, or even just to say hi! And if you’re looking for more inspiration from our kitchen, you can always peek at our about page. Happy cooking and happy prepping!
Sweet Potato and Chickpea Wraps
Ingredients
Equipment
Method
- Preheat your oven to 425°F (220°C).
- To a mixing bowl, add the chopped sweet potato, half of the olive oil, cinnamon, cumin, salt and pepper. Mix well. Pour the sweet potato onto a baking sheet and spread out the “fries” so they’re not touching each other. Bake for 30 to 35 minutes on a lower rack, flipping halfway, until the “fries” are tender and have darkened in color on the outside.
- To the same bowl, add the chickpeas, remaining olive oil, paprika, curry powder and salt to taste. Pepper is optional. Mix so the chickpeas are coated in the spices. Pour the chickpeas onto another baking sheet and bake for 15 to 20 minutes on a middle or upper rack. They’ll be a little crispy and darker in color when they’re finished.
- Let the sweet potato and chickpeas cool down to room temperature.
- Meanwhile, bring 4 to 5 cups of water to boil and add a few big pinches of salt. Get a bowl of very cold water ready. When the water is boiling, carefully add the chopped kale and let it cook for 1 to 2 minutes, until it’s vibrantly green. Drain the water from the pot and transfer the kale to the bowl of cold water to stop it from cooking. Lay a clean kitchen towel on the counter and spread the blanched kale on it to dry.
- Mash the avocado in a bowl. Add half of the lemon juice and a pinch of salt and mix. In another bowl, mash the cooked chickpeas gently. Add the remaining lemon juice and mix.
- Lay a tortilla down on a flat clean surface. Spread one-third of the hummus on the lower third of the wrap horizontally. Place one-third of the kale on the hummus, followed by an even layer of sweet potatoes. Add one-third of the mashed avocado on the potatoes, followed by one-third of the lightly mashed chickpeas. Top it off with a layer of sliced radishes.
- To roll the wrap: Fold the bottom of the wrap over the filling. Then fold the two sides over the edges of the filling. With the sides folded in, fold the wrap and filling completely over away from you. Adjust to tuck in the sides and keep rolling until you’re out of tortilla. Repeat to make all three wraps.
Notes
Tried this recipe?
Let us know how it was!
Certified Gluten-Free Culinary Master
Everything changed in 2017 when I received my celiac diagnosis. After ten years as a traditional pastry chef creating elaborate wedding cakes and French pastries, I suddenly couldn’t even taste my own work. It felt like the end of my culinary world.
Instead, it became my greatest challenge. I had to completely relearn baking – understanding how gluten-free flours behave differently, how they bind, how they absorb moisture. Adding the low-carb requirement? That was like solving a puzzle with half the pieces missing.
My breakthrough came with what I now call my “foundation flour blend system” – different combinations that seamlessly replace wheat flour while maintaining low-carb macros. These techniques have been adopted by culinary schools and have helped countless bakers who thought their favorite treats were gone forever.
That first successful batch of gluten-free, low-carb chocolate chip cookies? Watching my husband close his eyes and smile told me I’d found my true calling. Now, with over 300 tested recipes, I prove daily that dietary restrictions don’t mean culinary limitations.
When I’m not experimenting in my Austin test kitchen, I’m teaching weekend workshops or tending my herb garden with Biscuit, my rescue beagle who’s become an expert at detecting oven timers.