
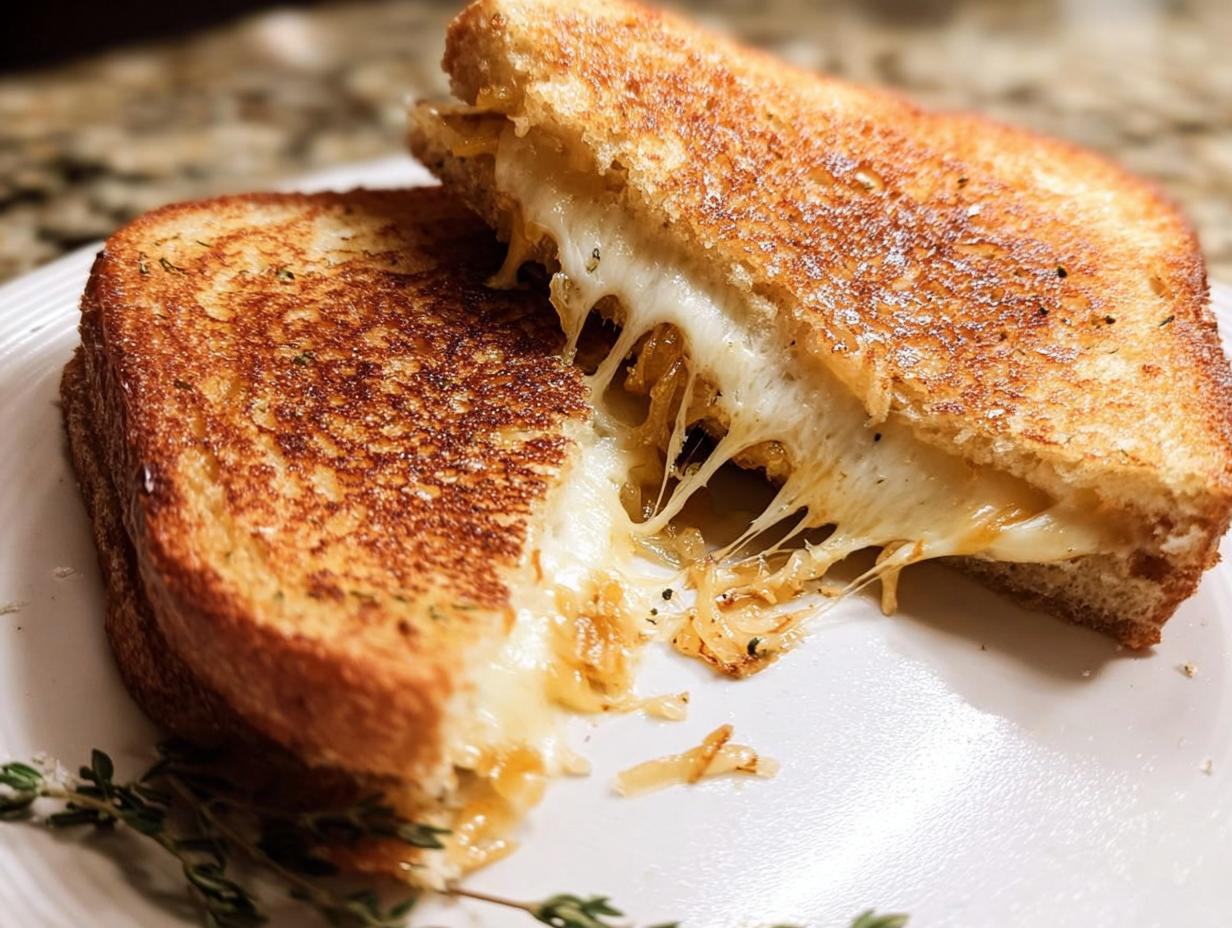
Oh, I get it. Life is hectic! Between work, family, and just trying to keep the house from looking like a tornado hit it, the last thing you want to think about is slaving away in the kitchen. But what if I told you that you can still enjoy that warm, gooey, hug-in-a-meal comfort of a grilled cheese sandwich, even when you’re super busy? Yep, it’s totally possible! I’ve figured out some tricks to make Grilled Cheese Recipes Meal Prep That Actually Tastes Great a reality. Trust me, I’ve been there – the scramble for a quick bite that *actually* tastes good, not like sad, reheated cardboard. As a busy professional and parent myself, I know the struggle is real. So, I’ve taken that nostalgic childhood favorite and turned it into a super practical, totally delicious meal prep option for anyone who loves good food but is short on time. Get ready to fill your fridge with pure cheesy goodness!
Why Grilled Cheese Recipes Meal Prep That Actually Tastes Great Works
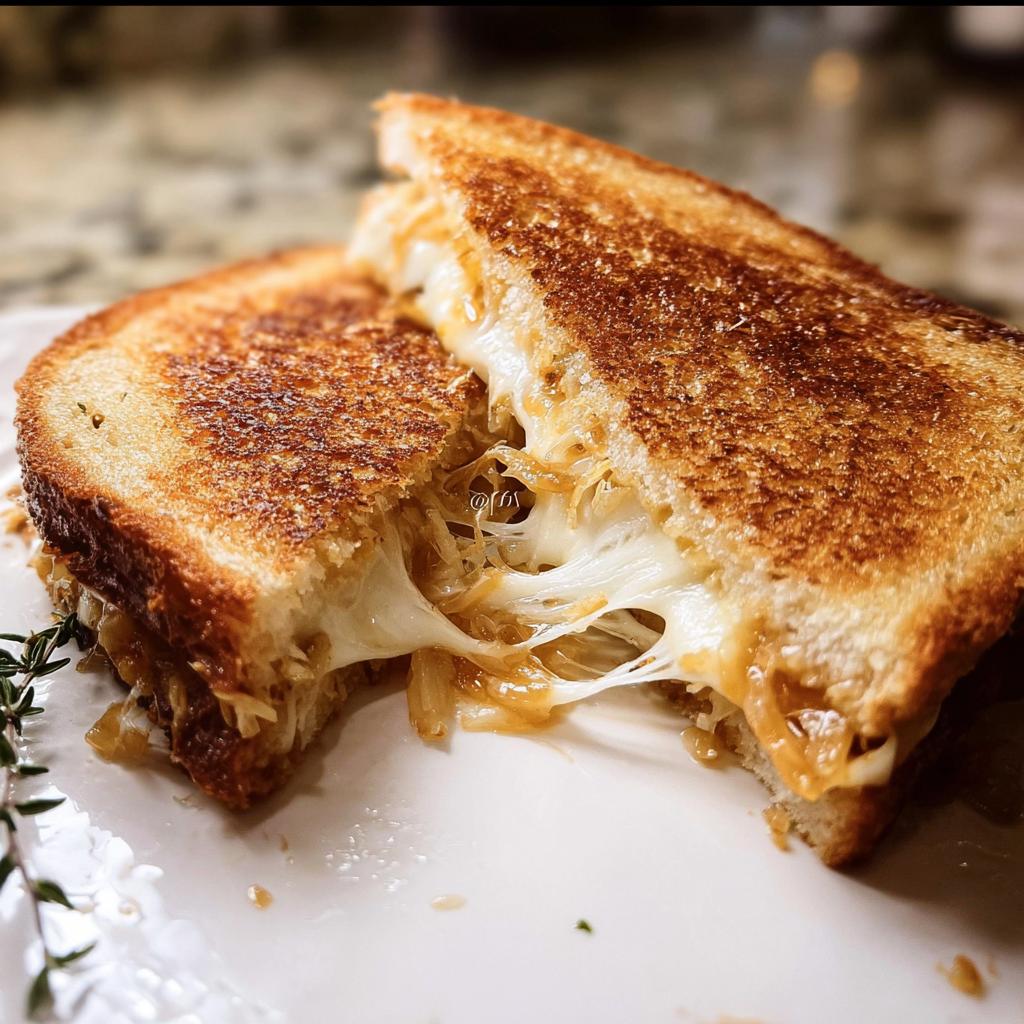
Honestly, the idea of prepping grilled cheese might sound a little funny at first. Like, how do you even do that without it turning into a soggy mess? Well, it’s all about a few clever tricks! This recipe for Grilled Cheese Recipes Meal Prep That Actually Tastes Great is designed from the ground up so that when you reheat it, it doesn’t just survive, it *thrives*. We’re talking cheesy, melty goodness that still has that perfect crispy bread. It’s like magic, but it’s actually just smart cooking! The secret really lies in the combinations we use – certain cheeses hold their shape and melt beautifully even after a day or two in the fridge, and the way we prep the onions adds a depth of flavor that just gets better over time. Plus, using a touch of mayonnaise instead of just butter on the outside helps create a super crisp crust that reheats like a dream. It’s more than just a sandwich; it’s a little taste of comfort, ready whenever you need it.
The Secret to Melty, Delicious Meal Prep
So, what makes these meal-prepped grilled cheese sandwiches taste so darn good even when they’re not fresh off the skillet? It really comes down to a few key things. First, the cheese! We’re using a blend of Gruyere, white cheddar, and Muenster. These cheeses have different melting points and flavors, and crucially, they don’t turn oily or gummy when they’re reheated. Gruyere gives you that amazing nutty flavor and stretch, white cheddar brings a nice sharpness, and Muenster makes it extra gooey. Another big player is the caramelized onions. Cooking them down low and slow brings out their natural sweetness and a rich, savory depth that’s out of this world. When you fold these flavors into the melty cheese, you get a sandwich that’s way more interesting than your average grilled cheese. And that little bit of mayo on the bread? It creates an incredibly sturdy, golden-brown crust that stays crispy even after a quick reheat. It’s these thoughtful little touches that turn a simple concept into a meal-prep success story!

Ingredients for Your Perfect Grilled Cheese Recipes Meal Prep
Okay, let’s talk about what you’ll need to make these amazing grilled cheese sandwiches that are totally meal-prep friendly. I’ve found that using good quality stuff really makes a difference, especially when you’re prepping ahead. Don’t skimp on the cheese, seriously!
Caramelized Onion Mixture
- 2 medium yellow onions, diced
- 1 tsp fresh thyme, minced
- 1 tsp fresh rosemary, minced
- 1 tsp brown sugar
- 1 1/2 Tbsp butter
- 1 Tbsp olive oil
- 1 tsp salt
- 1 tsp pepper
For the Ultimate Grilled Cheese
- 8 slices good quality bread (thick-cut artisan bread is my fave!)
- 12 oz Gruyere cheese, sliced thinly or grated (make sure it’s at room temperature!)
- 6 oz White cheddar cheese, sliced thinly or grated (room temperature works best!)
- 4 slices Muenster cheese, at room temperature
- 2 Tbsp mayonnaise (for spreading on the bread)
- 1 1/2 Tbsp butter, divided
- 1 tsp fresh rosemary, minced
How to Prepare Grilled Cheese Recipes Meal Prep That Actually Tastes Great
Alright, let’s get down to business and make some seriously delicious grilled cheese sandwiches that are perfect for meal prep! It’s not complicated at all, and I promise, the results are *so* worth it. We’ll start with those amazing caramelized onions because they are the real flavor bomb here.
Caramelize the Onions
First things first, grab a skillet. We’re going to heat up about 1 1/2 tablespoons of butter along with a splash of olive oil over medium-low heat. You want a nice gentle heat because we’re not trying to rush this process. Toss in your diced yellow onions, give them a sprinkle of salt and pepper, plus that lovely fresh thyme and 1 teaspoon of that minced rosemary we prepped. Now, let them sauté, stirring every so often, until they’re totally soft and starting to get a nice golden-brown color. This usually takes about 10 minutes. Don’t rush them! Once they’re looking gorgeous and sweet, stir in that teaspoon of brown sugar. It just takes about another minute before you transfer these beauties to a plate. Let them cool a bit.
Assemble and Grill Your Sandwiches
Now for the fun part – building your masterpiece! Grab two slices of your favorite bread. I love a good thick-cut artisan loaf for this. Spread a little bit of mayonnaise on one side of *each* slice. Yep, mayo! Trust me, it makes for the most amazing, crispy golden crust. While your onions are cooling, wipe out that same skillet (no need to wash it!) and melt the remaining 1 1/2 tablespoons of butter in it with that last teaspoon of minced rosemary. Heat it over medium heat and swirl it around so the bottom of the pan is nicely coated.
Carefully place your bread slices, mayo-side down, into the skillet. As soon as they hit the pan, load up the top of *each* slice with your glorious cheeses – the Gruyere, white cheddar, and Muenster. Once the cheese starts to look like it’s thinking about melting (that’s the magic starting!), sprinkle a couple of tablespoons of those delicious caramelized onions over the cheese on *one* of the bread slices. This really takes your grilled cheese to the next level, kind of like how this gourmet version does with its own special touches!
Let them cook for about 2-3 minutes until the bottom is beautifully golden brown and toasty. Then, carefully take the slice with the onions and flip it right on top of the other slice, creating your sandwich. Now, you want to keep cooking on low heat until that cheese is perfectly melted and gooey all the way through. You can gently press down with your spatula if you need to help things along. Once it’s perfectly golden and the cheese is oozing out, slide it onto a clean plate. Repeat this whole process with the rest of your bread slices and ingredients to make the other three sandwiches. Slice them in half, and you’ve got yourself some seriously tasty grilled cheese, ready to go!
Tips for Success with Your Grilled Cheese Meal Prep
Okay, so you’ve made these amazing grilled cheese sandwiches for the week, but how do you make sure they’re still fantastic when you’re ready to eat them? It’s all about a few little secrets that guarantee a delicious, crispy, and perfectly melty experience, even after a few days in the fridge. Think of it as unlocking the full potential of your meal prep! You want that crispy exterior and that gooey, cheesy center, right? Lucky for you, this recipe is designed to deliver just that, especially with a few smart choices.
Choosing the Right Bread and Cheese
This is seriously important for meal prep success! For the bread, you want something sturdy that can hold up to being stored and reheated without getting soggy. Thick-cut artisan breads, like a good sourdough or a hearty whole wheat, are usually your best bet. They have a nice crust that stays crisp. As for the cheese, the blend we used – Gruyere, white cheddar, and Muenster – is key! These cheeses melt beautifully and don’t get weirdly oily or rubbery when you reheat them. If you’re adding other cheeses, aim for ones that are good melters. You can find more great ideas for lunch box ideas that stay fresh that might give you more inspiration for durable meals!
Achieving the Perfect Melty Interior
The absolute key to getting that perfect, gooey cheese center when you reheat is to make sure it’s fully melted when you first cook the sandwich. That’s why we spread the cheese all the way to the edges and ensure it’s at room temperature before you start. When you’re reheating, low and slow is your friend! Don’t blast it with high heat or it’ll burn before the cheese melts. A gentle reheat in a skillet or even a toaster oven works wonders to bring back that crispy bread and ooey-gooey cheese. You want that moment where you bite in and the cheese just stretches for miles – it’s pure magic!
Dietary Adaptations for Grilled Cheese Recipes Meal Prep
You know, one of the best things about this grilled cheese recipe is how easily you can tweak it to fit different needs. Whether you’re going gluten-free or keeping an eye on your carb intake, you can still get that amazing, comforting grilled cheese experience. It’s all about making smart swaps that don’t sacrifice flavor or texture. Plus, adapting these recipes can often give you a nutritional boost, like reducing refined carbs or increasing fiber, making your meal prep even more beneficial. For anyone looking for ideas to manage special diets, checking out resources on gluten-free diabetic meal plans or making low-carb meals can be super helpful!
Gluten-Free Grilled Cheese Options
Making this grilled cheese gluten-free is surprisingly simple and still delicious! The key, of course, is the bread. There are so many fantastic gluten-free breads out there now that hold up really well to grilling and reheating. Look for a sturdy, thicker-cut loaf – sometimes they can be a little drier, so you might want to add an extra tiny bit of mayonnaise or butter to the outside before grilling to ensure that perfect golden crisp. Honestly, my favorite gluten-free loaves for this are usually ones made with a blend of rice flour or almond flour. They toast up beautifully and don’t crumble apart easily. Another great option for a delicious gluten-free meal is something like this Tuscan chicken recipe; it shows how versatile gluten-free cooking can be!
Low-Carb Adaptations
If you’re watching your carbs, you can totally still enjoy the amazing cheesy filling of this grilled cheese! The easiest way to go low-carb is to ditch the traditional bread altogether. You can use your favorite low-carb bread alternative – there are some great ones available now that toast up really nicely. Another super satisfying option is to serve the warm, melty cheese and caramelized onion filling inside big, crisp lettuce cups. Think of it like a cheesy, savory lettuce wrap! Or, if you’re feeling adventurous, you could even try using thick slices of grilled portobello mushrooms as your “bread.” Many one-pot low carb meals prove that deliciousness doesn’t need a lot of carbs!
Frequently Asked Questions About Meal Prepping Grilled Cheese
You’ve got questions, and I’ve got answers! Meal prepping is awesome, but it’s natural to wonder about the little things that make it work. Here are some common questions I get about making grilled cheese ahead of time. If you ever need to reach out about anything, our contact page is the place to go!
How to Store Meal-Prepped Grilled Cheese
The key to keeping your meal-prepped grilled cheese tasting great is proper storage. Once they’ve cooled down completely, wrap each sandwich individually in parchment paper, then place them in an airtight container or a heavy-duty zip-top bag. This helps prevent them from getting soggy and keeps them fresh in the fridge for about 2-3 days.
Best Way to Reheat
To get that perfect crispy outside and melty inside, I highly recommend reheating your grilled cheese in a skillet over medium-low heat. Add a tiny bit of butter or even a swipe of mayonnaise to the pan, just like you did when you first made it. Cook for a few minutes on each side until golden brown and the cheese is gooey again. A toaster oven also works wonderfully!
Can I Freeze Grilled Cheese?
Yes, you absolutely can freeze grilled cheese, though I find they are best enjoyed within a week or two from the fridge. If you do freeze them, make sure they’re well-wrapped individually to prevent freezer burn. When you’re ready to eat, it’s best to thaw them in the refrigerator overnight and then reheat using the skillet method for the crispiest results. You can also try reheating them directly from frozen in a low oven or toaster oven, but it might take a little longer.
Estimated Nutritional Information
Just a friendly heads-up, folks! The exact nutritional info for this grilled cheese can wiggle around a bit depending on the specific type of bread you use and how much cheese you pack in. But, as a general idea for one sandwich made with the ingredients listed, you’re looking at roughly around 450-550 calories, about 30-40g of fat, 20-25g of protein, and 25-35g of carbs. All those delicious caramelized onions and yummy cheeses add up, but it’s worth every bite!
Share Your Grilled Cheese Creations!
Now that you know all the secrets to making Grilled Cheese Recipes Meal Prep That Actually Tastes Great, I’d absolutely love to hear about it! Did you try it? How did it turn out? Don’t be shy – leave a comment below, tell me about your favorite cheese combo, or heck, even rate the recipe! You can also tag me in your photos online; I’m always up for seeing your delicious creations. And if you’re looking for more easy recipes to try, check out this page. Happy cooking!
Grilled Cheese Recipes Meal Prep That Actually Tastes Great
Ingredients
Equipment
Method
- Heat 1 1/2 Tbsp butter and olive oil in a skillet over medium-low heat. Add diced onions, salt, pepper, fresh thyme, and 1 tsp of fresh rosemary. Sauté, stirring often, until onions are soft and starting to brown, about 10 minutes.
- Stir brown sugar into the onions and cook for another minute. Transfer onions to a plate.
- Spread a little mayonnaise on one side of two pieces of bread.
- To the same skillet, add the remaining butter and rosemary. Heat over medium heat, swirling to coat the bottom of the skillet with the melted butter.
- Add both pieces of bread, mayonnaise side down, and cook until golden brown and crunchy, about 2-3 minutes.
- As soon as you add the bread to the skillet, add cheese to the top of each piece. Once it starts to melt, sprinkle a couple tablespoons of the caramelized onions over the top of one of the pieces of bread.
- When the bread is golden brown, sandwich the pieces of bread together and cook on low until the cheese is fully melted.
- Transfer to a plate. Repeat with the remaining slices of bread and ingredients.
- Slice and enjoy.
Notes
Tried this recipe?
Let us know how it was!
Certified Nutritional Science Authority
The intersection of celiac disease and metabolic health fascinated me from my first dietetic internship. Watching patients struggle to find foods supporting both their autoimmune condition and weight goals launched my career mission: proving medically necessary diets can be nutritionally optimal.
For twelve years, I’ve specialized in gluten-free living while achieving metabolic health objectives. My published research demonstrates that properly planned gluten-free, low-carb eating provides superior nutrition compared to standard approaches.
The hidden trap? Most commercial gluten-free products are carb bombs – rice flour and potato starch masquerading as healthy alternatives. My frameworks avoid this completely, using nutrient-dense ingredients like almond flour and flaxseed that enhance rather than just replace.
Every recipe I review meets rigorous standards: adequate protein for metabolic support, healthy fats for satiety, proper fiber levels for digestive health – all maintaining strict gluten-free protocols for celiac management. I’ve guided over 500 individuals through this optimization process.
My personal gluten-free, low-carb lifestyle fuels my long-distance cycling and triathlon training – proof that these approaches deliver sustained energy and mental clarity. Medical necessity doesn’t mean nutritional compromise.