
Oh, stuffing! It’s the side dish we all crave, especially around the holidays, right? But let’s be real, getting that perfect, savory goodness on the table when you’ve got a million other things going on can be a huge challenge. For years, I thought stuffing was one of those “cook it right before serving” kinda deals. That is, until I discovered how to make Stuffing Recipes Meal Prep That Actually Tastes Great. I remember one Thanksgiving, my kitchen was pure chaos, and I was dreading making stuffing from scratch. I decided to try making it ahead, and honestly, I was a little nervous it would turn out soggy or bland. But after a bit of tinkering with herbs and getting the bread just right, I found a method that’s totally changed my holiday game. It’s so easy, incredibly flavorful, and perfect for my busy life. Trust me, this is the stuffing you’ve been dreaming of – convenient, delicious, and totally doable!
Why You’ll Love This Stuffing Recipes Meal Prep That Actually Tastes Great
This stuffing is a game-changer for busy folks. You get all that amazing, cozy flavor we love, but with zero stress on the big day. It’s all about making ahead!
- Seriously Easy Meal Prep: Whip it up ahead of time, store it, and simply reheat. It’s like having a secret weapon for holiday cooking!
- Incredible Flavor: We packed this with savory herbs and got the texture just right, so it tastes like you slaved over it for hours.
- No More Mushy Mess: Forget soggy stuffing! This recipe is designed to stay wonderfully textured, even when prepped in advance.
- Perfect for Any Occasion: Beyond holidays, it’s just a fantastic, flavorful side dish that’s incredibly practical.
Gather Your Ingredients for Delicious Stuffing
Alright, let’s get down to business! The magic happens with good ingredients, and for this stuffing, we’re going for maximum flavor and ease. Here’s what you’ll need to gather up:
For the Stuffing Itself:
- 18-24 ounces bread cubes: Honestly, the best is stale bread (like, day-old sourdough or French bread) that you’ve either dried out a bit more yourself or bought pre-cubed and toasted. It just gives the best texture!
- 1 cup unsalted butter: Melted, of course. This is our flavor base!
- 3 cups diced sweet onion: That’s about two medium-large onions. We want them nice and soft.
- 2 cups diced celery: Adds that classic, subtle crunch and flavor.
- 6 cloves garlic: Minced up fine. Garlic makes everything better, right?
- 1-2 teaspoons kosher salt: Start with one, and we can always add more later.
- 1-2 teaspoons black pepper: Freshly ground is always best if you have it!
- 3 tablespoons chopped fresh sage: Oh, the aroma! Sage is non-negotiable for that classic stuffing taste.
- 3 tablespoons chopped fresh parsley: For a little brightness and color.
- 3 tablespoons chopped fresh rosemary: Another herb that just screams holiday comfort.
- 2 ½ cups chicken or vegetable stock: Use a good quality one – it really makes a difference!
- 2 large eggs: These are our binder, helping everything come together beautifully.
- Fresh herbs for sprinkling: Just a little extra bit to make it look and smell amazing before serving.
Step-by-Step Guide to Making Your Stuffing Recipes Meal Prep That Actually Tastes Great
Alright, let’s get this stuffing party started! Following these steps is how we make sure your stuffing is *chef’s kiss* perfect, even when you’re prepping it ahead. It’s really not complicated, just a few key things to get right. If you’re looking for more ideas, this best stuffing recipe from How Sweet Eats gives some great inspiration too!
Preparing the Bread Cubes
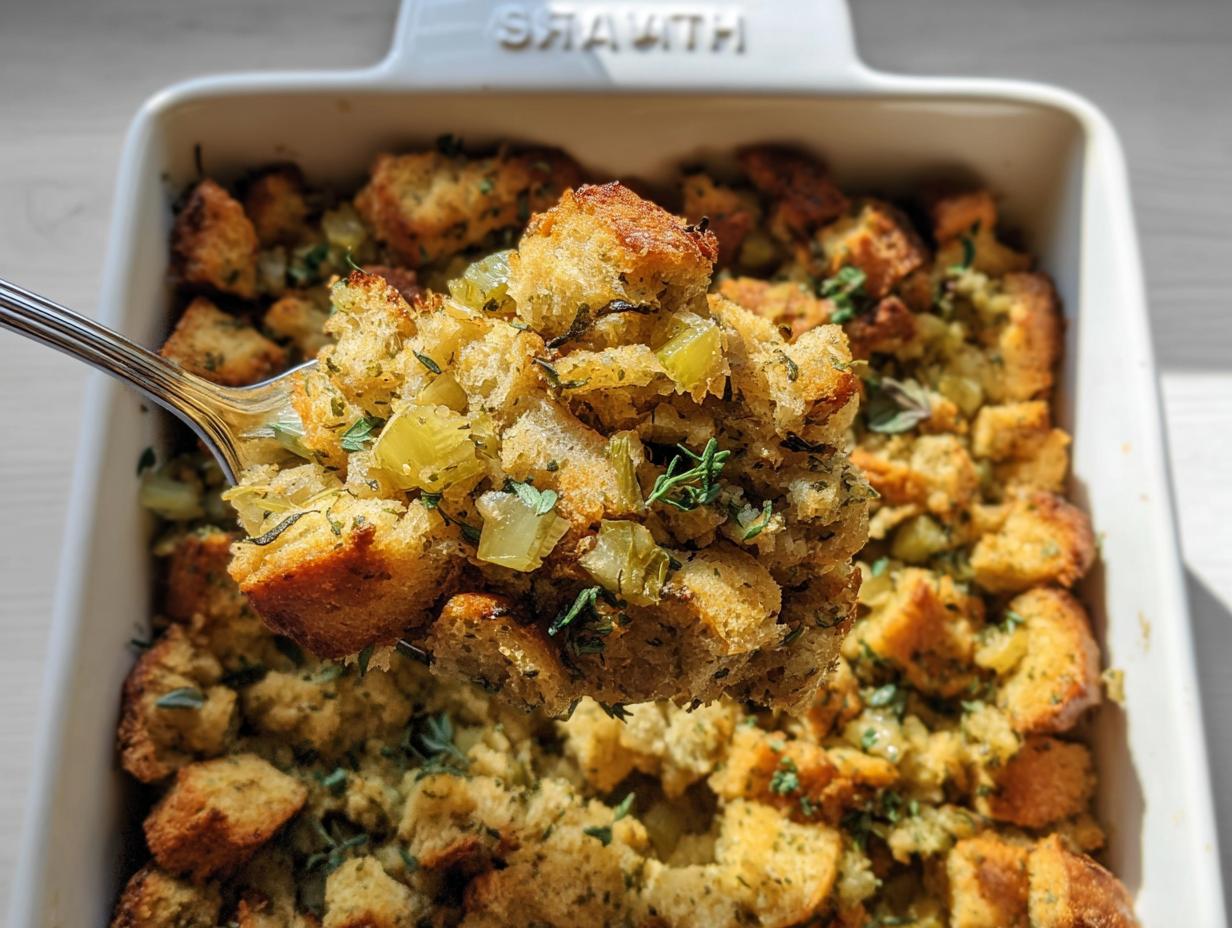
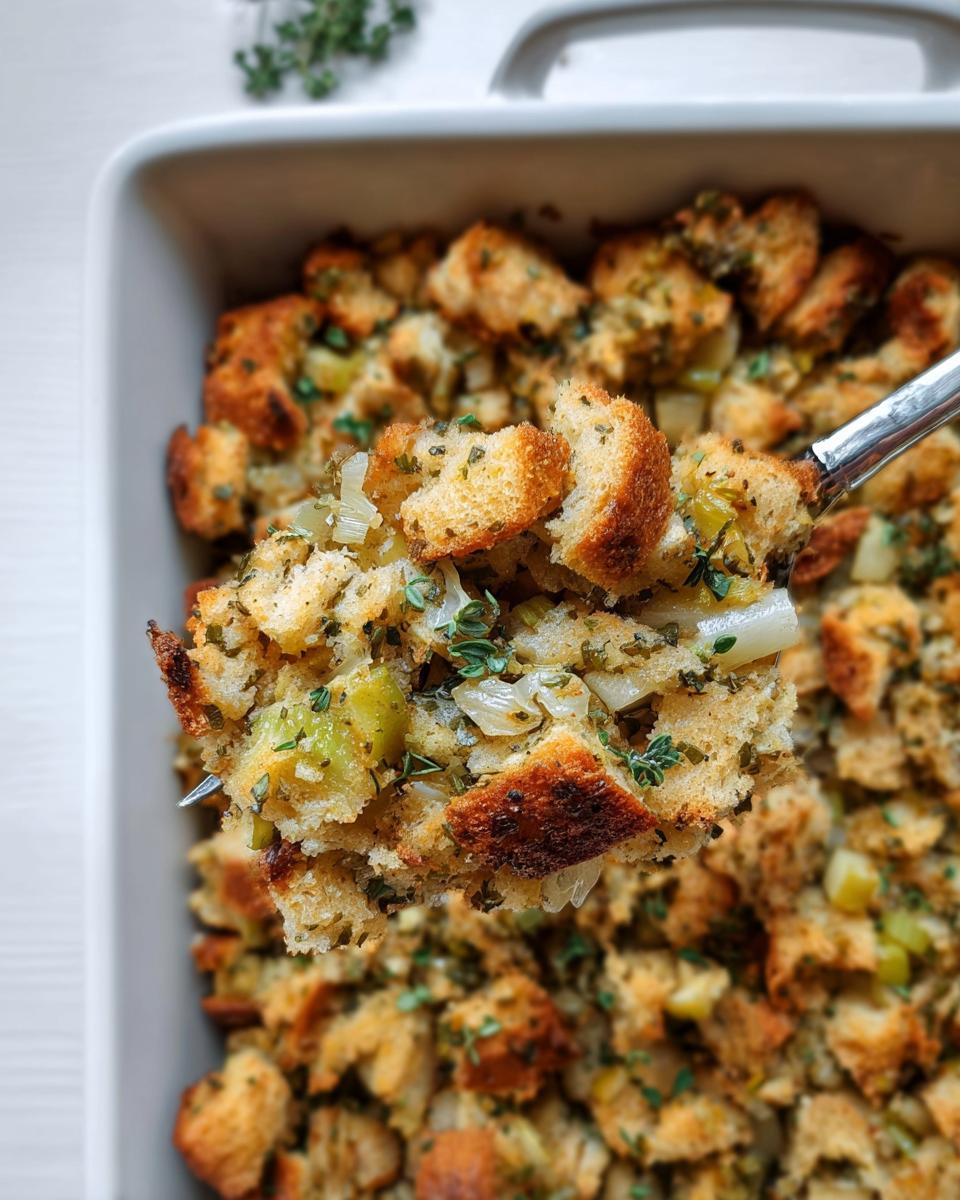
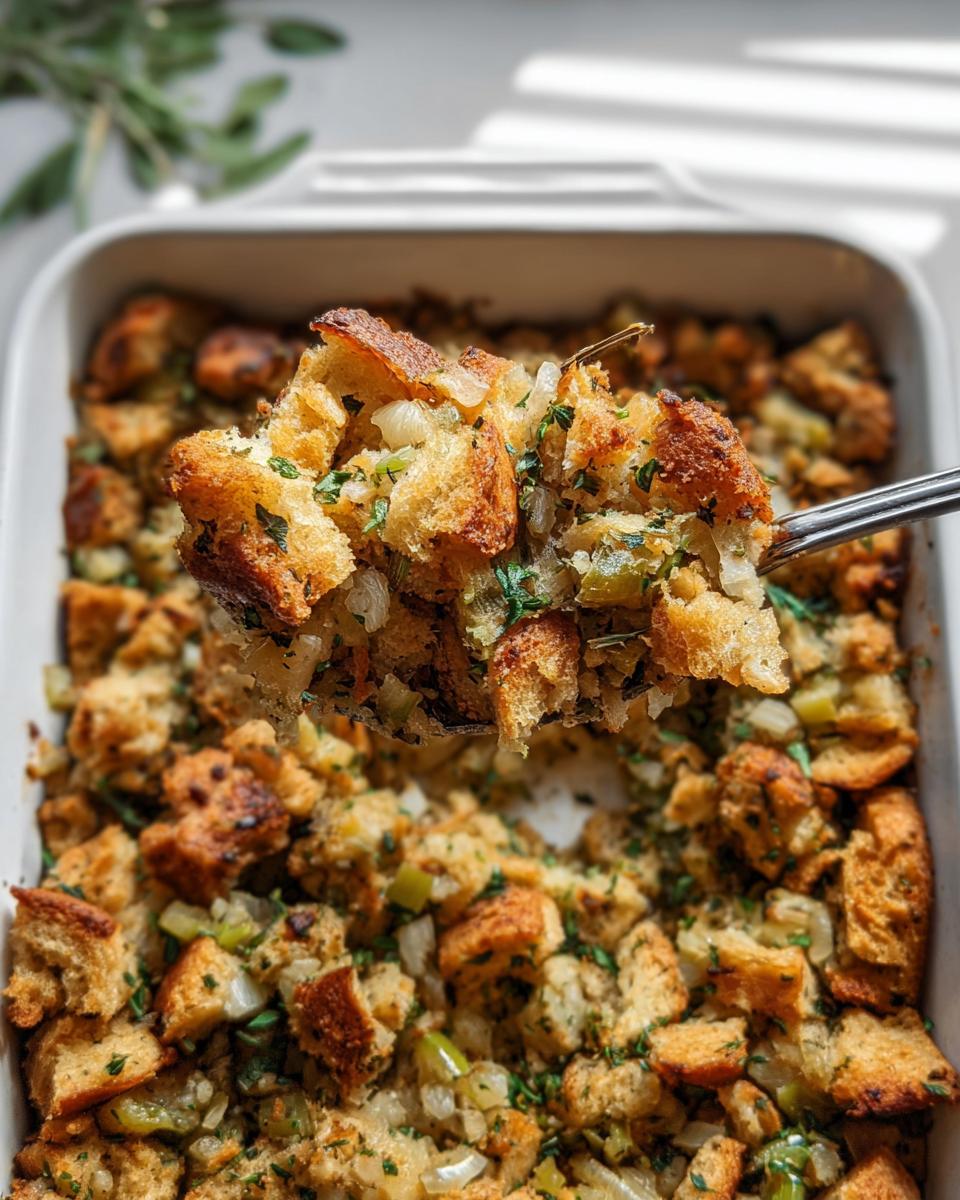
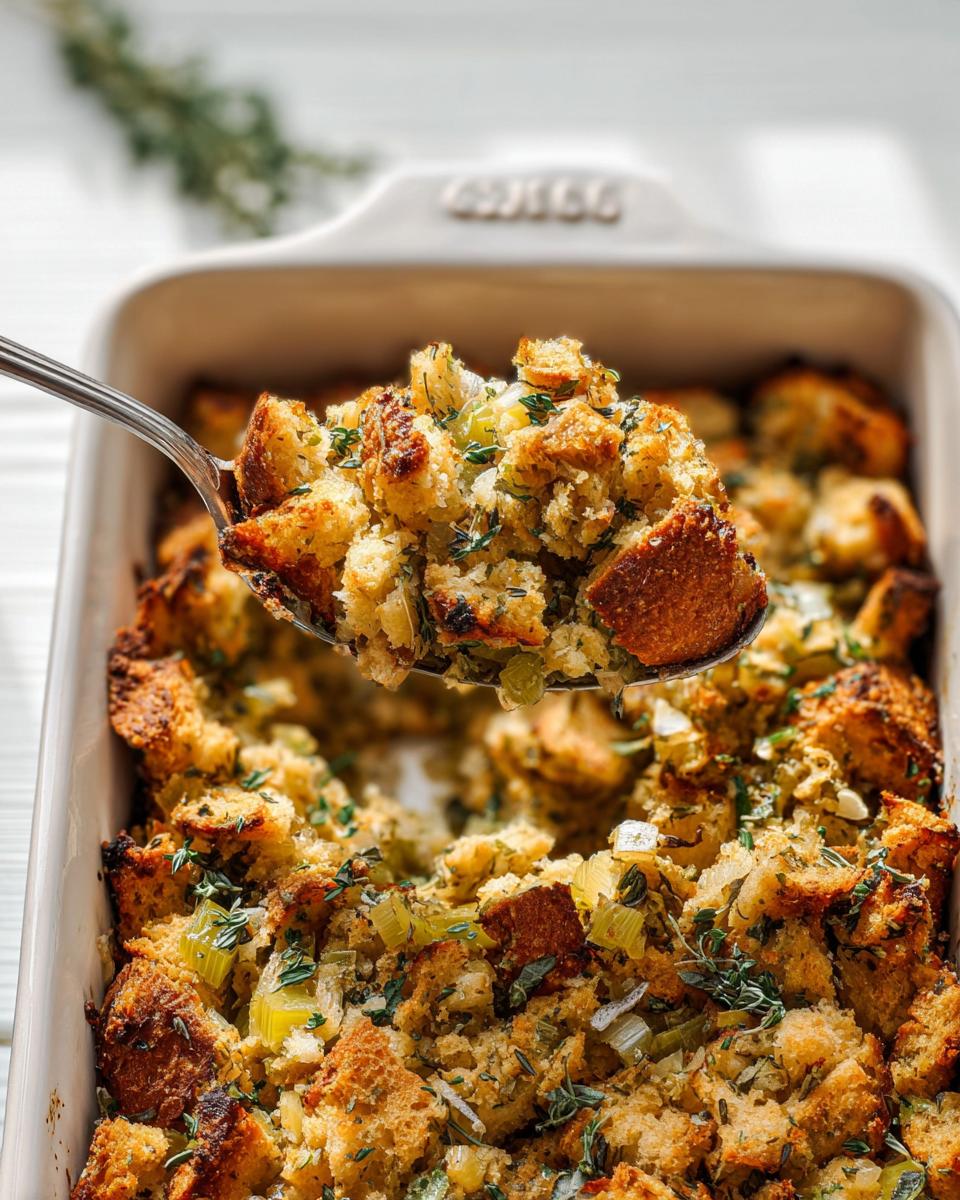
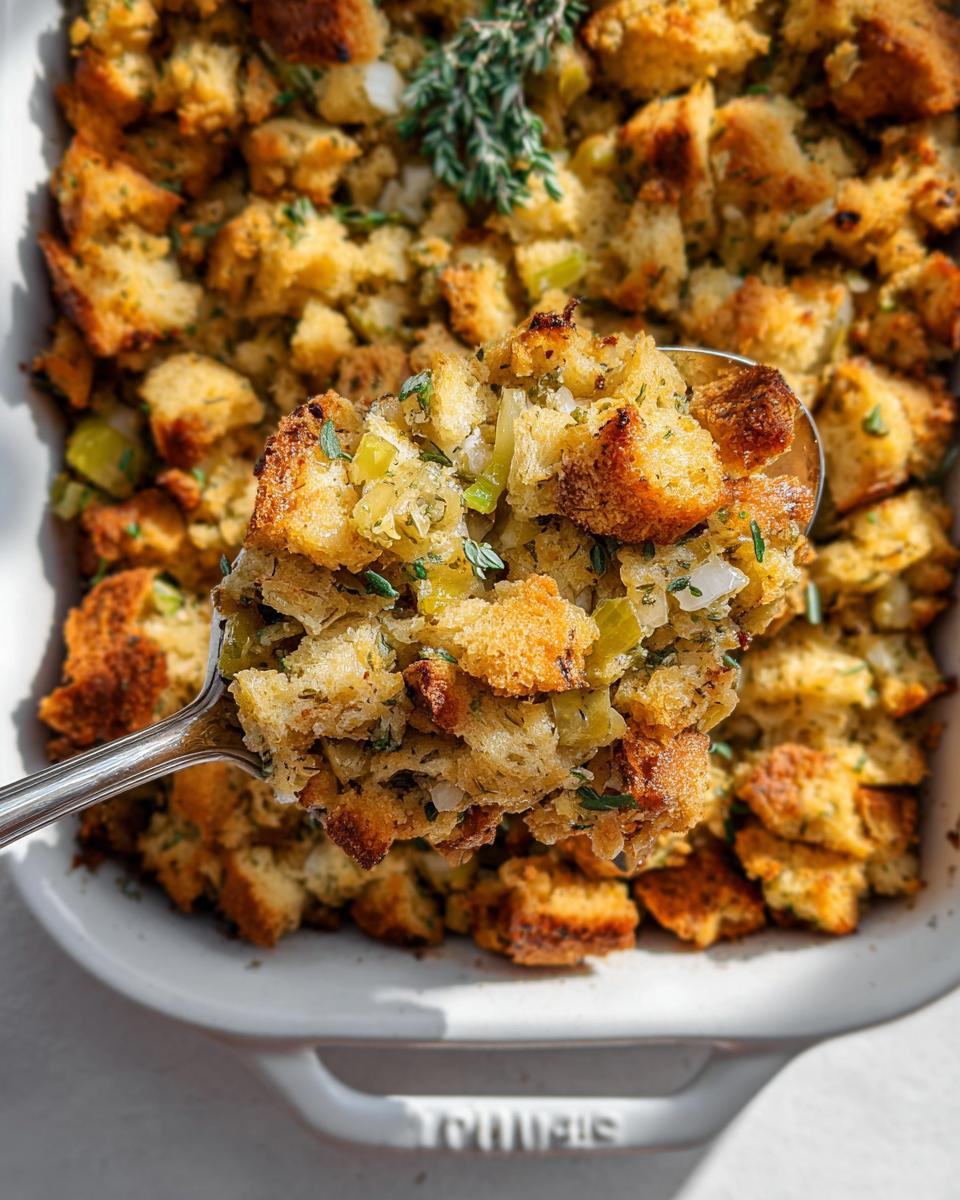
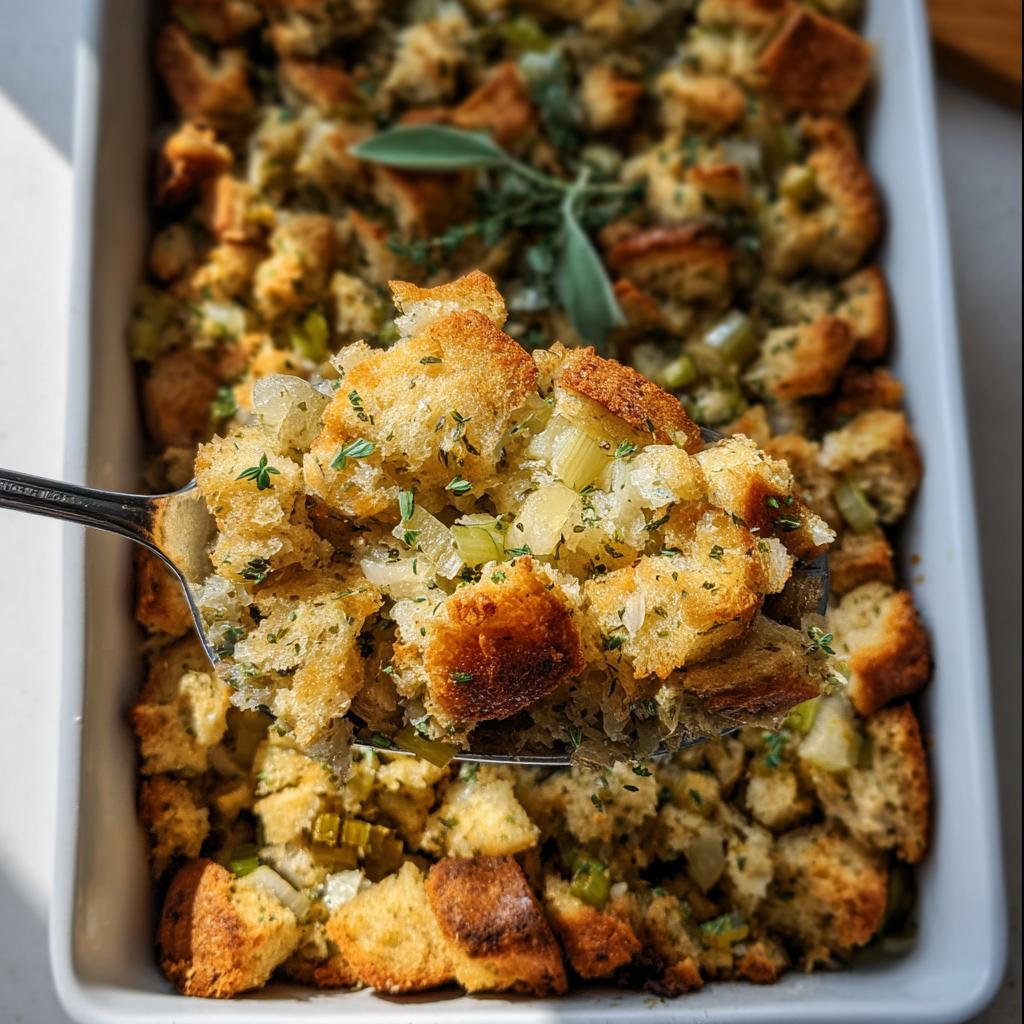
First things first, those bread cubes! You really want them to be a bit dry and sturdy, not soft and squishy. My favorite trick is to use bread that’s a day or two old. If your bread is super fresh, just spread those cubes out on a baking sheet and pop them in the oven at 350°F for about 10-15 minutes until they resemble croutons. You don’t want them hard as rocks, just not soggy anymore. It helps them soak up all that yummy buttery goodness without falling apart. And don’t stress too much about the size – rustic, slightly irregular cubes are totally fine!
Sautéing the Aromatics
Now for the flavor base! Grab a big skillet or your Dutch oven and melt that butter over medium heat. Once it’s shimmering, toss in your diced onions and celery. We want these to get nice and tender, not browned and crispy, so let them cook down for about 8 to 10 minutes. Stir in that minced garlic and cook for just another minute until you can really smell it (careful not to burn it!). Now for the herbs: add your fresh sage, parsley, and rosemary. Stir them around for about 60 seconds until their fragrance really blooms – it’s basically magic happening in your pan. Finally, pour in about a cup of your chicken or veggie stock and give it all a good stir, scraping up any little bits from the bottom of the pan. This is where all that savory flavor really starts building!
Combining and Binding the Stuffing
Once your veggies are beautifully softened and fragrant, it’s time to bring it all together. Pour that glorious veggie and herb mixture right over your prepared bread cubes in your big mixing bowl or the baking dish you’ll be using. Give it a good toss to coat everything evenly. Don’t be shy – make sure every single cube gets a little bit of that deliciousness! In a separate, smaller bowl, whisk your two eggs with the remaining 1 ½ cups of stock. This mixture is what’s going to bind everything together. Pour this liquid over the bread and veggie mix. Now, gently fold everything together. The key here is to be gentle! We’re not mashing, we’re folding, just enough so all the bread cubes are moistened. You don’t want a paste, you want distinct cubes.
Baking to Perfection
Okay, oven time! Make sure your oven is preheated to 350°F. Pour your combined stuffing mixture into your buttered 9×13 inch baking dish. Smooth it out a little. Now, pop it in the oven and bake for about 45 to 50 minutes. You’re looking for that beautiful golden-brown on top and for the internal temperature to reach 160°F if you have a thermometer. If you notice the top is getting a bit too dark before it’s cooked through, no worries! Just loosely tent it with some aluminum foil. This stops it from burning while the inside finishes cooking. And always check with a tester (like a knife) inserted in the center – it should come out with moist crumbs, not wet batter.
Resting and Serving
This resting step is super important, especially for meal prep! Once it’s out of the oven, let it sit for at least 60 minutes before you plan to serve or reheat it. This really lets the flavors meld and the texture set up perfectly. If you’ve made it ahead, this is when you’ll cover it and pop it in the fridge. And hey, this stuff is so good, you can even use it to stuff a turkey if you’re feeling adventurous! Just make sure whatever you’re stuffing is properly cooked to a safe temperature. Whether it’s Thanksgiving or just a Tuesday dinner, this stuffing will be a star!
Tips for Success with Your Stuffing Recipes Meal Prep
Okay, so you’ve got the recipe, but let me give you a few little nudges to make sure your meal-prepped stuffing is absolutely amazing. It’s all about these little details that really make a difference, trust me! Think of it as my way of sharing those little secrets I picked up along the way.
First off, the bread! I know I mentioned it, but it’s really key. Day-old, slightly stale bread is your best friend. If you’re using a gluten-free loaf, make sure it’s one that holds up well when toasted – some GF breads can get a bit too crumbly. And use fresh herbs whenever you can; they pack so much more flavor than dried ones, and that punch of freshness is what makes this stuffing spectacular. I found this neat idea for a gluten-free chicken dish that got me thinking about adapting bread too!
When it comes to moisture, the balance is everything. You want it moist, but not soggy. That’s why we sauté the veggies first – it softens them and releases their moisture *before* they hit the bread. Be careful not to over-mix once you add the egg and stock. Just fold until everything is *just* combined. Too much mixing can make it dense. Oh, and for that perfect crispy top? If you’re reheating it in the oven, uncover it for the last 15 minutes or so. That little bit of extra heat will bring back that delightful crunch!
Ingredient Notes and Substitutions
Let’s talk ingredients for a sec! Sometimes you need to swap things out, and that’s totally okay. This recipe is pretty forgiving, and knowing how to make simple substitutions can be a lifesaver, especially for meal prepping.
For the bread, if you’re going gluten-free, look for a hearty loaf like a sourdough or a robust whole grain. Just make sure it’s on the drier side – my go-to is usually a day-old loaf. You can even find some fantastic pre-cubed and toasted GF bread options now. For the stock, chicken stock is classic, but a good quality vegetable stock works beautifully for a vegetarian version. And those fresh herbs? If you absolutely can’t find fresh sage, parsley, or rosemary, you can use dried, but you’ll need much less – about 1/3 of the amount. Just be sure to crumble the dried herbs between your fingers before adding them to wake up their flavor. You can find tons of recipe ideas, including all sorts of meal prep recipes that might give you inspiration for other swaps!
Make-Ahead and Storage Instructions
Okay, the beauty of this stuffing is that it’s basically designed for making ahead. It’s that superpower you need for busy days! The absolute best way to get it ready for the future is to bake it completely, let it cool to room temperature, and then cover it tightly with plastic wrap or an airtight lid. You can store it in the fridge for up to 3 days. Honestly, the flavors get even better overnight, so it’s a win-win.
When it’s time to serve, pull it out of the fridge and let it sit on the counter for about 20 minutes while your oven preheats to 350°F. If it’s still a little firm, that’s okay! Cover it loosely with foil and pop it in the oven for about 20-30 minutes, or until it’s heated through. If you want that nice crispy top back, take the foil off for the last 10 minutes of heating. Sometimes, if it seems a bit dry after reheating, I’ll add a tablespoon or two of extra stock or water before the final bake. It’s all about bringing back that perfect moisture and texture. You can find more easy meal prep ideas that might inspire your other make-ahead adventures!
Frequently Asked Questions about Stuffing Recipes Meal Prep
Can I make this stuffing recipe gluten-free?
Absolutely! The key to making this stuffing gluten-free is using a hearty, good-quality gluten-free bread. Look for loaves that are naturally a bit drier or toast them well to get that lovely crouton-like texture. Some of my favorite gluten-free breads hold up beautifully when cubed and toasted, preventing that dreaded soggy stuffing. It’s a simple swap that makes all the difference and keeps the flavor profile wonderfully intact for your meal prep!
How do I keep my stuffing from being dry?
Oh, dryness is the enemy of good stuffing! The best way to avoid it is to start with the right bread – one that’s a bit stale or well-toasted so it absorbs moisture without disintegrating. Also, don’t over-bake it! Keep an eye on it and use the foil tent trick if the top is browning too fast. When reheating, a little splash of extra stock or water before it goes back into the oven can work wonders. It’s all about that moist, tender crumb!
What is the best bread for stuffing?
You really can’t go wrong with a day-old crusty bread like sourdough or a French baguette for stuffing. They have a sturdy texture that toasts up perfectly and soaks up flavor without turning into mush. If you can’t find stale bread, just cube your favorite loaf and spread it on a baking sheet for about 15 minutes at 350°F until it’s dry to the touch. This simple step is crucial for that delicious texture we’re after!
Can I freeze stuffing?
Yes, you totally can! This stuffing recipe freezes like a dream, which is fantastic for meal prep. Once it’s baked and cooled completely, portion it out into airtight containers or freezer bags. It should stay good in the freezer for about 2-3 months. When you’re ready to enjoy it, just transfer it to the fridge overnight to thaw, and then reheat it in the oven as directed. For more on managing dietary needs with meal prep, check out this guide on creating a gluten-free diabetic meal plan; it’s full of helpful info!
Understanding the Nutritional Value
Now, let’s peek at the good stuff inside! While exact numbers can wiggle around depending on brands and the specific bread you use, a typical serving of this delicious stuffing usually comes in around: Calories: 350-450, Fat: 20-25g, Protein: 8-10g, and Carbohydrates: 30-40g. This is a treat, and it’s packed with flavor, so enjoy every bite!
Share Your Delicious Stuffing Creations
So, what did you think? Did this stuffing recipe make your meal prep life SO much easier and tastier? I really hope you enjoyed making it as much as I do! I’d absolutely love to hear from you. Drop a comment below with your thoughts, your rating, or any fun twists you added. Did you try out a different herb combo? Or maybe a new type of bread? Let me know! If you have any questions, feel free to reach out via my contact page!
Stuffing Recipes Meal Prep That Actually Tastes Great
Ingredients
Equipment
Method
- Prepare your bread cubes. You can toast them in the oven at 350 degrees F for about 15 minutes until they resemble croutons, or use stale bread cubes. You can also buy pre-toasted bread cubes from the store. Cut cubes to your desired size, small or rustic.
- Preheat your oven to 350 degrees F. Prepare a 9×13 inch baking dish by brushing it with butter or spraying with nonstick spray. Place the bread cubes in a large mixing bowl or directly in the baking dish.
- Melt the butter in a large skillet or Dutch oven over medium heat. Add the diced onion, celery, and minced garlic. Season with salt and pepper. Cook until the vegetables soften, about 8 to 10 minutes. Stir in the chopped sage, parsley, and rosemary, and cook for another minute. Add 1 cup of stock and stir.
- Pour the vegetable and herb mixture over the bread cubes and toss to coat evenly.
- In a small bowl, whisk together the remaining 1 1/2 cups of stock and the 2 eggs.
- Pour the egg and stock mixture over the bread cubes. Stir and fold gently until all the bread cubes are thoroughly combined.
- Bake for 45 to 50 minutes, or until the internal temperature reaches 160 degrees F. If the stuffing begins to brown too quickly, you can loosely tent it with foil.
- Allow the stuffing to rest for 60 minutes before reheating if made ahead. This stuffing can also be used to stuff a turkey.
Notes
Tried this recipe?
Let us know how it was!
Certified Nutritional Science Authority
The intersection of celiac disease and metabolic health fascinated me from my first dietetic internship. Watching patients struggle to find foods supporting both their autoimmune condition and weight goals launched my career mission: proving medically necessary diets can be nutritionally optimal.
For twelve years, I’ve specialized in gluten-free living while achieving metabolic health objectives. My published research demonstrates that properly planned gluten-free, low-carb eating provides superior nutrition compared to standard approaches.
The hidden trap? Most commercial gluten-free products are carb bombs – rice flour and potato starch masquerading as healthy alternatives. My frameworks avoid this completely, using nutrient-dense ingredients like almond flour and flaxseed that enhance rather than just replace.
Every recipe I review meets rigorous standards: adequate protein for metabolic support, healthy fats for satiety, proper fiber levels for digestive health – all maintaining strict gluten-free protocols for celiac management. I’ve guided over 500 individuals through this optimization process.
My personal gluten-free, low-carb lifestyle fuels my long-distance cycling and triathlon training – proof that these approaches deliver sustained energy and mental clarity. Medical necessity doesn’t mean nutritional compromise.